BioShock 2: High difficulty level
On this page of our guide to BioShock 2 you will find hints and tips on how to complete the game at a high difficulty level. Our guide explains its general assumptions, presents recommended playing tactics and lists tonics that can be most useful at the highest difficulty level.
{ramkaniebieska}Playing the campaign at a high difficulty level is one of the requirements for unlocking the platinum trophy. You can find more information about this in our trophy guide.{/ramkniebieska}
 | Playing on the highest difficulty setting will allow you to unlock an Against All Odds trophy. Additionally, you can choose to disable the Vita-Chambers (it can be done from the main menu and will grant you with Big Brass Balls achievement). You can also promise yourself not to use saves and rely on auto-saves at the end of each level. All of the above can be done and even bring lots of fun. For starters, read the chapter below :) |
What does the high difficulty setting involve? The enemies are more resistant and deal higher damage. In consequence, you'll need more ammo, better Plasmids, proper Tonics and weapons upgrades. This all causes a higher need for cash and ADAM. Summing up, each of your decisions should be well thought out, because there's not much place for error.
The difficulty affects the style of gameplay. On Easy you can jump into a room and take on everyone without worrying about enemy fire, while on Hard such behaviour will lead to a certain death.
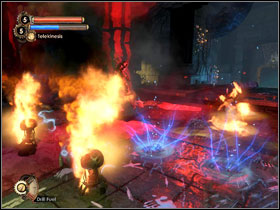
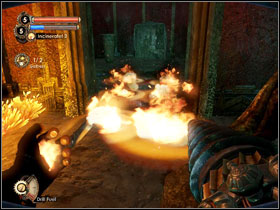
Often you will have to rely on cleverness. Sneak onto enemies (the [Drill Lurker] tonic will come in handy), slowly analysing each room and avoiding (when it's possible) fights with multiple enemies at once. Of course try to aim at the heads - the quicker you kill, the less the chance that the fight will cost you your health or life. The enemies often move in groups and loudly talk, so hearing voices can indicate that there are some foes in the area. Using the Hypnosis Plasmid on such a group will make things much easier.
Don't forget about traps. Even if the proper ammo (traps rivets and spears, mines) isn't very common and cheap, you always have the [Cyclone Trap] Plasmid, which on level 2 and above allows you to charge it with almost any Plasmid. Additionally, if you stock up on Tonics which lower EVE usage, you will be able to secure the whole room with traps and the only thing left will be to lure the enemies into them. And all of that thank to one or two cheap EVE Hypos. |  |
From the moment you obtain the camera, always use it before a fight to fully take advantage of the bonuses it brings. The quicker you finish research on a given Splicer type, the easier fighting him will become. I encourage you to carefully read the chapter devoted to research, thanks to which you will be able to finish them quicker.
In a way, hacking all vending machines and other stuff is a natural thing to do upon entering a new room. However it's worth to leave some of them for later, if you don't really need to use them. If you equip a proper set of Tonics (for example - [Hacker's Delight]), you will regain health and EVE each time you hack something. This also relates to chocolate bars and each other type of food which refills your health and EVE. Additionally, if you have the [Booze Hound] Tonic equipped, alcohol will do the same thing.
In BioShock 2 you don't have to possibility to return to previously visited locations, but nothing stand in your way to visit rooms in the current level multiple times. The items in boxes and corpses and even those lying on the ground don't disappear, so you can collect them later. You can print the maps found in the walkthrough and then mark on them the spots where you've killed an enemy and didn't get all the items from his corpse, safes with items left inside etc. Making such notes takes time, but it's well worth it.
Yet another strategy connects with the above tip and that's using different types of weapons. The reason for that is easy - various ammo types can be found on the map, so you should make use of it and cut the costs. Personally I like to focus on one favourite weapon (if possible of course).
- Bioshock 2 Game Guide & Walkthrough
- BioShock 2: Recommendations & tips
- BioShock 2: Weapons and their development stations - tips
- BioShock 2: Gene tonics - description
- BioShock 2: Gene tonics - maps
- BioShock 2: Plasmids - description
- BioShock 2: Starting tips - list
- BioShock 2: Plasmids - maps
- BioShock 2: Hacking
- BioShock 2: Enemies and how to conduct a research on them
- BioShock 2: Big Sisters and Big Daddies
- BioShock 2: Little Sister's and gathering ADAM
- BioShock 2: High difficulty level
- BioShock 2: Recommendations & tips
You are not permitted to copy any image, text or info from this page. This site is not associated with and/or endorsed by the developers and the publishers. All logos and images are copyrighted by their respective owners.
Copyright © 2000 - 2025 Webedia Polska SA for gamepressure.com, unofficial game guides, walkthroughs, secrets, game tips, maps & strategies for top games.
