Zelda TotK: Find the Fifth Sage
Our Secret of the Ring Ruins and Guidance from Ages Past quest walkthrough will help you complete the main Find the Fifth Sage quest in TotK.
Last update:
This page of our guide to Zelda: Tears of the Kingdom explains how to find the final companion during the Find the Fifth Sage main quest. We explain how to complete Secret of the Ring Ruins and Guidance from Ages Past. You'll learn how to find Mineru's limbs and how to beat the Seized Construct.
- How to unlock the main quest?
- Kakariko Village
- Secret of the Ring Ruins
- Guidance from Ages Past
- Left-Arm Depot
- Left-Leg Depot
- Right-Leg Depot
- Right-Arm Depot
- Mineru
- How to defeat the Seized Construct?
How to unlock the main quest?
You'll unlock this quest after exploring Hyrule Castle during the Crisis at Hyrule Castle main quest. After defeating Phantom Ganon, return to Lookout Landing and talk to Purah.
Kakariko Village

After talking to Purah, head to Kakariko Village, southeast of Lookout Landing. Calip will prevent you from entering the floating building when you approach it. Talk to Tauro and Paya nearby to unlock the Secret of the Ring Ruins main quest.
Secret of the Ring Ruins
You need the Camera to unlock this quest, received during the Camera Work in the Depths main quest.


Paya and Tauro will ask you to examine the floating ruins. Stand underneath the building and Ascend. Take a photo of the plaque and return to Tauro.
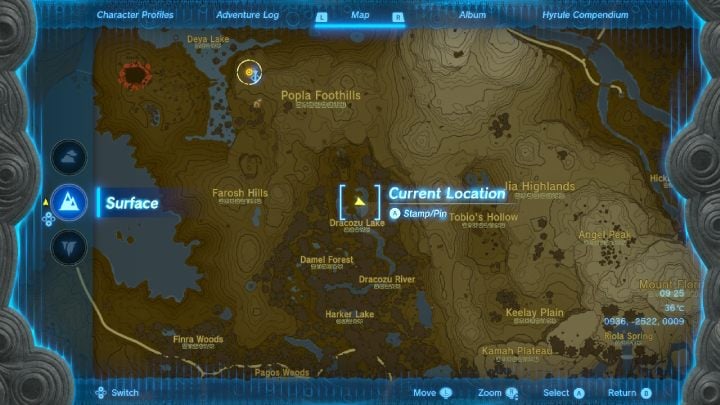
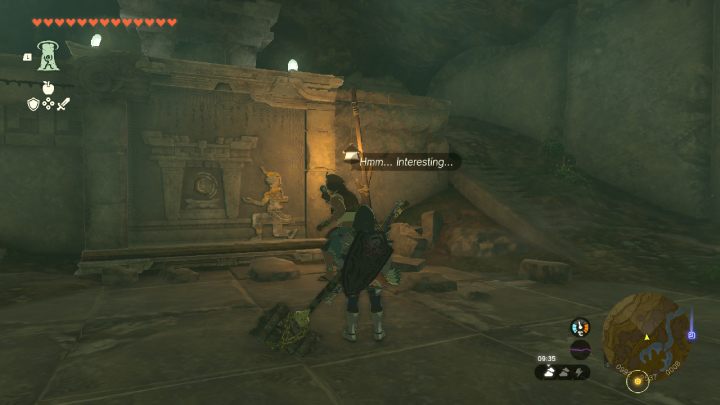
Go to the marked place by Skyview Tower at Poopla Foothills and talk to Calip. Next, head to Dracozu Lake to meet Tauro in a small temple. Grab the Charged Shirt from the chest. You need to assemble the entire armor set.
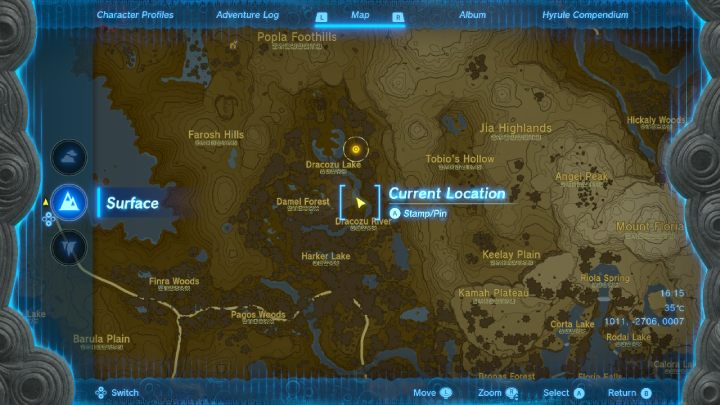
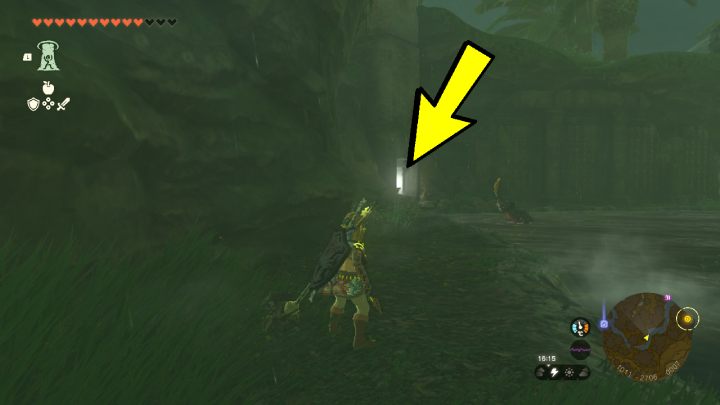
The Charged Trousers are in a cave in the middle part of Dracozu River. Destroy the boulder blocking the cave entrance and open the chest.
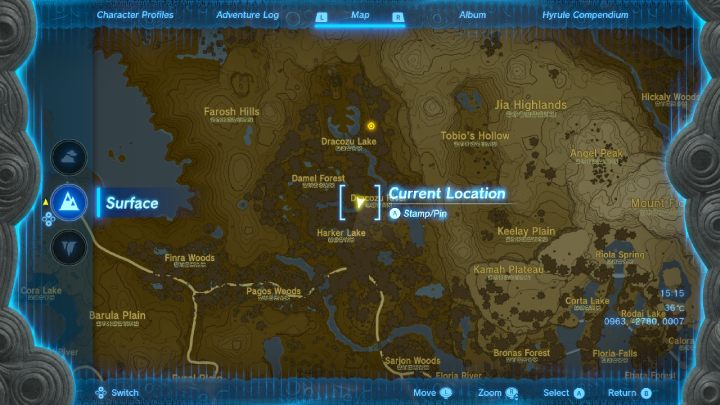
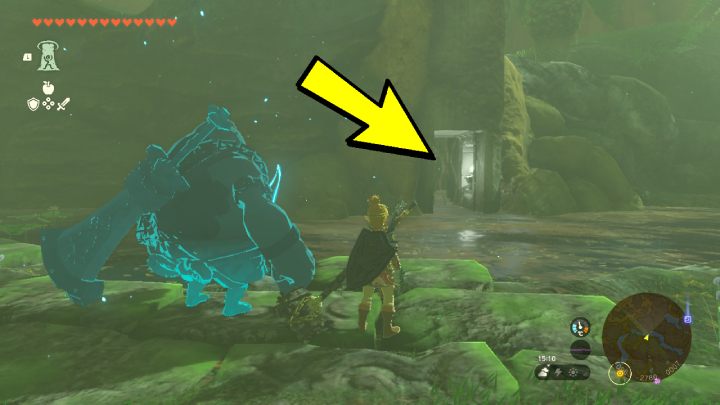
You'll find the Charged Headdress in a cave in the southern part of Dracozu River. Remove the vines with fire or a fire arrow, then open the chest.

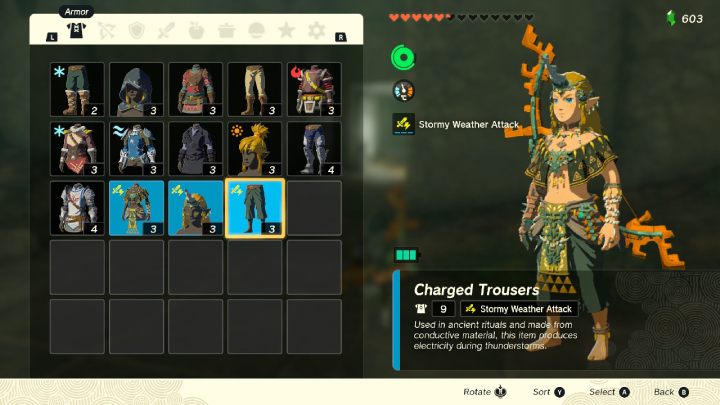
Equip the entire armor set and go to the cave at Dracozu River's tail.
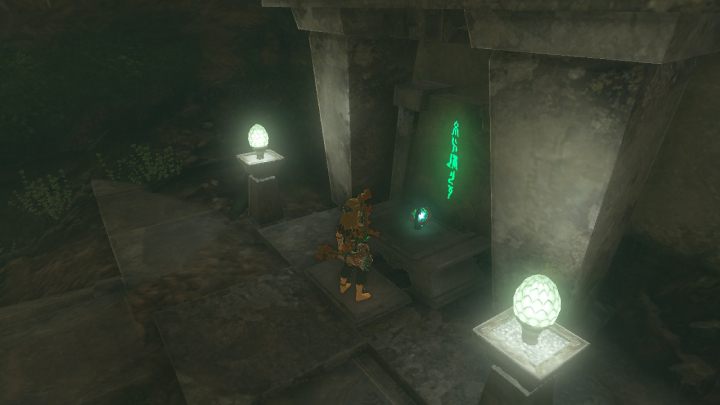
Place a Zonai Charge on the altar. Dragon-shaped islands will appear in the skies. Use the Popla Foothills Skyview Tower to reach Thunderhead Isles.
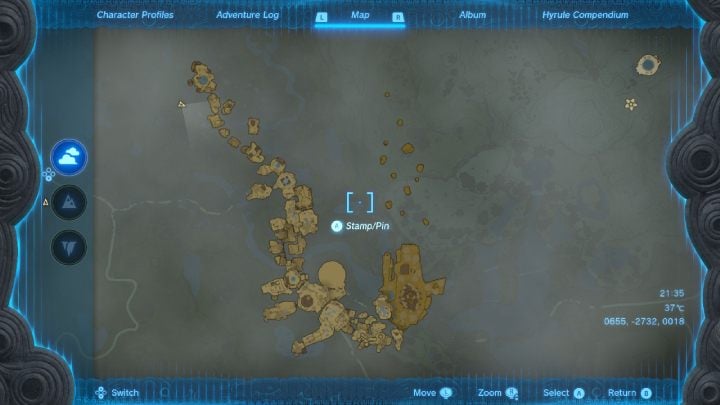
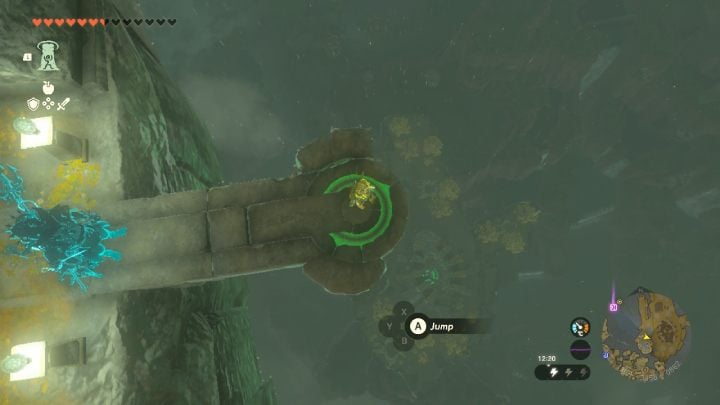
Once you land on the dragon's tail, head south, towards its head. Use the railtracks along the way, as they'll quickly lead you to the next islands. You'll find many different planks, fans and other items used to create vehicles.
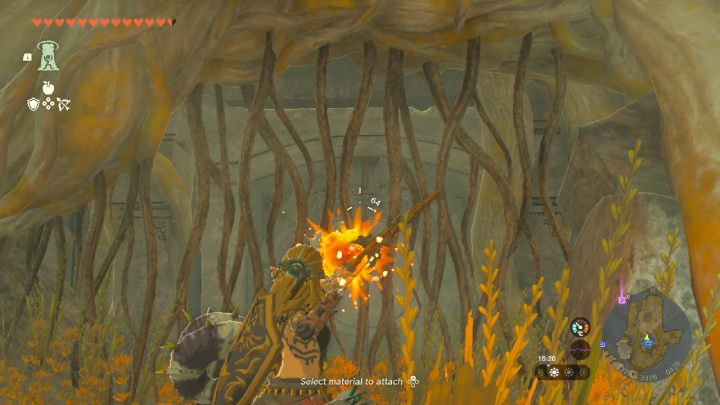
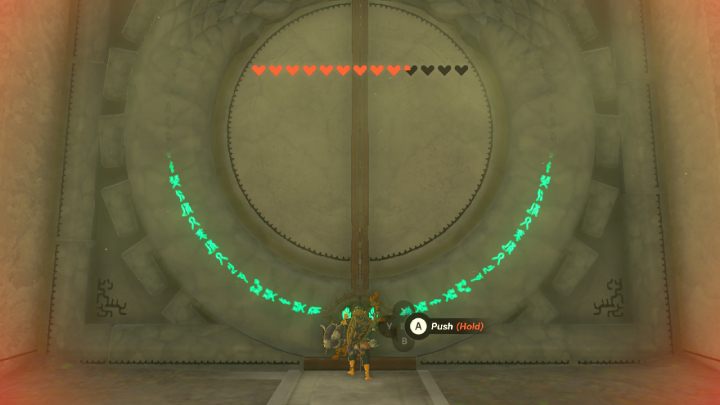
After reaching Dragonhead Island visit Joku-u Shrine. Remove the vines and open the door (you need at least 10 Hearts). Examine the altar to complete the quest and unlock a new one - Guidance from Ages Past.
Guidance from Ages Past
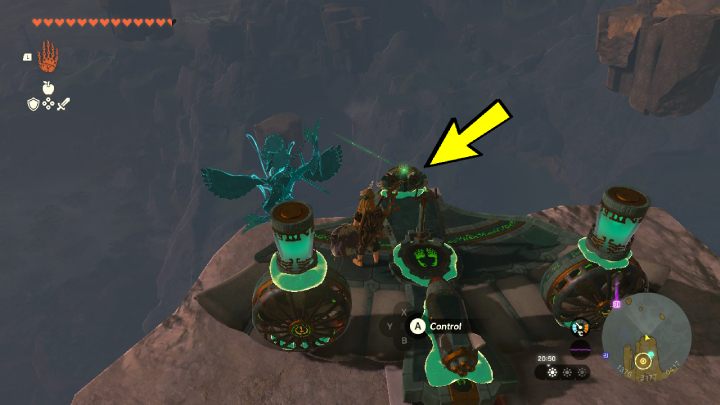
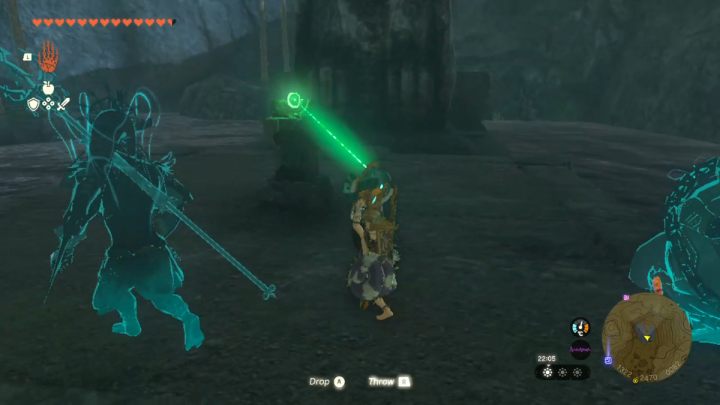
Pick up the mask, from which a green beam of light is emanating. Build a flying vehicle and attach the mask to it. Fly to the place the light beam is showing you. Place the mask on the pedestal and wait for the door to Tobio's Hollow Chasm to open. Pick up the mask and put it on the designated spot. Jump down into the Depths.
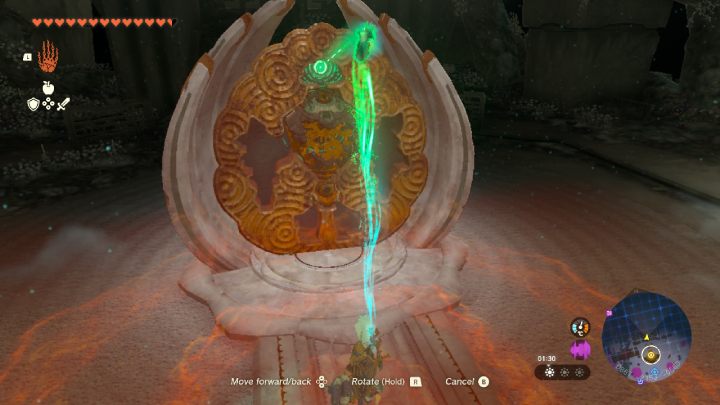
Once you're at the Construct Factory, place the mask inside the mold. You must now find four of Mineru's remaining limbs.
Left-Arm Depot
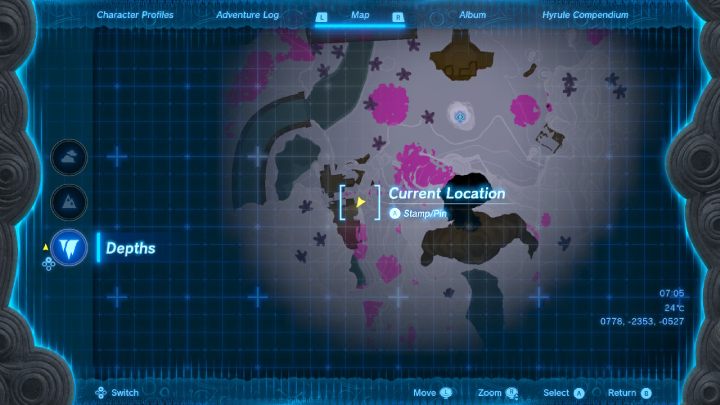
Head to the building southwest of the Construct Factory.
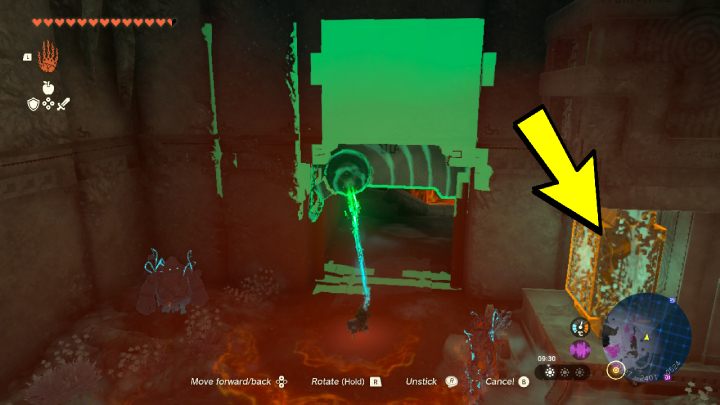
Lift the door with Ultrahand and hold it up for a while. Next, drop it and Recall it back up. While it's up, move the box with Mineru's left arm to the next room.
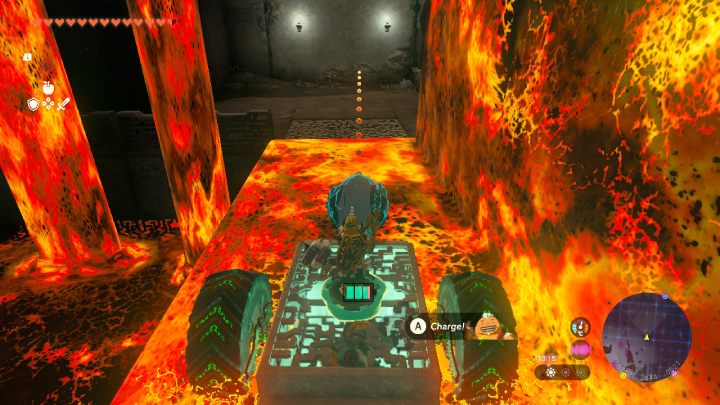
Attach two wheels to the box and cross over the lava.
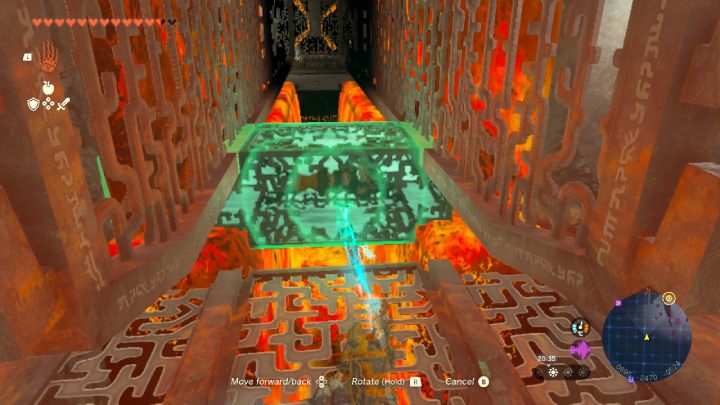
Detach the wheels from the box and place them as pictured above. Move the box as far as you can.
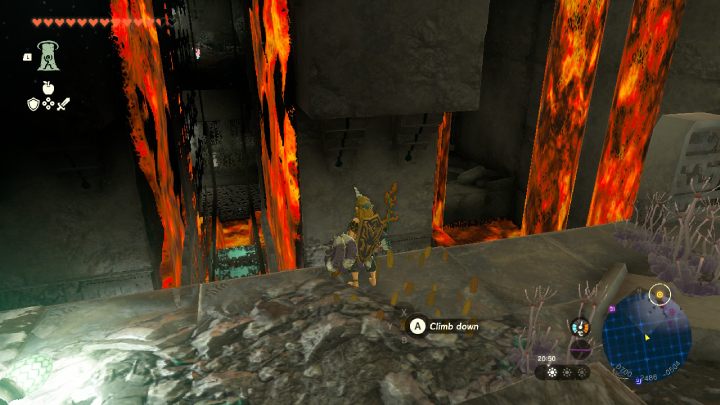
Reach the higher area and fly over the lava. Grab the box with Ultrahand and move it to the next room.
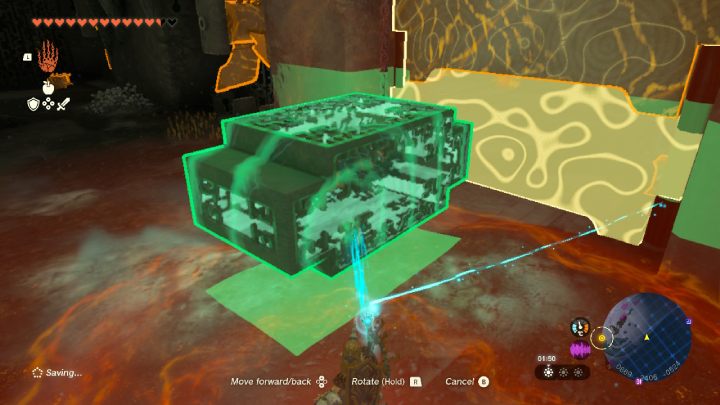
Lift the door and hold it up for a while. Then Recall it back up and quickly move the box to the other side.
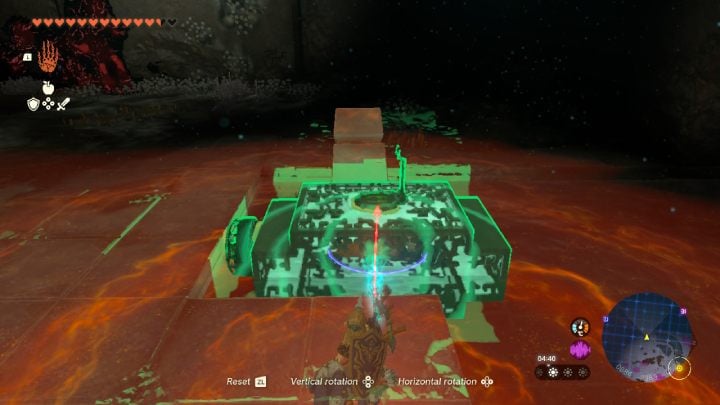
Attach a Fan and a Steering Stick to the box, then lay it down on the water. Steer the box down and insert Mineru's left arm into the mold.
Left-Leg Depot
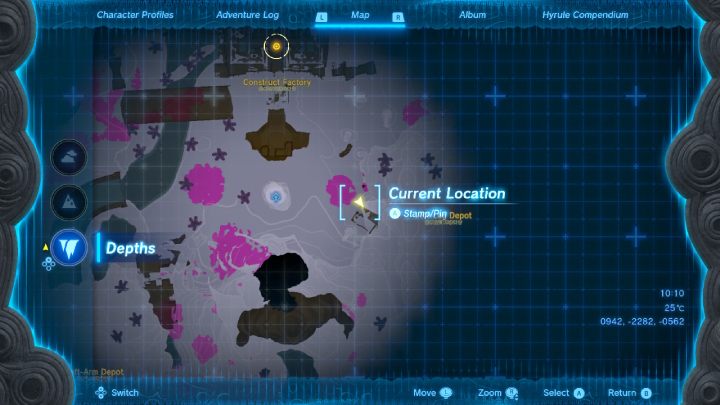
Enter the building east of the Construct Factory.
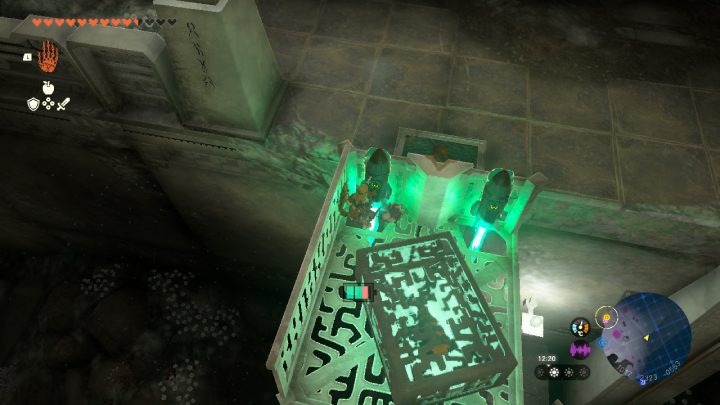
Place the box holding the left leg on the platform and turn on the rockets. Lift the box and keep going.
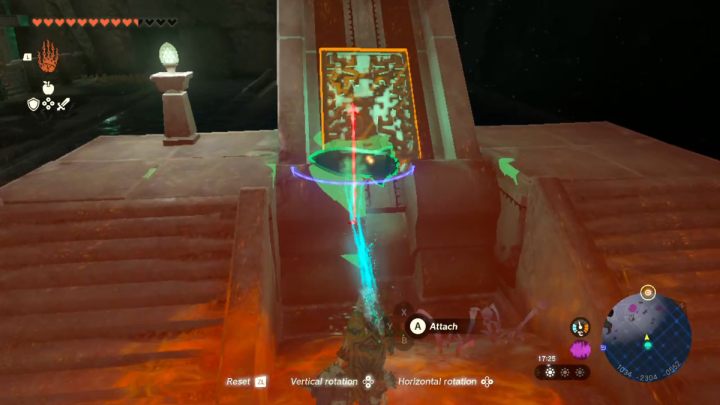
Turn the wheel to raise the platform at the right angle and place the box on it. Attach a rocket to it and get on the box. Start the rocket and fly up to the higher part of the room.
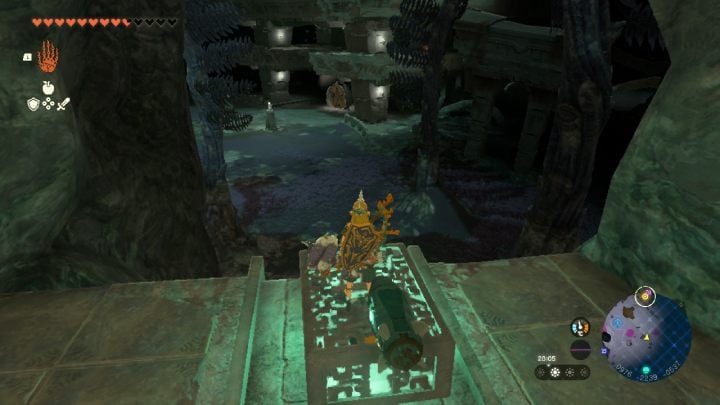
Place the box by the exit and fly to the Construct Factory. Place down Mineru's left leg.
Right-Leg Depot
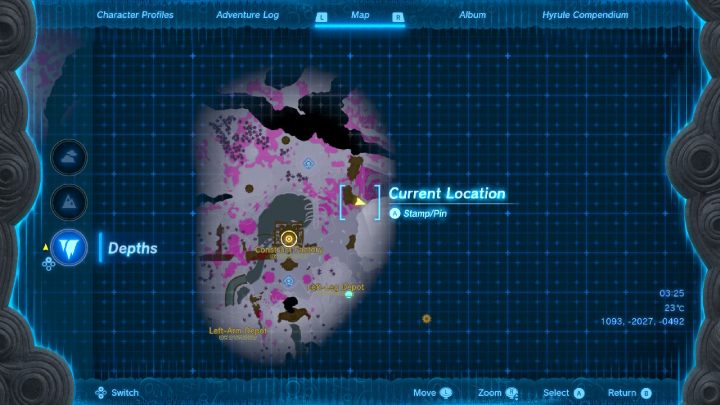

Go to the building north-east of the Construct Factory. The entrance is above the ground, you must fly there with the Paraglider.

Lift the right leg box and put it on the platform. Get on the platform and start the fans.
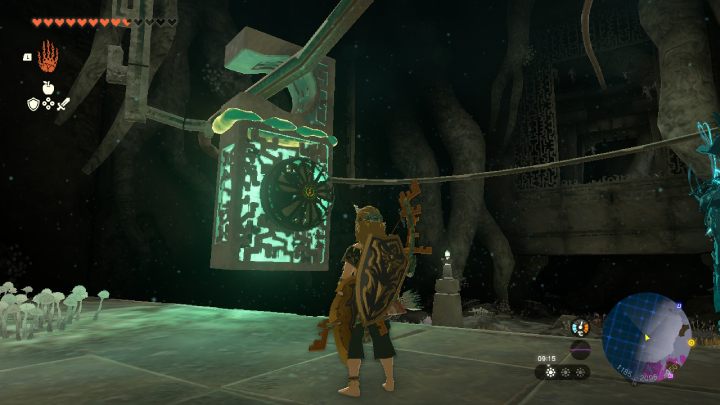
Attach the elements pictured above to the box and place it on the rails. Start the fan and wait for the box to move to the other side of the room. Jump down and climb the ladder towards the exit.
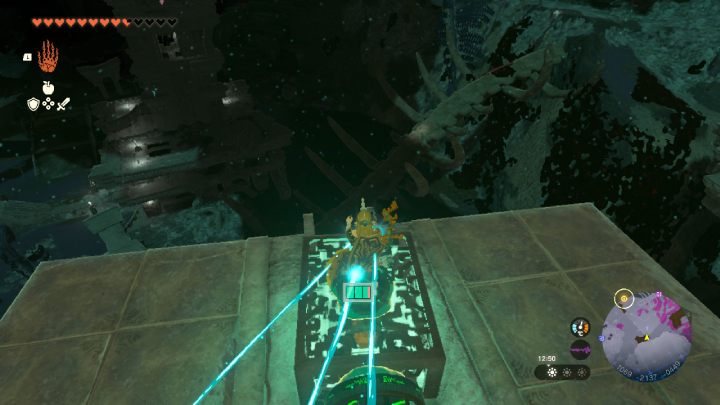
Use the next elevator, then attach a Fan and a Steering Stick to the box. Fly down to the Construct Factory and insert the left leg into the construct.
Right-Arm Depot
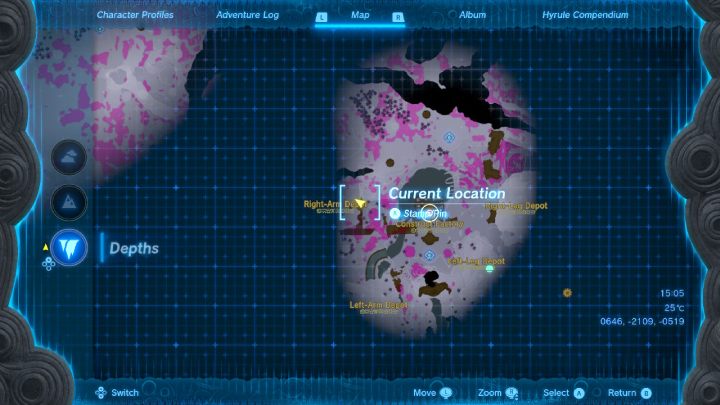
Go to the last building, west of Construct Factory.
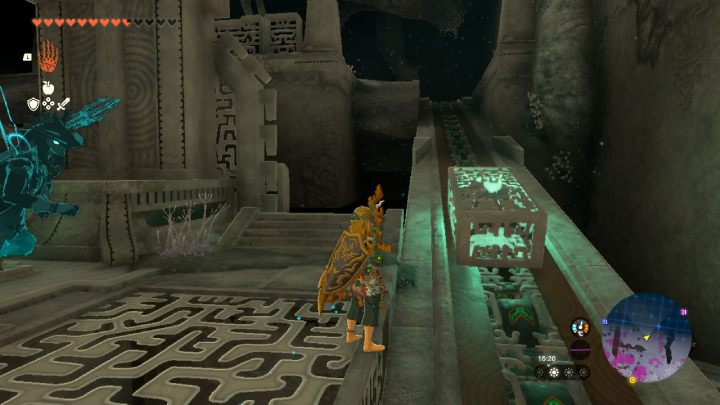
Put the box on the conveyor belt and get on it.
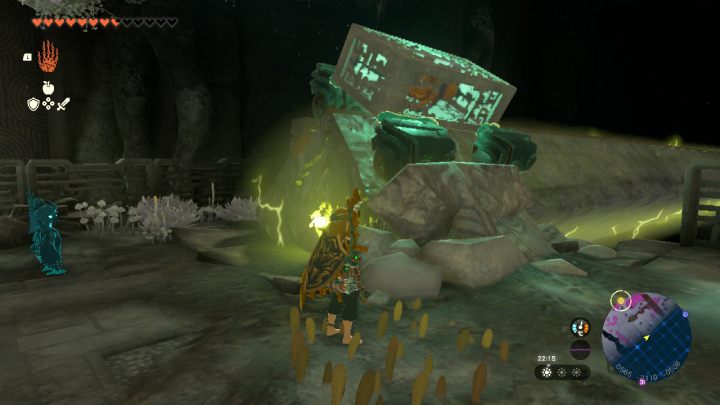
Attach four wheels to the box and place it on the overturned column, just as pictured above. Start the wheels and wait for the box to move along the column. Jump down and climb the ladder towards the exit.
At the end, attach a Steering Stick to the box and leave the building. Inserting the last limb will let Mineru leave the Construct Factory.
Mineru
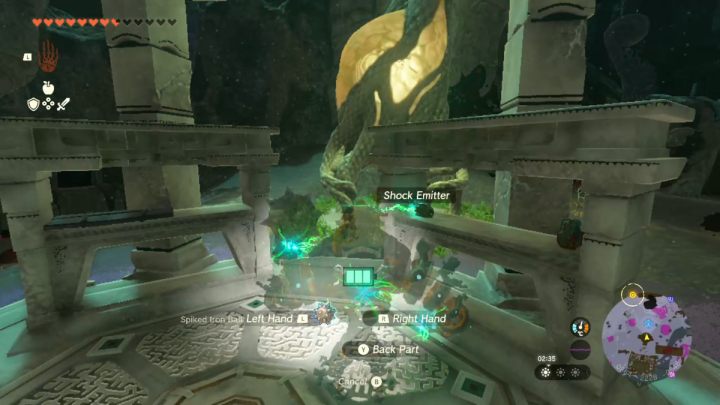
Mount Mineru and approach the indicated place. Attach the Spiked Iron Ball and the Shock Emitter to her limbs. They'll come in handy for the upcoming fight.
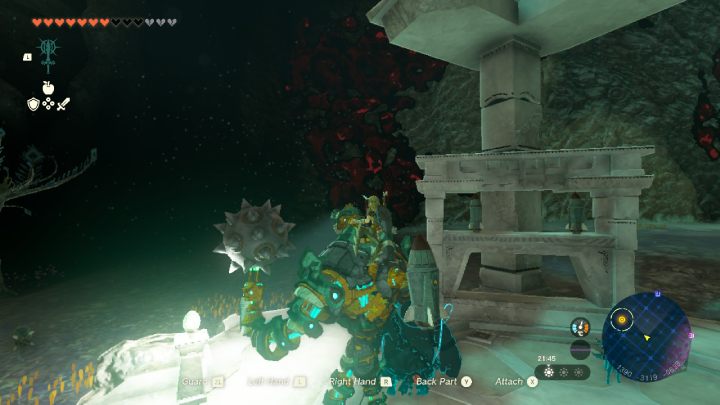
Head towards the mission marker. When you reach the destroyed staircase, attach a rocket to the construct's back. Approach the stairs and fly up. Now examine the statue.
How to defeat the Seized Construct?
The Seized Construct is a mecha vs. mecha boss fight. The entire arena is covered by Gloom, so it will gradually drain Link's entire health bar if he ever gets off Mineru.
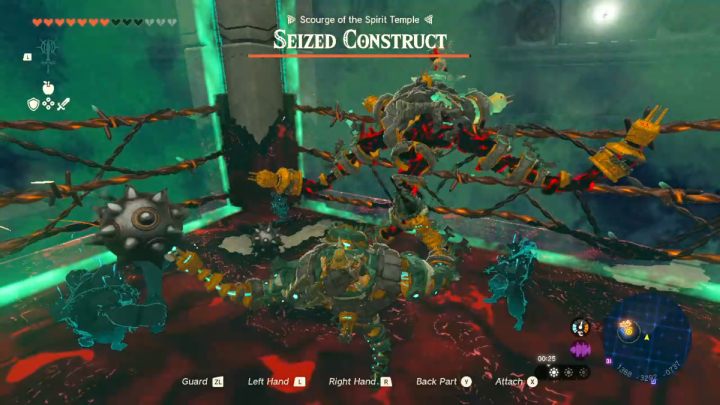
In the first phase of the fight, try to shield yourself from the enemy's attacks (ZL). Aim for the golden parts of its body when attacking it. You can use Shock Emitters to temporarily stun it. It should fall over after a few hits with a regular weapon.
During the second phase, the enemy starts flying. Avoid his attacks by moving left or right. When it starts charging, you must dodge at the right time. Otherwise, Link will be electrocuted and die immediately.
Wait for the enemy to come back down and keep attacking. After winning the fight, examine the stone on the altar. You will receive the Vow of Mineru, Sage of Spirit. This completes Guidance From Ages Past.
Go talk to Purah at Lookout Landing to finish the Find the Fifth Sage main quest.
- Zelda Tears of the Kingdom Guide
- Zelda TotK: Game Guide
- Zelda TotK: Walkthrough
- Zelda Tears of the Kingdom: List of all Main Quests, walkthrough
- Zelda TotK: Find Princess Zelda
- Zelda TotK: The Closed Door
- Zelda TotK: Regional Phenomena
- Zelda TotK: Camera Work in the Depths
- Zelda TotK: Impa and the Geoglyphs
- Zelda TotK: The Dragon's Tears
- Zelda TotK: Tulin of Rito Village
- Zelda TotK: Yunobo of Goron City
- Zelda TotK: The Sludge Covered Statue - walkthrough
- Zelda TotK: Sidon of the Zora
- Zelda TotK: A Mystery in the Depths
- Zelda TotK: Riju of Gerudo Town - walkthrough
- Zelda TotK: Crisis at Hyrule Castle
- Zelda TotK: Find the Fifth Sage
- Zelda TotK: Trail of the Master Sword
- Zelda TotK: Destroy Ganondorf
- Zelda TotK: Walkthrough
- Zelda TotK: Game Guide
You are not permitted to copy any image, text or info from this page. This site is not associated with and/or endorsed by the developers and the publishers. All logos and images are copyrighted by their respective owners.
Copyright © 2000 - 2025 Webedia Polska SA for gamepressure.com, unofficial game guides, walkthroughs, secrets, game tips, maps & strategies for top games.
