Steelrising: In search of Abbot Gregoire - walkthrough
It's time to set off to La Cite to perform the task In search of Abbot Gregoire. On this page of the guide to Steelrising, you will read the walkthroug of this quest. We also explain how to beat the Titan Bishop of Cite.
The new quest involves exploring La Cite and defeating The Bishop of CIte. On this page of our Steelrising guide, you can find a walkthrough for In Search of Abbot Gregoire story quest and how to defeat the Unstable Butcher.
Don't forget to collect Bishop Nancy Echoes.
Automats
During this quest, you'll encounter Light Jaguars and Tiger Grenadiers (more on them on a dedicated page of the guide - Felines). Moreover, you'll face Assault Acolytes (visit Acolytes page of the guide to learn more about them) as well as Lancers and Musketeers (more on them in Guards) Stalkers are another enemy encountered (more on these automatons in Serpents and Prototypes) Finally, the list is closed with Phoenixes (more on them in Hunters) and Forgers (described in Labourers)
La Cite
Once you enter the area, watch out for a Dextral Prototype nearby which may attack you. Turn leftand go past the burned building. There are 2 opponents of a new type (Tiger Grenadiers) waiting for you there. Watch out, as once they have less than 50% of their health, they will self-destruct after a few seconds, creating a blast that may hurt you.
Enter Les Halles market square. This is a sizable location filed with opponents. You'll encounter, among others, Prototypes, Lancers/Musketeers, Assault Acolytes, and Tiger Grenadiers. Moreover, there is a Stalker on the right side of the square. Fortunately, you'll have some time to recuperate between battles. Best to face the opponents one by one.
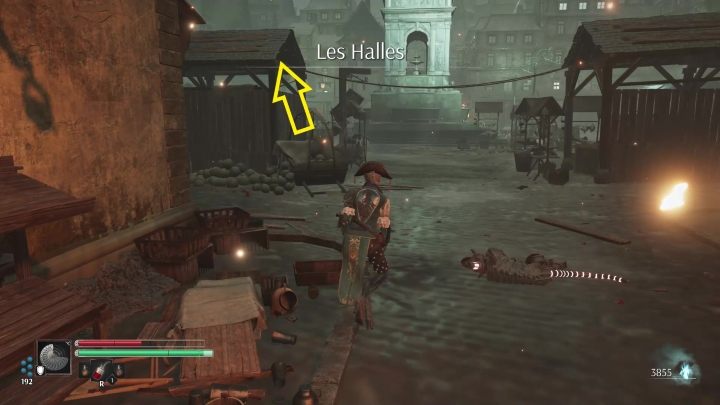
There is a single Lancer that you need to watch out for. You can find him standing on a stall. To get access to it, climb the stands. Right at the entrance to the square, climb the cart, and then the roof and trigger the enemy.
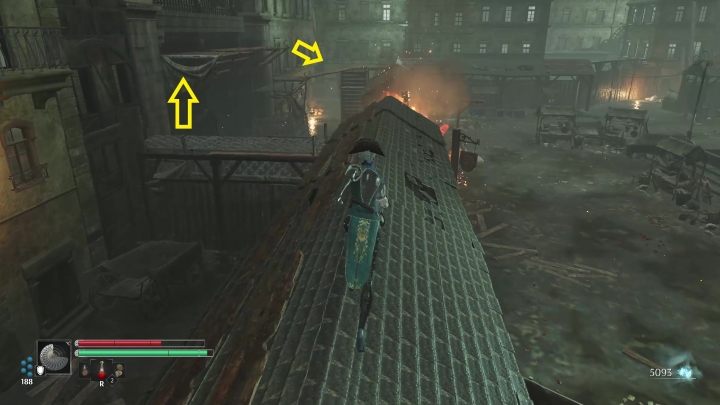
Head to the other end of the square - there is a scaffolding on the left behind the stands. Climb it and then get to the roofs. Follow them until you reach the wooden platform. Jump on it and go down the other side again to the rooftops. Follow the path laid by the rooftops. At the end, go left to access the next part of the location.
Follow the path further. You will reach a small square with a well. It is guarded by a Phoenix and 2 standard Prototypes. On the right side of the square (looking from the alley where you entered from) is a gate that will unlock a useful shortcut for you.
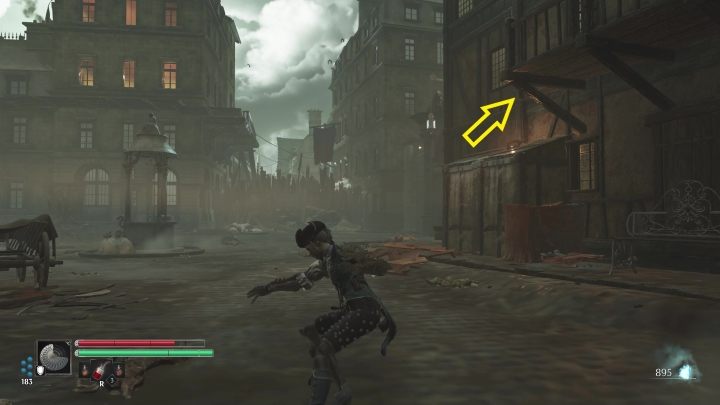
However, the path forward is in front of the square. You have to climb an annex on the right side of the road. Jump up onto the terrace and follow the footbridges further and finally jump onto the stone balcony. A cut-scene will be activated.
Once it concludes, follow the footbridges and return to the ground level. You'll encounter a Phoenix here. Follow the path. The first street to the right reveals a shortcut. Don't forget to activate it.
Keep going. Now you need to face a Stalker. Once you reach burning ruins, turn left. There is a small square there. It is guarded by a Prototype and a Phoenix. Walk through it.
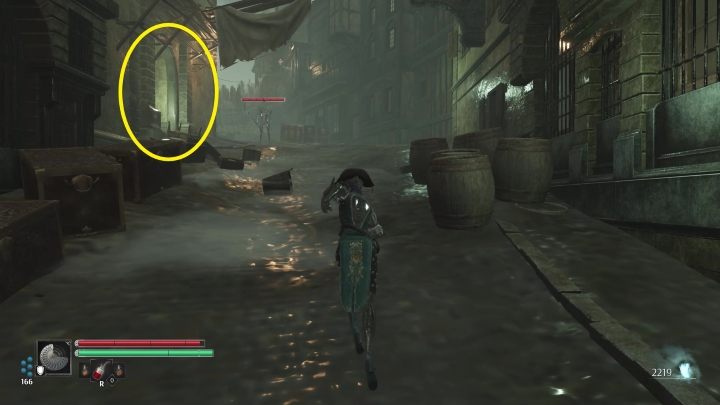
You will reach a wider road, which is patrolled by a Forger. Further ahead, you'll encounter a Lancer. However, before you reach him, turn left.
There is a small square. The square is guarded by a Light Jaguar, Tiger Grenadier, and a Lancer. At the top of the nearby stairs is a gate. Open it (it's a shortcut).
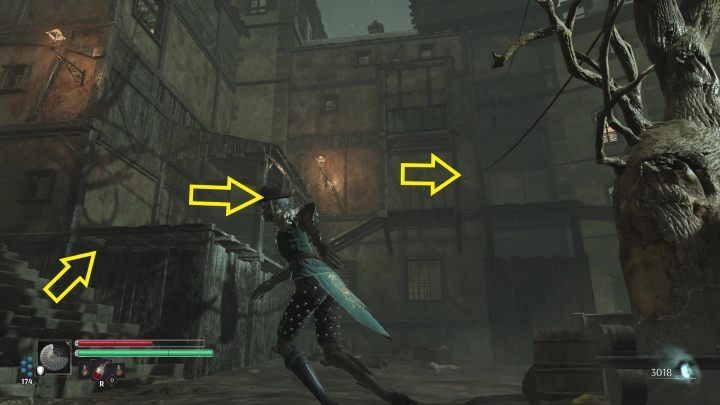
Climb the stairs, jump from them to the platform and follow it. Enter the apartment and exit the other way. Follow the footbridge to the next room and head to the balcony. Jump down to the square. It is guarded by the usual Prototypes and a Phoenix.
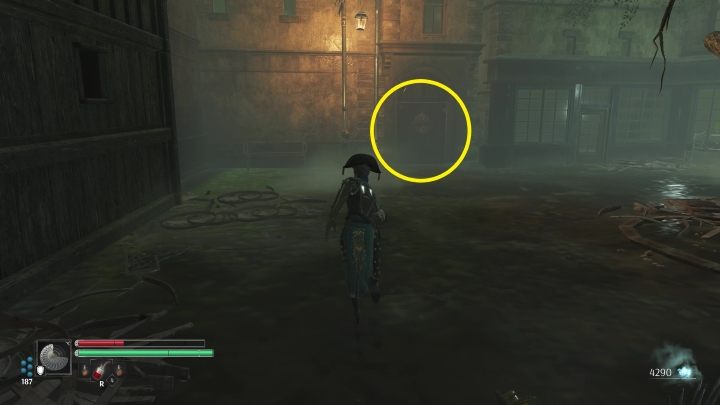
Unlock the door and go through it. Follow the road. Along the way, you'll have to fight a Stalker, and a Prototype further on ahead. You should reach a path by the river. It is guarded by a Heavy Prototype and a Musketeer.
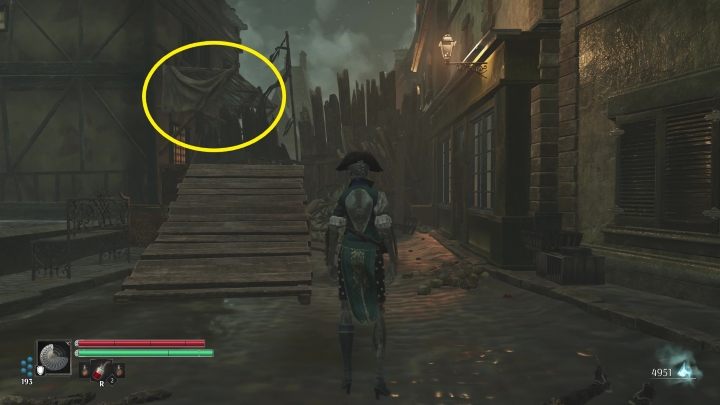
Reach the end of the road. Jump on the platform shown above and go to the other side of the barricade. A cutscene will start, during which you will find an Echo. Activate the encountered Vestal. Follow the road uphill and use the opportunity to unlock a shortcut.
The Bishop of Cite
Descend using the ruined bridge. However, be careful not to fall into water, as this will automatically kill you.
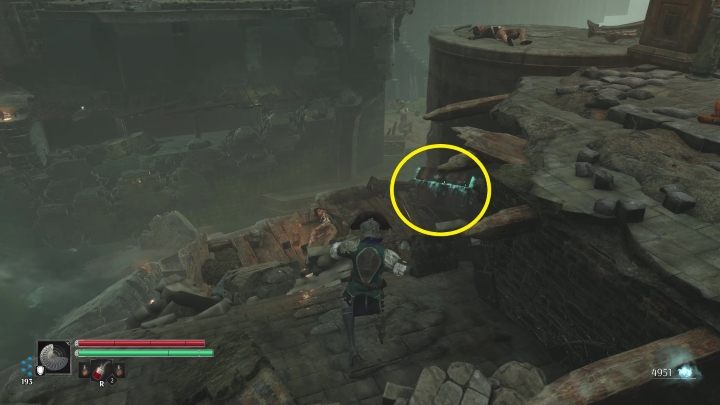
In the chest, on the bridge, there is a part that allows you to upgrade the Burette. Use the boats to continue to the other bank. You'll have to face a Forger and a Stalker. Continue by following the birdge. There is a Stalker at the top of the stairs. and a Musketeer not far from where you are now.
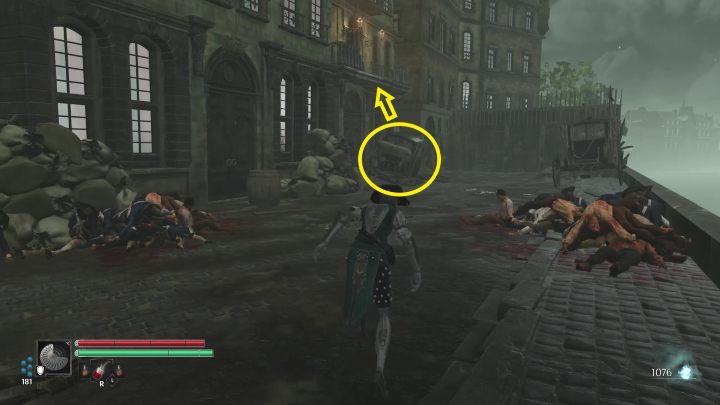
At the end of the road, you need to climb a carriage and then continue to the balcony. Go through the room and jump down.
There, you will face the mini-boss Unstable Butcher. You will learn more about this enemy on a separate page of the guide.
Get past the square. Use the opportunity to pick up an Echo (you can locate it easily thanks to a lit spot on the path). Once the cut-scene concludes, activate the Vestal.
Follow the path. There are 2 Tiger Grenadiers and a Light Jaguar behind the corner. Go down the steps to reach the river and walk along the bank. Get rid of Sinistral Prototype.
Climb the stairs. There is a Lancer/Musketeer waiting for you there. Go in the direction of the fire. In front of it, turn right.
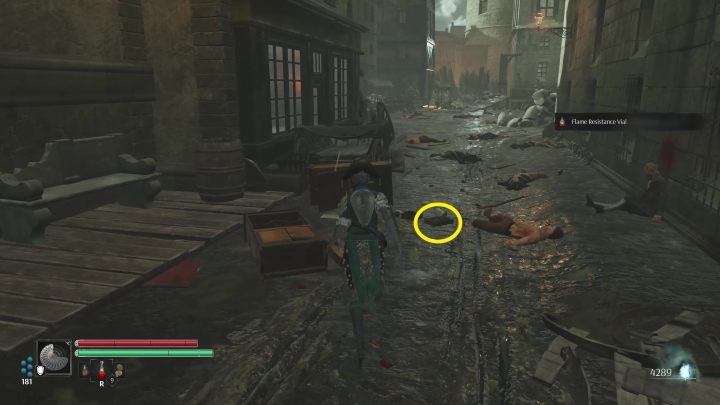
In the alley, approach the book on the ground. You've collected the final Echo. Keep walking along the path. You will reach a square. There is a Vestal here. Activate it.
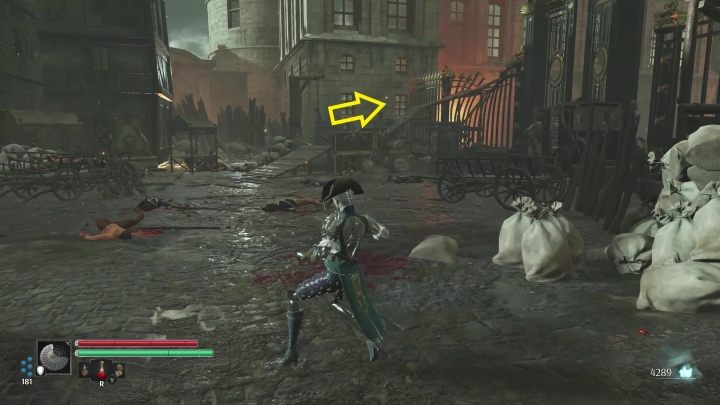
Follow the footbridges to get behind the fence. The battle against The Bishop of CIte starts now. To view tips and strategy for the encounter, visit a dedicated page of the guide. Prepare a Flame Resistance Vial.
Once the boss is defeated, talk to the bishop. You received a new power - The Bishop's Hook. It will allow you to latch and pull up in designated locations. The item influences combat a bit, but you'll use it mainly to traverse the city, unlocking new pathways.
Societe des Amis des Noirs
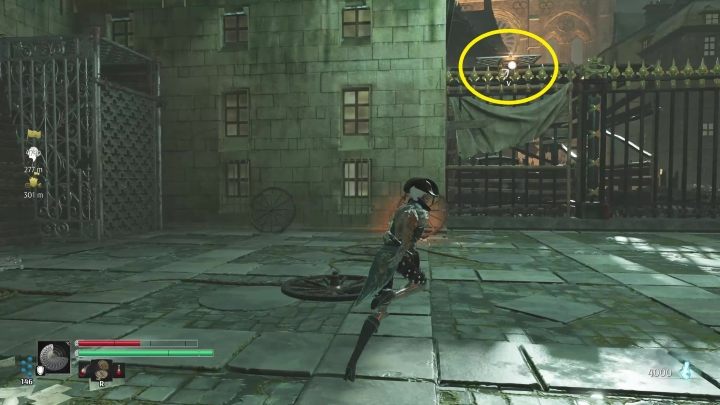
Your next task is to get the bishop's documents. To get out of the arena you have to pull yourself up on a hook over the fence.
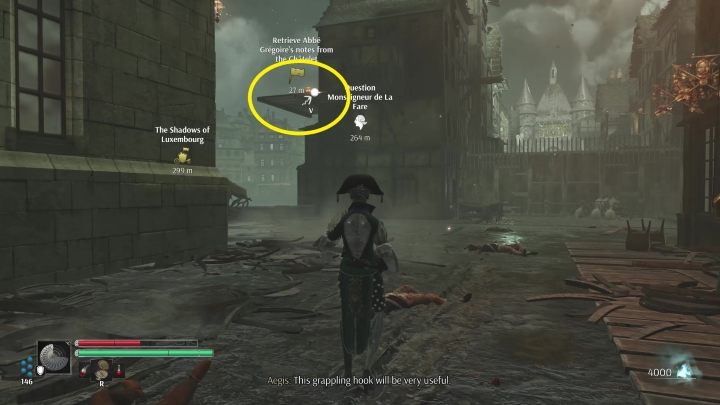
Turn left at the Vestal. Climb the tower. Follow the wooden footbridges. Go through the building and come out on the other side. You'll encounter a Forger here.
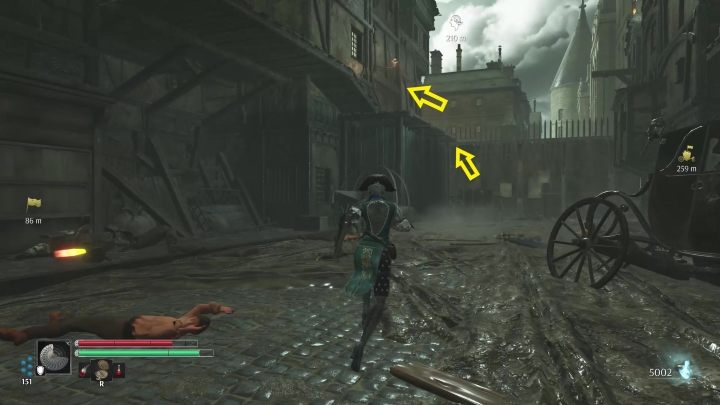
Follow the alley to its end. Watch out for a Musketeer. Climb the crates and follow the footbridges, then go through the house. Jump down to the footbridge below. Cross it to the left (with your back to the house) and descend to the other side.
Now turn left. Walk along the river. The area is guarded by a Phoenix and a Musketeer. Climb the stairs. There is a Vestal on top of them - Activate it.
There are 2 Phoenixes in the square next to the Vestal. Unlock the golden gate located near the Vestal and go through it.
On the right you will find a room with a Forger. There is a Musketeer on the elevation.
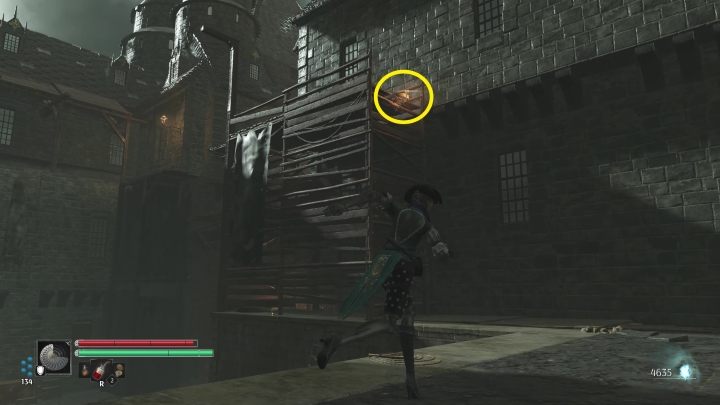
Climb the stairs and pull yourself up on a rope to reach the scaffolding.
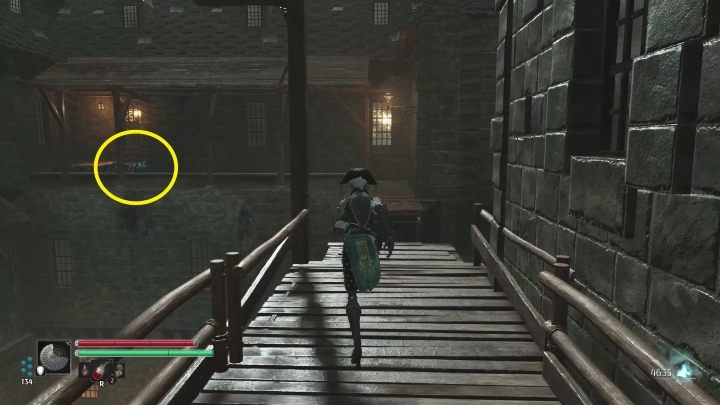
Follow the footbridges and open the chest located at the end of them, as it contains a mechanism part.
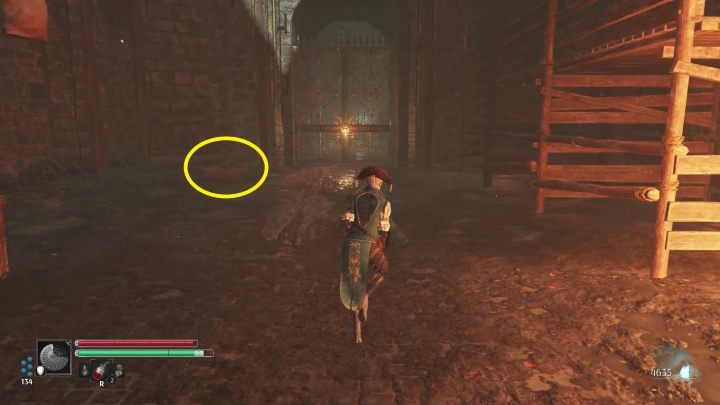
Now return to the main road. Approach the golden gate and repair the mechanism that opens it. There is a Vestal right behind the gate.
Go back to the building from which you came. This time, however, you can explore the final room (the one opposite the room with the mechanism part).
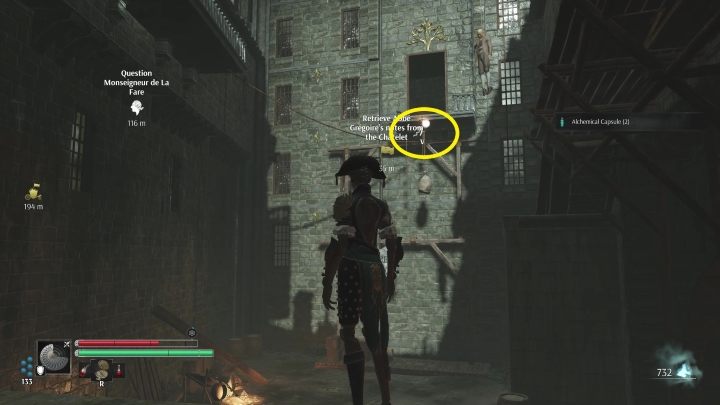
You'll encounter a Phoenix and a Musketeer there. Climb the crates to the elevation where the Musketeer is standing. From there, grapple to the passage visible above. The room on the left contains the needed documents. Now go out through the gate, which you have already opened before.
Turn left and go up the stairs You will reach the street, cross it and continue up the stairs (optionally, you can turn right first and unlock the shortcut on the right). Turn left and open the gates with mechanism.
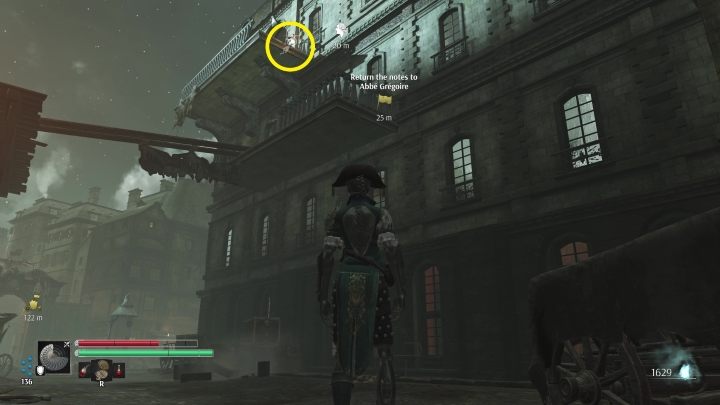
Beyond the gate, look up and use the grappling hook to reach the high balcony. Enter the room to activate a cut-scene. Use all dialogue options with the bishop. You can also talk to de La Fare. It is part of A Family Affair task (you can read more about this mission on a separate page of the guide).
The quest is officially concluded. You can return to the horseless carriage and choose the next mission.
- Steelrising Guide, Walkthrough
- Steelrising: Game Guide
- Steelrising: Walkthrough
- Steelrising: Main missions
- Steelrising: In the Queen's drawing room - walkthrough
- Steelrising: The Master of the Machines - walkthrough
- Steelrising: Troubled Waters - walkthrough
- Steelrising: In search of Abbot Gregoire - walkthrough
- Steelrising: The Shadows of Luxembourg - walkthrough
- Steelrising: To Les Invalides - walkthrough
- Steelrising: The Recluse of the Abyss - walkthrough
- Steelrising: The Prisoner in the Bastille - walkthrough
- Steelrising: Checkmate - walkthrough
- Steelrising: Main missions
- Steelrising: Walkthrough
- Steelrising: Game Guide
You are not permitted to copy any image, text or info from this page. This site is not associated with and/or endorsed by the developers and the publishers. All logos and images are copyrighted by their respective owners.
Copyright © 2000 - 2026 Webedia Polska SA for gamepressure.com, unofficial game guides, walkthroughs, secrets, game tips, maps & strategies for top games.
