Starcraft 2 Legacy of the Void: Templar's Return
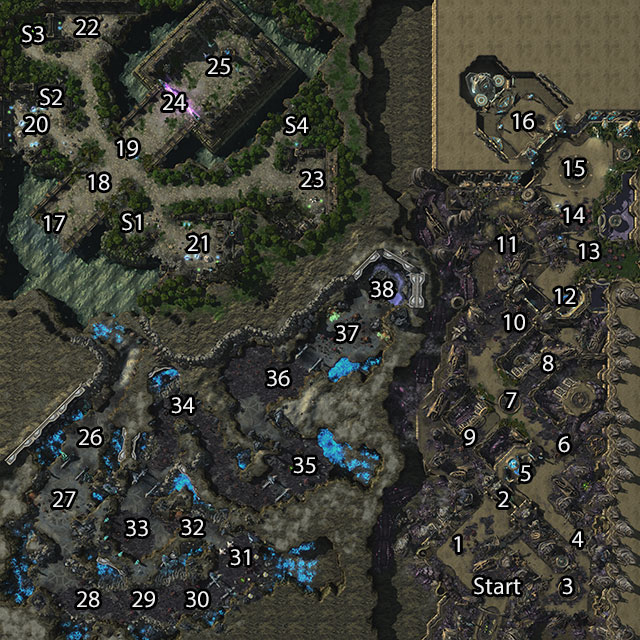
Location: Aiur
Main objectives:
- Destroy 3 power structures.
- Gather an army that is worth at least 60 supply points.
- All heroes must survive.
Side objectives:
- None.
Reward for completing main objectives:
- Unlocking wrathwalker unit.
- Unlocking another mission.
Reward for completing side objectives:
- None.
A long mission divided into three parts during which you will control six different heroes and units that will support them. Be ready to frequently switch between them with the TAB button and to often use skills with the numerical shortcuts. Without that, the mission will be much harder.
First you will control Alarak and Vorazun. Alarak can hurt and push the enemies, jump towards them dealing high damage and each enemy killed will regenerate his shield and hit points. Vorazun can teleport on short distance and immediately attack enemies that are close to each other, just like a dark templar. Additionally, she is permanently invisible and while undetected she regenerates her shield faster. Alarak's role is to gather the attention of enemies and hurt them with his abilities, while at the same time invisible Vorazun will be freely killing all zerg that are nearby. Don't forget about concentrating the efforts of your heroes on the most dangerous targets, such as ultralisks, and about retreating when the battle becomes too hard. Vorazun is not able to heal, so try to avoid getting into the range of detectors.
![First you will have to participate in two battles - in the starting location and a bit further [1] - Mission 17 - Templars Return - Campaign - Legacy of the Void - StarCraft II: Legacy of the Void - Game Guide and Walkthrough](/starcraft2legacyofthevoid/gfx/word/422837168.jpg)
First you will have to participate in two battles - in the starting location and a bit further [1]. They won't be hard as both your characters are very strong and their abilities don't require energy. Among the enemies there will be overlords, but it's not a problem since Alarak's destruction wave can also hurt aerial targets. Get rid of both enemy groups and walk to the door [2].
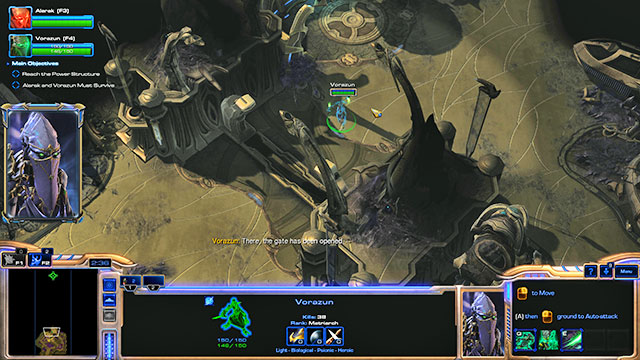
Teleport Vorazun to the passage on the right and go ahead. Teleport next to the detector in point [3] and keep going further north. You will have to make few other jumps combined with killing nearby zerg [4]. Enemies aren't hard and the only thing that will slow you down is the time needed for Vorazun's skills to regenerate. After a short march you will reach a door. Stand in the pointed location [5] and it will open.
![Two other enemy groups [6][7] are ahead of you, this time slightly stronger than the previous ones, so dont forget about using abilities - Mission 17 - Templars Return - Campaign - Legacy of the Void - StarCraft II: Legacy of the Void - Game Guide and Walkthrough](/starcraft2legacyofthevoid/gfx/word/422837199.jpg)
Two other enemy groups [6][7] are ahead of you, this time slightly stronger than the previous ones, so don't forget about using abilities. Once you get rid of enemies in [7], take care of nydus worms in [8] and [9] to get rid of enemy reinforcements constantly coming at you. Their protection consists of buildings and a bunch of zerg units, so you shouldn't have bigger trouble with eliminating them.
![Another nydus worms and a large group of enemies, including ultralisk and detectors, can be found under the second door [10] - Mission 17 - Templars Return - Campaign - Legacy of the Void - StarCraft II: Legacy of the Void - Game Guide and Walkthrough](/starcraft2legacyofthevoid/gfx/word/422837215.jpg)
Another nydus worms and a large group of enemies, including ultralisk and detectors, can be found under the second door [10]. On the left from the door you will find a passage. Teleport Vorazun there. There are many flying zerg units whom you will have to fight and detectors. The detectors are moving across a fixed route, so spend some time to learn it. Once you will know when the enemy units will move, go as Vorazun north. Use the gaps between the enemy detection fields, teleport to the cliffs and through the obstacles [11]. In case of trouble you can be detected, but only for few seconds, otherwise your shield will deplete quickly and then your hit points will drop as well. Reach the location pointed by the game and open the second door [12].
Two other large zerg groups [13][14] are ahead of you. Don't let them surround you and remember about using abilities with area of effect. You can also lure some enemies from the second door, kill them and quickly return and finish of the rest. You will reach another closed door. Behind them you will find the first power structure [16]. Stand as Alarak in the place marked by the game [15]. You must protect it for another minute.
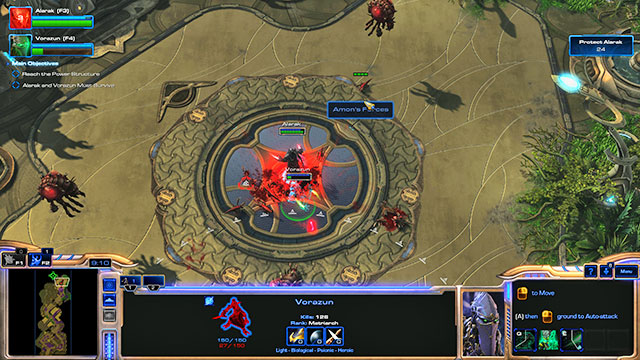
This part of the mission can be completed in two ways. You can stand next to Alarak and let Vorazun kill zerg on their own or turn off the auto use of the shadow fury ability and point the attack targets on your own. Both tactics will be similarly good, as Alarak will be attacked by infantry units, and each killed zerg will replenish his shield and resistance. In both cases you can, but don't have to watch out for detectors. There are too little enemies and they are too focused on Alarak to seriously threaten Vorazun. After a minute of battle the gate with the power structure will be destroyed.
The map and characters will change. Now you will control Karax and Fenix. Fenix is able to jump on enemies, attack all targets around him and immediately regenerate damaged shield. All his abilities can be used automatically, so you can leave him to himself. Karax is able to take over any mechanic unit of enemy, summon photon cannon and activate nearby buildings. In that case he works like pylon which additionally speeds up the construction of units. With the help of both characters you will have to gather a small army without which you will not be able to kill the hybrids protecting the second power structure.
![Move both characters [17] at the first enemy group [18] and take over the enemy immortal unit - Mission 17 - Templars Return - Campaign - Legacy of the Void - StarCraft II: Legacy of the Void - Game Guide and Walkthrough](/starcraft2legacyofthevoid/gfx/word/422837246.jpg)
Move both characters [17] at the first enemy group [18] and take over the enemy immortal unit. Kill the zealots. Slightly further [19] you will face a larger group of enemies, this time archons. Summon photon cannon against them. The Fenix will finish up the work of destruction.
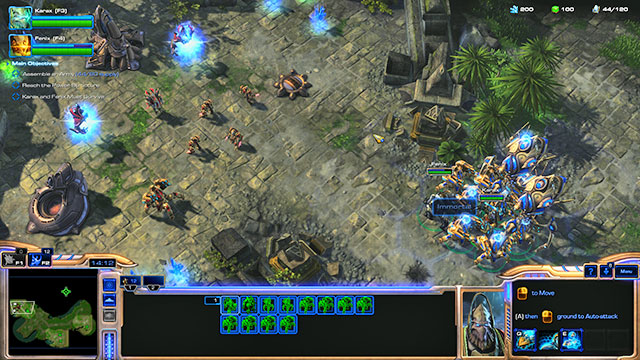
Now you must gather army to fight hybrids. There are four protoss bases [20-23] on the map. In them you will find units and buildings to take over and resources to produce new units. Other resources can be found in points [S1-S4]. Small enemy groups can be found on paths leading to the bases, including immortals and colossus. Let your units take care of zealots and other infantry units while Karax will focus on taking over machines and creating photon cannons. Optionally he can focus on taking over enemy photon cannons, it can be done in point [20].
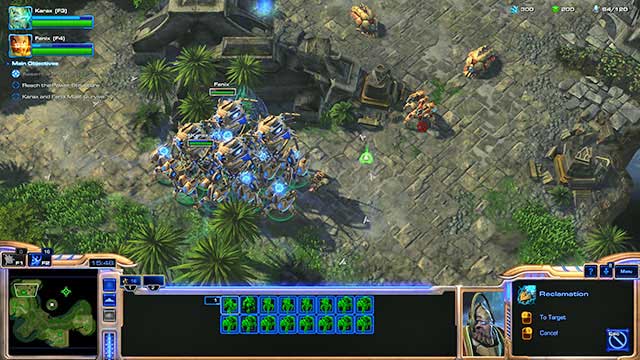
While creating the army, with the additional resources you can immediately create immortals or you can wait until you will be able to produce colossus. To do it, you must take over the robotic support bay at [23]. Next to it you will find a colossus ready to be taken over by Karax. In [22] you will find two reavers. In order to take them over, lure other enemy units away and destroy them when they are separated from the reavers. Then send Karax to take them over. You can take over one, but if you will allow your character to be slightly hurt, you can take over both. It is worth it, as you won't be able to build reavers. Don't attack as a group unless you want to seriously hurt your units or even lose few of them.
![After gathering an army (it doesnt matter what units you have, only their number), let Karax open the gate [24] - Mission 17 - Templars Return - Campaign - Legacy of the Void - StarCraft II: Legacy of the Void - Game Guide and Walkthrough](/starcraft2legacyofthevoid/gfx/word/422837293.jpg)
After gathering an army (it doesn't matter what units you have, only their number), let Karax open the gate [24]. On the other side you will find five hybrids - three at the start and two summoned. Focus on the largest one and destroy it, then take care of the other ones. Don't forget about summoning the turret. Once you kill all enemies, Karax will destroy the power structure.
The map will change after another scene. Now you will control Artanis and a small group of support units. Artanis has the same abilities as in The Infinite Cycle, but you will mostly use his healing ability. This time you must hurry, as you are chased by a psionic energy which will hurt your units if they will get close to it. The location of the energy will be marked on the map.
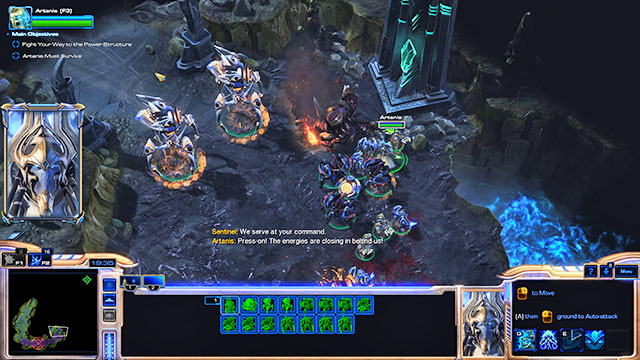
Walk ahead. After a moment you will face a group of zerg [27]. Kill all enemies, heal your units and go ahead. Now you will have to face three very large zerg groups [28-30]. During the battle you will definitely lose few zealots. Regularly heal your units and don't forget about Artanis' combat abilities. A while further you will find zerg attacked by allied units [31]. Destroy all the buildings together and the allied units will join you.
Gather the army and move ahead. You will face another zerg [32][33] but this battles will be much easier than the previous ones. You might have some trouble with marching through the tunnel [34] full of zerg turrets. You will be constantly forced to fight and your zealots will have no time to regenerate their shields. You must use Artanis' healing ability wisely to avoid losing too many units. If the psionic energy chasing you is far away, give your army a moment to rest.
![At the end of the tunnel, you will find another zerg base in point [35] - Mission 17 - Templars Return - Campaign - Legacy of the Void - StarCraft II: Legacy of the Void - Game Guide and Walkthrough](/starcraft2legacyofthevoid/gfx/word/422837324.jpg)
At the end of the tunnel, you will find another zerg base in point [35]. This time it will be attacked by a group of dark templars. Similarly as previously, help them in destroying the buildings and they will join you.
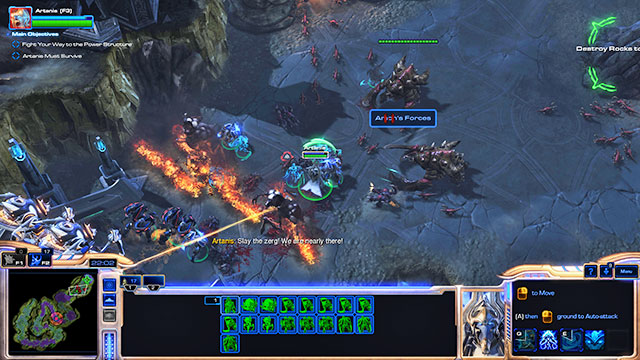
Gather the army, heal your units and go ahead. In [36] you will face a large group of zerg units and fortifications. Get the attention of the units, step back and kill them outside the reach of turrets. Send few other units in order to destroy the nydus worms while destroying the fortifications. Another nydus worms with a large group of zerg can be found further [37]. Concentrate on killing the ultralisks and later get rid of the smaller units. Don't forget about burying the entrances to the tunnels.
Once you reach the last power structure [38], a cutscene will start and after that the mission will end.
- StarCraft II: Legacy of the Void Game Guide
- Starcraft 2 Legacy of the Void: Game Guide
- Starcraft 2 Legacy of the Void: Campaign Legacy of the Void
- Starcraft 2 Legacy of the Void: For Aiur!
- Starcraft 2 Legacy of the Void: The Growing Shadow
- Starcraft 2 Legacy of the Void: The Spear of Adun
- Starcraft 2 Legacy of the Void: Amon's Reach
- Starcraft 2 Legacy of the Void: Last Stand
- Starcraft 2 Legacy of the Void: Forbidden Weapon
- Starcraft 2 Legacy of the Void: Sky Shield
- Starcraft 2 Legacy of the Void: Brothers in Arms
- Starcraft 2 Legacy of the Void: Temple of Unification
- Starcraft 2 Legacy of the Void: The Infinite Cycle
- Starcraft 2 Legacy of the Void: Harbinger of Oblivion
- Starcraft 2 Legacy of the Void: Steps of the Rite
- Starcraft 2 Legacy of the Void: Rak'Shir
- Starcraft 2 Legacy of the Void: Templar's Charge
- Starcraft 2 Legacy of the Void: Unsealing the Past
- Starcraft 2 Legacy of the Void: Purification
- Starcraft 2 Legacy of the Void: Templar's Return
- Starcraft 2 Legacy of the Void: The Host
- Starcraft 2 Legacy of the Void: Salvation
- Starcraft 2 Legacy of the Void: Campaign Legacy of the Void
- Starcraft 2 Legacy of the Void: Game Guide
You are not permitted to copy any image, text or info from this page. This site is not associated with and/or endorsed by the developers and the publishers. All logos and images are copyrighted by their respective owners.
Copyright © 2000 - 2025 Webedia Polska SA for gamepressure.com, unofficial game guides, walkthroughs, secrets, game tips, maps & strategies for top games.
