Chapter 3 - The Risen Island - Quests - Part 1
Secure the volcano keep
 |  |
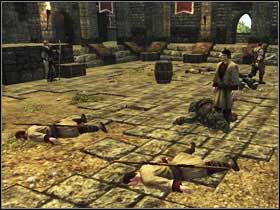
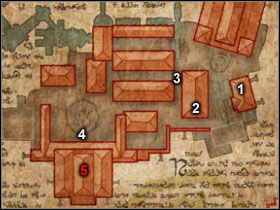
After opening the volcano gate, riots break out in the Monastery. You have to find the mages who are still alive and send them back to Ignatius (M4.22). Visit Cyrus (#1), Illumar (#2), Abrax (#3), Vitus (#4) and dead Pallasa (#5), who you can now rob. Return to Ignatius and tell get him the dead mage's notes. After finishing The supplies from the library and The lizard warrior, report him about securing the object.
The supplies from the library
 |  |
Abrax (#3) will send you to his workroom. Get there through the library (see The test of Master Ignatius). Now you must defeat 10 intruders placed in the marked spots of the building. Remember about the crystal blocking the use of magic (drive the enemies away from the crystal and kill them then). You have to search every dead body. Once you get back to Abrax, you should have three alchemical supplies and some notes. On your way you should also meet Sirius to whom you can give the notes (if you're playing as a bandit, Sirius won't be in the lab). Free of charge or for 200 coins. Don't forget to talk with Abrax.
The lizard warrior
 |  |
Vitus (#4) will order you to get rid of the invader's leader, dwelling at the centre of the graveyard crypt. You can report to the mage after completing the task.
Open the great gate
 |  |
Inside the volcano, the Inquisitor will order you to open the great gate. Go right. The corridor will lead you to natural "stairs" ending with a narrow crack in the wall. Turn into a nautilus transformation and enter the temple.
 |  |
Get rid of the ghouls and go the next room through the hole in the ceiling. In the corridor, jump over the floor trap and fight with the Saurians.
 |  |
Jump over the spiked trap, get your weapon (spells) ready and fall down through the crumbling floor.
 |  |
The stairs will lead you to a windlass - turn it. Return to the Inquisitor (you can use the "window") and report about your actions. It's time to head left.
 |  |
After a few steps you should find a tunnel on the left. The tunnel turns right and after a while you should reach a pit with some ruins and three enemies on the other side of it. You have to use levitation to get there. You will find an old bust by one of the bodies.
 |  |
Push the lever in the corridor on the right. Enter the corridor on the left, safely cross over the bars (the trap which you have disabled) and stand in front of a thin wall. Use the pickaxe [have it in the inventory and click the wall] and break through to the other side.
 |  |
Push the lever on the other side and step into the next room at the end of the corridor, where some enemies will greet you. Take another bust from one of the bodies. Place both of them on the pedestals. Use the windlass in the newly opened room. This way you will open the great gate. Now you can read what's written on the pillar by which the Inquisitor has been standing until now.
You are not permitted to copy any image, text or info from this page. This site is not associated with and/or endorsed by the Deep Silver / Koch Media or Piranha Bytes. All logos and images are copyrighted by their respective owners.
Copyright © 2000 - 2025 Webedia Polska SA for gamepressure.com, unofficial game guides, walkthroughs, secrets, game tips, maps & strategies for top games.
