Oxygen Not Included: Agriculture and food
Cultivating plants and providing food for your duplicants is probably the most important thing if after sorting out the oxygen. There are many ways to provide food. You can grow plants from your own seeds, taking good care of them, or try to find an already started plantation in the caves. You can also kill some animals. The plantations have their Predicted Harvest Rating - the higher it is, the better the harvest will be and the greater the chance of getting more seeds. The PHR is determined by the temperature, concentration of gas, etc.
Each duplicant needs some 1000 calories per day/cycle. Lack of food will result in deteriorating health - malnutrition will eventually kill. Everyone have their expectations of the food quality, and though they still may be able to eat less fresh products, it will negatively influence their happiness, increasing the level of stress. The requirements increase with experience. Better food requires more work and preparation before production. The food that's not quickly consumed or properly stored will start deteriorating and oozing fowl air. Hence you should store it in Ration Boxes or in the Refrigerator.

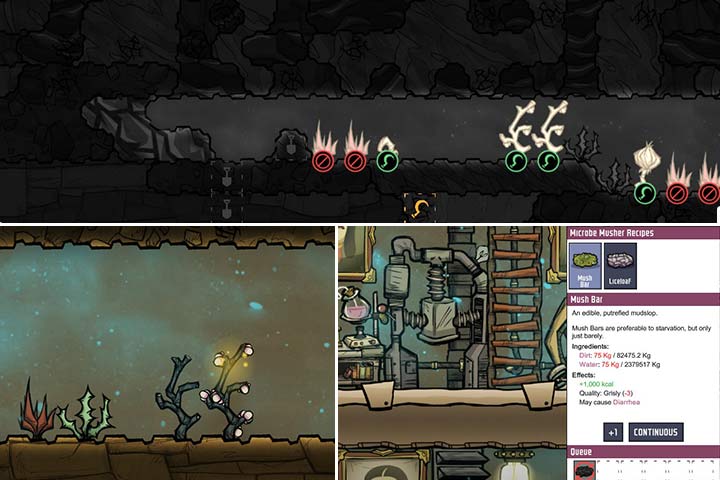
Getting food at the beginning. Although you start the game with minor food reserves, you will have to start exploring other options right away. There are two quick ways out of it: either search for Muckroot or caves with Mealwood or Bristle Berry already growing in them. You just have to dig them out or order your duplicants to begin auto harvest, and they'll get to work. Until you have the right technology, don't dig out any plants. They will grow and blossom without your interference. The only issue is re-planting them or achieving better harvest. You can also hunt animals, such as Hatch, which will drop meet. Most of the time there are not enough of them to provide enough food.
You can also build a Microbe Musher, where Mush Bar can be created out of sheer dirt and water. The problem is that the quality of this nom is classified as "grisly" and it can cause diarrhea. However, often this will be the only solution during famine or when waiting for harvests. You can also use five units of Meal Lice and 50kgs of water to create Liceloaf¸ consequently doubling the amount of calories (up to 1000).

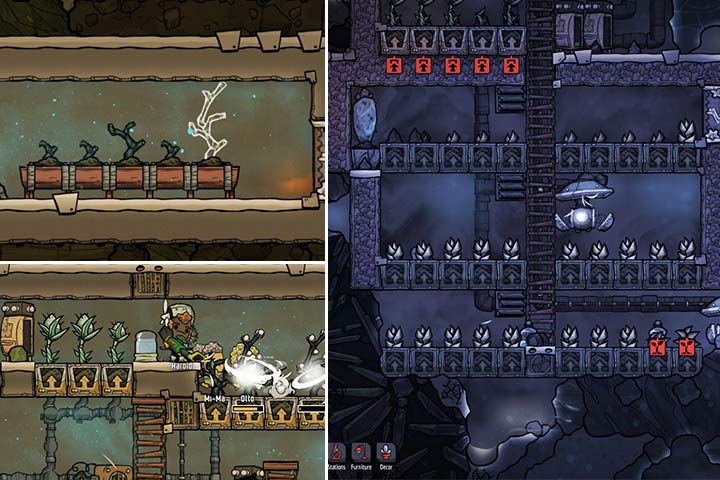
After you unlock the Farming and Fine Dinning technologies, new possibilities will open. Most importantly, you will be able to build Planter Box and new tiles: Farming and Hydroponic. The former allows you to plant seeds. You need dirt to build it. It's most useful if the place where you want to grow plants has good temperature. New tiles can be built on standard base tiles. The Farming Tiles' plantation can be upgraded with the specific fertilizer; the hydroponic tile can be joined with a system of valves, providing irrigation. This will allow you to get much better output during harvests, but you can also cultivate some plants despite unfavorable conditions.
Each plant requires it's own range of temperature, beyond which it doesn't grow. Each one has the perfect temperature as well, in which it will flourish and yield the most food (Harvest Rating). Spreading fertilizer and irrigation will also increase the rating. It's bets to create farming fields in locations that already have good conditions and temperature (like Sleet Wheat in winter biome).
There are three tiers of crops yield: standard, good and excellent. Each subsequent tier provides more food and increases the chance for additional seeds. Make investments into at least one place in which crops should be excellent. Pay for systems that will let you maintains ideal temperature. Use a gas concentration sensor to monitor the amount of gas. Most plants need at least 150g. Ideally, the amount of gas should be greater than 750g.
Below is a table with all useful information:
Name | Temperature range (perfect range) | Time to grow to maturity/ harvest interval | Number of harvests and yield | Harvest Rating: Standard (0-40) Good (40+) Excellent (80+) |
Mealwood | 10 to 30 (18 to 22) | 5/2,5 | Meal Lice (100kcal), 3 harvests | 8 units 16 units and 1 seed 16 units and 2 seeds |
Bristle Blossom | -23 to 23 (-3 to 3) | 10/2 | Britsle Berry (1600 kcal), 5 harvests | 1 unit 1 unit and 1 seed 1 unit and 2 seeds |
Sleet Wheat | -55 to 5 (-40 to -35) | 20/0 | Sleet Wheat Grain, 1 harvest | 25 seeds 50 seeds 75 seeds |
Pincha Pepper | 35 to 85 (55 to 60) | 25/20 | Pincha Peppernut, 3 harvests | 4 units and 1 seed 4 units and 2 seeds 8 units and 2 seeds |
Summary: The maximum number of cycles required to get the food and the lowest possible rating for every plant:
- Mealwood. After 12 cycles - from 2400 kcal do 4800 kcal. Remember that Meal Lice weights a lot and takes up a lot of space in your boxes/fridges. The quality is grisly (-3). You can make a couple better meals, such as Liceloaf (from 50kg of water and 5 units, i.e. 500 kcal, will yield a meal worth 1000 kcal).
- Bristle Blossom: after 24 cycles, 4800 kcal. Bristle Berry is one of the best tasting fruits, the quality is relatively good (-1) for a raw meal, however, and its ideal temperature requires a lot of work if you want a lot of these.
- Sweet Wheat. After 20 days from 25 to 75 seeds. If you use the whole yield to prepare a simple meal, Frost Bun, you will get from 25000 to 75000 calories. It requires some waiting, and the temperature has to be pretty low, but the high calories output should compensate. Notice that you use the seeds for both planting and making meals!
- Pincha Peppernut: after 85 cycles you'll get from 12 to 24 seeds. Used to season other meals, has no calories itself. Increases the quality of meals.
Remember that you get the seeds during the last harvest of the given plantation. That's when you should make sure the Harvest Rating is as high as possible. Bristle Blossom and Sleet Wheat require clean water if you want to irrigate them. Mealwood and Pincha Pepper actually require polluted water, and lots of it. All plants require fertilizer (apart from Pincha - it needs Phosphorous). All plants apart from Mealwood have a décor bonus, but Mealwood is the fastest-growing and most economic plant.
As already mentioned, you will quickly gain access to Microbe Musher, and after discovering the Fine Dining technology; you will also be able to build a Cooking Station. There, your people can make much better and nourishing meals. Make sure that the best cooks take care of cooking, and nobody else. Better meals will require Pincha Peppernut. It's a spice and it can be combined with other meals to produce better food.
You are not permitted to copy any image, text or info from this page. This site is not associated with and/or endorsed by the developers and the publishers. All logos and images are copyrighted by their respective owners.
Copyright © 2000 - 2025 Webedia Polska SA for gamepressure.com, unofficial game guides, walkthroughs, secrets, game tips, maps & strategies for top games.
