NiOh 2: Pervading Waters Walkthrough
Last update:
Pervading Waters is the first main mission of the fourth region in NiOh 2 - you will have to defeat two bosses. This page of the guide contains a walkthrough for this mission.
First shrine
Approach the shrine - you will open the shortcut on the left later. You have to go right. Around the corner, you will encounter new human opponents - they are mainly using firearms. Be careful, because there's another opponent around the corner.

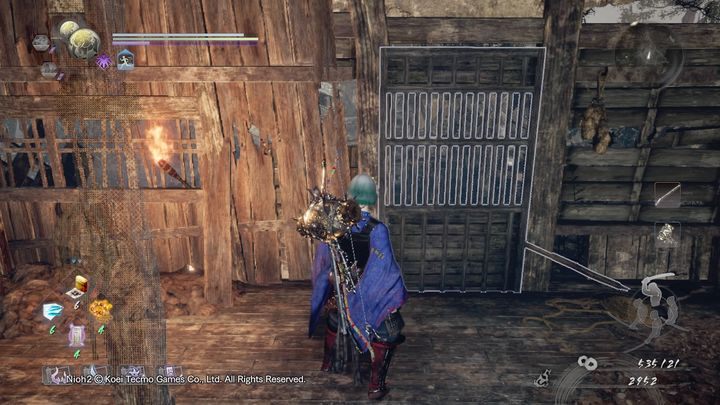
On the right, you have a small building with one opponent. Defeat him and open the gate to unlock the shortcut.

Then continue towards the bridge, where you will encounter three opponents - two at the bottom, and one at the top.

Try to shoot them one at a time, and it is best to start with the opponent at the top, as he can use his horn to call the enemies nearby. Then take care of the opponents downstairs. Once you have beaten them, turn left and enter the building.

Nurikabe is on one of the walls. Pay attention to the color of its eyes and make a gesture in that color. This will unlock access to the rooftops. Get up the ladder and keep walking.

Shoot down another opponent. Be careful, though, because he stands in a place that will collapse under your character. You will fall down to one of the houses. Defeat the enemy and open the door - they can only be opened from this side.

Another opponent is standing at the top - he will shoot at you if you go down. It is worth killing him quietly from behind, as he can cause you some trouble when fighting against one of the stronger opponents encountered at the bottom.

That enemy is the woman seen in the picture - after dealing with the marksman, shoot her in the head from that spot and quickly jump off to inflict serious damage to the stunned opponent. There is another marksman nearby - watch out for him.

After defeating your opponents, go to the gate. Behind it, you will find an NPC and the second shrine.
Second shrine
Pray at the shrine and talk to the NPC. Further on, you will find a broken bridge on the right. You will get to the other side later. In that place, you will, for example, help an NPC defeat a big Yokai.

First, head towards the NPC. On the left, you have Nure-Onna, while on the right you will see a large building corrupted by the Yokai Realm.

When you enter the building, shoot down the marksman upstairs immediately. A single Gaki is on the left. The area further away is patrolled by Mitsume Yazura. Instead of fighting everyone in the Yokai Realm, it is best to run quickly to the lantern presented in the photo and destroy it as fast as possible. This will get rid of the Yokai Realm.

Be careful, however, as the lamp releases electric Oni-bi. After destroying the lamp, take care of Mitsume Yazura. In the corridor to the right, there is a Nure-Onna and a skeleton. In the room downstairs, you have a small cyclops. Shoot him in the eye, quickly run to the enemy and attack. Remember not to get hit twice, because then he will turn into a big cyclops.

Find the path leading up - it is on the left of the entrance to the building. Follow it. Moving on, you will encounter Gaki and Tesso.

Shoot Gaki and then take care of Tesso. Be careful, because the room is small, which can make Tesso a little more dangerous. Once you have beaten them, deal with a skeleton on the right. You can shoot it from a safe distance.

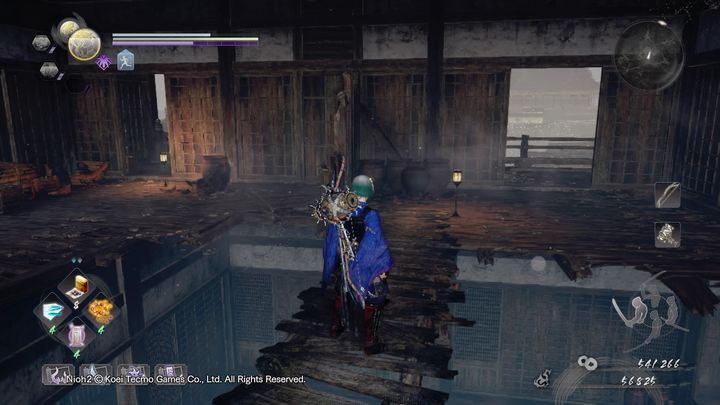
Walk down the wooden footbridge and head to the corridor on the right, where you will see a ladder that will act as a shortcut. Lower it and go to the left corridor.

It will lead you to the wooden bridge with more human enemies. Deal with them from a distance if you have enough ammo. After defeating them, go down, but don't jump.

On the right, on the top, there is a building with a new Yokai, Ubume. It is characterized by the fact that it mainly screams, creating a field that inflicts damage and pushes you away. She holds an Amrita Crystal - this is her weak spot. However, if you destroy it, Ubume will get angry and start attacking you more aggressively, for example, with her long hands. After beating her, open the door straight ahead and go down.

After that, turn left and walk between the buildings visible in the photo. On the left, you can see an NPC fighting a large Yokai.

If you have done previous side missions related to him, you can talk to the NPC and get a temporal ally. Otherwise, he will refuse.

Go the other way now. You will find a door that serves as a shortcut to the first shrine. Rest there to shorten the time you will have to spend on going back to the place of your death.

Stick to the right and keep walking forward until you encounter the marksmen visible in the photo. Kill them from a safe distance by shooting them in the head. If you don't have ammo, run quickly towards them and start the fight by attacking the marksman on the right.

After defeating them, head to the left, where you will encounter another patrolling opponent. A wooden building is nearby - go inside an open the door to unlock another shortcut. Once the passageway has opened, go back and keep walking.

The path on the left leads to the lesser Umi-bozu, Tesso and Gaki, which are on roofs or inside buildings. One of them contains a chest that is actually a Mimic. The path to the right will bring you closer to the next shrine.

However, this bridge is again guarded by a stronger soldier. There are marksmen located on the left and right. It is worth dealing with them quickly first and then fighting one-on-one with the opponent presented in the picture. Wait for him to attack and when he misses, attack him and break his guard. After this, go to the other side of the bridge and open the passage. You will reach the third shrine.
Third shrine
You see a door straight ahead and on the left. Both passages lead to the boss, however, you will open them later. Go to the right.

You will find yourself in the Yokai Realm. Watch out for the lamp - this is another Koroka. On the right, you have a new Yokai, Onyuda. You have fought him together with the NPC. Watch out for his tongue attacks and punches. You will encounter more lanterns spawning Oni-bi. Destroy them as fast as possible.

To purify the Yokai Realm, enter the center of the building from the other side and defeat Ubume again. Watch out for Gaki above - shoot him in the head and then eliminate Ubume. Once you have beaten them, open the door that will serve as a shortcut.

Go outside and follow the toppled tree trunk to the top. You will find a Sudama and a chest.

Go inside the next building with more paintings - cut them. Nurikabe is in front of you. Behind it, you will find a hot spring - use it to regenerate health.

Soon, you will fight with e.g. a skeletal Archer (eliminate this enemy first), Tesso and Gaki. You should also kill Biwa Boku-boku from a distance. In addition, there is a small cyclops. After defeating them, stick to the left and go behind the building.

You will find the last marksman. Defeat him, and go downstairs to open the door by shrine. This unlocks the shortcut to the arena with the boss - Saika, known from the first NiOh. The boss fight is described in a separate chapter.

After defeating Saika, talk to him - he will give you the key to another gate. Go back to the shrine and talk with the two NPCs. After talking to them, open the gate on the right. You start to hear strange noises - they are caused by the second boss named Gyuki. To get to it, open the gate and keep moving forward.

There, however, you will encounter a lamp - Koroka will spawn from it. On the right, you have Gaki guarding an item. Deal with them or ignore and go forward.

Time to fight the next boss. You have to face Gyuki, a giant beetle-like boss. The fight with Gyuki is described in a separate chapter.
- NiOh 2 Guide
- NiOh 2: Walkthrough
- NiOh 2: Main missions
- NiOh2: Main missions list
- NiOh 2: The Village of Cursed Blossoms Walkthrough
- NiOh 2: The Beast of Smoke and Flame Walkthrough
- NiOh 2: The Viper's Sanctum Walkthrough
- NiOh 2: The Hidden Monsters of Okehazama Walkthrough
- NiOh 2: The Mysterious One Night Castle Walkthrough
- NiOh 2: The Hollow Fortress Walkthrough
- NiOh 2: A Way Out Walkthrough
- NiOh 2: Corpses and Ice Walkthrough
- NiOh 2: Bird in a Cage Walkthrough
- NiOh 2: Pervading Waters Walkthrough
- NiOh 2: The Frenzied Blaze Walkthrough
- NiOh 2: The Sun Sets On Mount Tenno Walkthrough
- NiOh 2: Imminent destruction Walkthrough
- NiOh 2: The Two Faces of Hospitality Walkthrough
- NiOh 2: The High Spirited Demon Walkthrough
- NiOh 2: The Mausoleum of Evil Walkthrough
- NiOh 2: The Golden Castle Walkthrough
- NiOh 2: Cherry Blossom Viewing in Daigo Walkthrough
- NiOh 2: In the Eye of the Beholder Walkthrough
- NiOh 2: Main missions
- NiOh 2: Walkthrough
You are not permitted to copy any image, text or info from this page. This site is not associated with and/or endorsed by the developers and the publishers. All logos and images are copyrighted by their respective owners.
Copyright © 2000 - 2026 Webedia Polska SA for gamepressure.com, unofficial game guides, walkthroughs, secrets, game tips, maps & strategies for top games.
