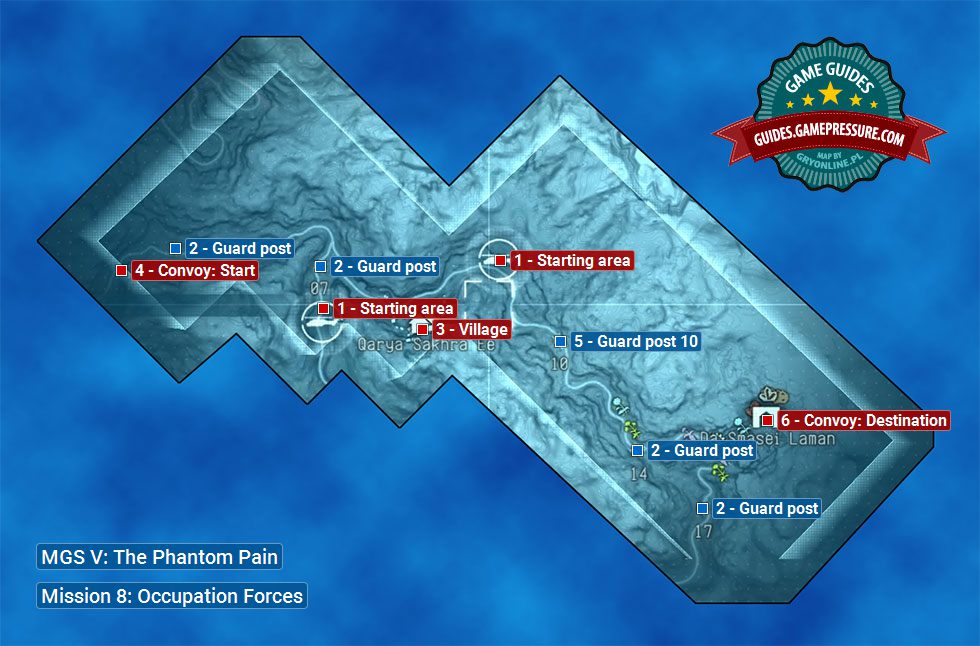
MGS 5 The Phantom Pain: Occupation Forces - mission map
The map above shows the area available to you during the eight mission in Metal Gear Solid V, entitled Occupation Forces. Its most important part starts after you reach Qarya Sakhra Ee (number 3 on the map) and collect the deployment plans. After you do that, a convoy will appear (no. 4), heading to Da Smasei Laman (no. 6). You can use the armored vehicle near one of the outpost (no. 5) to stop the convoy.
- Metal Gear Solid V: The Phantom Pain Game Guide & Walkthrough
- MGS 5 The Phantom Pain: Strategy guide and main missions
- MGS 5 The Phantom Pain: Walkthrough
- MGS 5 The Phantom Pain: Mission 8 - Occupation Forces
- MGS 5 The Phantom Pain: Mission 8 - Occupation Forces
- MGS 5 The Phantom Pain: Occupation Forces - mission map
- MGS 5 The Phantom Pain: Securing the deployment plans
- MGS 5 The Phantom Pain: Eliminating the colonel and the tanks from the convoy
- MGS 5 The Phantom Pain: Remaining Occupation Forces secondary mission objectives
- MGS 5 The Phantom Pain: Mission 8 - Occupation Forces
- MGS 5 The Phantom Pain: Walkthrough
- MGS 5 The Phantom Pain: Strategy guide and main missions
You are not permitted to copy any image, text or info from this page. This site is not associated with and/or endorsed by the developers and the publishers. All logos and images are copyrighted by their respective owners.
Copyright © 2000 - 2025 Webedia Polska SA for gamepressure.com, unofficial game guides, walkthroughs, secrets, game tips, maps & strategies for top games.
