Act 3 / Final - part 5 | Act 3
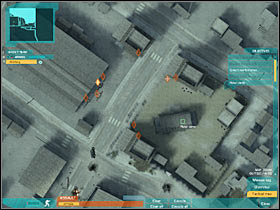
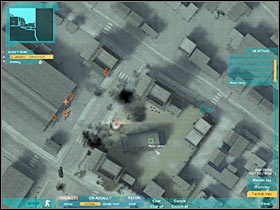
Now it would be a good idea to use a mortar strike in order to take out some of the enemy troops. As a result, you would have to activate your tactical view. I would recommend targeting the main encampment (#1). Now you will have to wait for the mortar strike to take place (#2). As you've noticed, some of the enemy soldiers have survived the attack, however it's going to be quite simple to get rid of them (without any assistance).
 |  |
Start moving forward. You should see that one of the enemy soldiers is standing to the right of the main group. He is also facing the main encampment, so you should have any problems surprising him (#1). Once he's gone, head on towards the larger group (#2). Thankfully, you'll be able to use higher brick walls for much needed cover.
 |  |
Lean out carefully in order to disable one of the heavy machine gun posts (#1). You could also use a grenade here (or a grenade launcher), however this won't be necessary and even if you don't have any explosives with you, there's nothing you should be worried about. Now you will have to kill one of the enemy soldiers (#2). Use a machine gun.
 |  |
It would be a good idea to turn left here. You will have to enter the main rebel base (#1). The objective here will be to find a better shooting spot. You will have to place your main character correctly, so he'll be looking at the entrance to the warehouse. Disable the second heavy machine gun post (#2). After that, move to the left and take out a single soldier.
 |  |
3a) Locate the missile inside the bunker (This is going to be a follow-up for the main objective of this mission. You've already found the missile bunker. Now you will have to reach the missile itself.)
Obviously you should start moving towards the warehouse, the same one that was guarded by the rebel units (#1). You shouldn't encounter any new units for the time being. I would also recommend that you leave your team here. You will have to locate a small staircase which leads to the bunker area (#2). Go there now. You should also save your game.
 |  |
You probably won't encounter rebel soldiers right away. Despite what you might think (radio transmissions), you won't have to be in a lot of hurry. Stop once you've reached a left turn (#1). There are two enemy soldiers just around the corner (#2). Choose longer bursts (instead of single shots), so you'll be certain that they die.
 |  |
Try entering a new room. The lower floor is going to be guarded by at least two enemy units. You should be able to kill one of the soldiers right away (#1). As for his colleague, you will have to move to the right (#2). Once he's dead, use the stairs.
 |  |
The next corridor is going to be guarded by a single rebel unit (#1). If you're lucky, you should be able to surprise this soldier. Just make sure that you're aiming at his head. Go straight. You must be careful here, because one of the enemy soldiers will be hiding inside a small room (#2). Kill him, before he manages to fire at the main character.
 |  |
You are not permitted to copy any image, text or info from this page. This site is not associated with and/or endorsed by the Ubi Soft or Grin. All logos and images are copyrighted by their respective owners.
Copyright © 2000 - 2025 Webedia Polska SA for gamepressure.com, unofficial game guides, walkthroughs, secrets, game tips, maps & strategies for top games.
