Act 3 / Final - part 1 | Act 3
1) Secure U.S. border station
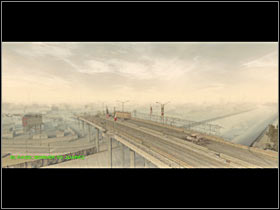
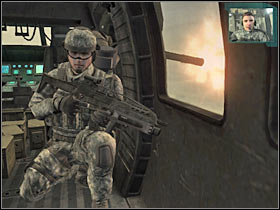
Obviously this mission is going to begin with a cut-scene (#1), however it's going to be more important and longer this time. You will be able to take a look at the map, so try to memorize some of the crucial areas. You will begin the mission inside the allied gunship (#2). Get ready, because you will reach the drop zone in just a few seconds.
 |  |
The door of the helicopter should open. After that, your character will automatically use the rope to the reach the bridge (#1). It would be a good idea to spend this time on observing your opponents, especially since they can be found in front of you. Once you're on the ground, order your squad members to hide behind a nearest bus (#2). It's VERY important that they follow your orders. Additionally, you CAN'T stand up or leave this cover. Otherwise you would have died almost instantly, because enemy soldiers are well prepared for this assault.
 |  |
Once you've got everyone on the ground and hidden behind cover (buses), you should take a look at your tactical map (#1). You won't see any enemies from here, but you'll at least know where you are and what kinds of obstacles are in front of you. Make sure that you're hidden! Start off by eliminating a soldier equipped with rocket launcher (#2). You will have to crouch and shoot through the windows of the northern bus in order to kill him without risking any injuries.
 |  |
If you have a sniper rifle at your disposal, you won't have any major problems with some of the upcoming fights. You will have to lean out VERY carefully. There are THREE heavy machine gun posts in this area. Start off by disabling two posts - the left one (#1) and the middle one (#2). DON'T lean out too much, because there's a third machine gun post to your right!
 |  |
Now you will have to focus your efforts on killing a few additional enemy troops. Most of the enemy soldiers will be standing near the American checkpoint (#1). Also, if you don't have a sniper rifle at your disposal, you may use the grenade launcher to take out most of the heavy machine gun posts (#2).
 |  |
You would have to choose a very similar approach with the third gunner. This machine gun post is located to your right. Check the first screen (#1) if you want to find out about its precise location. If you don't have a sniper rifle, you would have to lean out VERY carefully. Once he's gone, start moving towards the border station (#2).
 |  |
One of the enemy soldiers may also be standing inside the checkpoint building (#1). Thankfully, he should expose his position to you, so you shouldn't have any problems killing him. The second one is hiding behind the sandbags (#2), to the north of the border station. Once again, you will have to lean out carefully in order to get rid of him. This should allow you to secure this border station. Now you will have to defend it, however wait for some new objectives to be displayed on your screen. The game will also create an auto-save here.
 |  |
You are not permitted to copy any image, text or info from this page. This site is not associated with and/or endorsed by the Ubi Soft or Grin. All logos and images are copyrighted by their respective owners.
Copyright © 2000 - 2025 Webedia Polska SA for gamepressure.com, unofficial game guides, walkthroughs, secrets, game tips, maps & strategies for top games.
