Car Mechanic Simulator 2018: Order 4 - Mayan M6
The fourth order in Car Mechanic Simulator 2018 is Mayan M6. In this chapter, you will find information on how to fix the car. You will learn which parts you have to replace and tips on how to do that.
Shopping List
The list of parts:
- Lower Suspension Arm 2x
- Front Axle Drive C 2x
- Front Shock Absorber Cap 2x
- Outer Tie Rod 2x
- Front Shock Absorber 2x
- Sway Bar End Link (front, type A) 2x
- Inner Tie Rod 2x
Also, parts that weren't detected in diagnosis tests:
- Radiator Type A
- Radiator Fan Housing B
Walkthrough
Reach level 4 to unlock this order. You can also expand your workshop by using the toolbox. By doing this you unlock a test path which allows you to test suspension, and you can also get a repair bench - it can help you save money on some of the parts.

You can proceed with a new story order in which you must test the suspension. First, you should use the test path by moving the car there rather than to the car lift. The double red door leads to that place. Inside, you must approach and use the diagnosis computer. After that the car will be automatically moved here. Follow these instructions: place the front wheels on the brake tester and hold the brake (S), then do the same with the rear wheels and after that you can drive on the suspension tester. Thanks to that you can know which parts need to be replaced.

Move your car to the car lift. You can also use the test track if you want to be sure which parts need to be changed (there are 16 of them) - drive to the workshop's gate, select the track from the map and complete the ride. Test track and test path both give you a list of the performance of the other parts of the suspension and the braking system. In order to replace the suspension elements, you must first dismount the wheels and then remove all front suspension parts, one after another. Lift the car high up to dismount lower suspension arm.

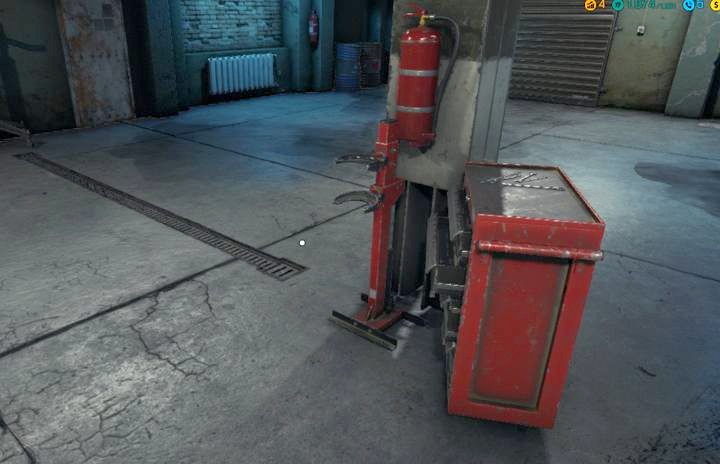
To dismount a shock absorber, you need to use the spring puller that stands next to the pillar in the workshop. Some damaged parts can be fixed by using the repair bench (if you unlocked one by using the toolbox) but you should know that in order to complete this order all replaced parts must be in 100% condition. Before you mount the shock absorbers you must remember to put them together with springs on the spring puller!
- Car Mechanic Simulator 2018 Game Guide
- Car Mechanic Simulator 2018: Game Guide
- Car Mechanic Simulator 2018: Story orders
- Car Mechanic Simulator 2018: Tutorial
- Car Mechanic Simulator 2018: Order 1 - Emden Lotz
- Car Mechanic Simulator 2018: Order 2 - Royale Crown
- Car Mechanic Simulator 2018: Order 3 - Royal Bianco
- Car Mechanic Simulator 2018: Order 4 - Mayan M6
- Car Mechanic Simulator 2018: Order 5 - Salem Kieran
- Car Mechanic Simulator 2018: Order 6 - Salem Flamo
- Car Mechanic Simulator 2018: Order 7 - Royale Crown
- Car Mechanic Simulator 2018: Order 8 - Olsen Grand Club
- Car Mechanic Simulator 2018: Order 9 - FMW Roadster
- Car Mechanic Simulator 2018: Order 10 - Bolt Chapman
- Car Mechanic Simulator 2018: Order 11 - Olsen Grand Club
- Car Mechanic Simulator 2018: Order 12 - Katagiri Katsumoto
- Car Mechanic Simulator 2018: Order 13 - Echos Cobra
- Car Mechanic Simulator 2018: Order 14 - Royale Bianco
- Car Mechanic Simulator 2018: Order 15 - Sakura Moon
- Car Mechanic Simulator 2018: Order 16 - Mayen M3 4x4
- Car Mechanic Simulator 2018: Order 17 - FMW Panther
- Car Mechanic Simulator 2018: Order 18 - Elenti Callope
- Car Mechanic Simulator 2018: Order 19 - Olsen Grand Club
- Car Mechanic Simulator 2018: Order 20 - Bolt Reptilia
- Car Mechanic Simulator 2018: Order 21 - Luxor Bowen
- Car Mechanic Simulator 2018: Order 22 - Castor Avalanche
- Car Mechanic Simulator 2018: Order 23 - Bolthorn Grand Mojave
- Car Mechanic Simulator 2018: Order 24 - Royale Crown
- Car Mechanic Simulator 2018: Order 25 - Salem Kieran
- Car Mechanic Simulator 2018: Order 26 - Rino Piccolo
- Car Mechanic Simulator 2018: Order 27 - Emden Lotz GT
- Car Mechanic Simulator 2018: Order 28 - Bolt Atlanta
- Car Mechanic Simulator 2018: Order 29 - Mayen M8
- Car Mechanic Simulator 2018: Order 30 - Smith 1500
- Car Mechanic Simulator 2018: Order 31 - Delray Custom
- Car Mechanic Simulator 2018: Order 32 - Castor Earthquake
- Car Mechanic Simulator 2018: Order 33 - Chieftain TBX
- Car Mechanic Simulator 2018: Order 34 - Bolt Reptilia R2
- Car Mechanic Simulator 2018: Story orders
- Car Mechanic Simulator 2018: Game Guide
You are not permitted to copy any image, text or info from this page. This site is not associated with and/or endorsed by the developers and the publishers. All logos and images are copyrighted by their respective owners.
Copyright © 2000 - 2025 Webedia Polska SA for gamepressure.com, unofficial game guides, walkthroughs, secrets, game tips, maps & strategies for top games.
