Car Mechanic Simulator 2018: Order 26 - Rino Piccolo
In this task, you have to make repairs on a Rino Piccolo. Below, you will find what are the steps that need to be completed during this order in Car Mechanic Simulator 2018.
Shopping list
Replacement list
Engine components:
- Battery
- Air Filter
- Oil Filter (I4)
- Fuel Filter
- Throttle (I4)
- Intake Manifold (I4 DI)
- Oil Pan (I4)
- Radiator Fan Housing
- Radiator Fan Housing Fan
- Ignition Coil x4
- Spark Plug x3
- Serpentine Belt A
- Serpentine Belt B
- Belt Tensioner
- Idler Roller A
- Crankshaft Pulley
- Timing Belt
- Cam Gear
- Starter
- Gearbox (I4)
- Flywheel
- Clutch Pressure Plate
- Clutch Release Bearing
Front Suspension:
- Rubber Bushing x6
- Wheel Hub Cap x2
- Front Shock Absorber Cap x2
- Front Spring x2
- Front Sway Bar
- Steering Rack
- Front Drive Axle C x2
- Front Drive Shaft
Rear Suspension:
- Rear Sway Bar A
- Sway Bar Rear End Link (right side)
- Rear Swing x2
- Rear Shock Absorber Cap x2
- Rear Axle Knuckle Housing A (right side)
Brakes, Wheels, Body:
- Brake Servo
- ABS Pump
- ABS Module
- Brake Pads x4
- Brake Caliper (front left)
- Brake Disc Ventilated (right side)
- Brake Disc x2
- Rim Classic 02, 14' x4
- Tire Standard (175/65R14) x4
- Front Bumper
- Front Left Fender
Walkthrough

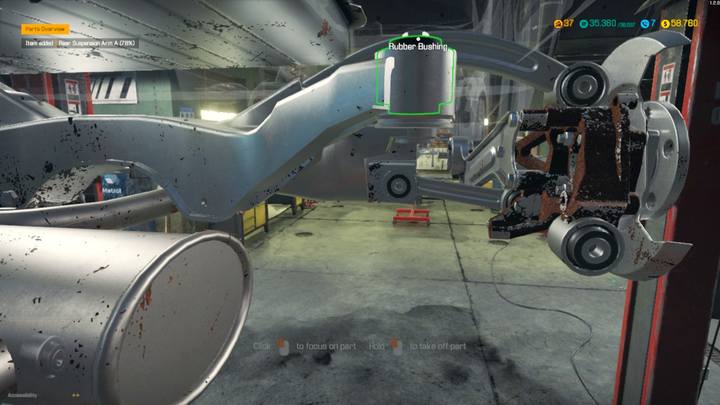
Rino Piccolo is your next guest - nothing too tricky or time-consuming. Just watch out for the rubber bushings: replace all in the front suspension crossmember but only the two rearmost in the rear.
You'll also have to replace the battery. Once you've upgraded your workshop to level 3 after your last order, the battery can be simply recharged. No need to buy a new one. Just put it in the battery charger and leave it there for a while.
- Car Mechanic Simulator 2018 Game Guide
- Car Mechanic Simulator 2018: Game Guide
- Car Mechanic Simulator 2018: Story orders
- Car Mechanic Simulator 2018: Tutorial
- Car Mechanic Simulator 2018: Order 1 - Emden Lotz
- Car Mechanic Simulator 2018: Order 2 - Royale Crown
- Car Mechanic Simulator 2018: Order 3 - Royal Bianco
- Car Mechanic Simulator 2018: Order 4 - Mayan M6
- Car Mechanic Simulator 2018: Order 5 - Salem Kieran
- Car Mechanic Simulator 2018: Order 6 - Salem Flamo
- Car Mechanic Simulator 2018: Order 7 - Royale Crown
- Car Mechanic Simulator 2018: Order 8 - Olsen Grand Club
- Car Mechanic Simulator 2018: Order 9 - FMW Roadster
- Car Mechanic Simulator 2018: Order 10 - Bolt Chapman
- Car Mechanic Simulator 2018: Order 11 - Olsen Grand Club
- Car Mechanic Simulator 2018: Order 12 - Katagiri Katsumoto
- Car Mechanic Simulator 2018: Order 13 - Echos Cobra
- Car Mechanic Simulator 2018: Order 14 - Royale Bianco
- Car Mechanic Simulator 2018: Order 15 - Sakura Moon
- Car Mechanic Simulator 2018: Order 16 - Mayen M3 4x4
- Car Mechanic Simulator 2018: Order 17 - FMW Panther
- Car Mechanic Simulator 2018: Order 18 - Elenti Callope
- Car Mechanic Simulator 2018: Order 19 - Olsen Grand Club
- Car Mechanic Simulator 2018: Order 20 - Bolt Reptilia
- Car Mechanic Simulator 2018: Order 21 - Luxor Bowen
- Car Mechanic Simulator 2018: Order 22 - Castor Avalanche
- Car Mechanic Simulator 2018: Order 23 - Bolthorn Grand Mojave
- Car Mechanic Simulator 2018: Order 24 - Royale Crown
- Car Mechanic Simulator 2018: Order 25 - Salem Kieran
- Car Mechanic Simulator 2018: Order 26 - Rino Piccolo
- Car Mechanic Simulator 2018: Order 27 - Emden Lotz GT
- Car Mechanic Simulator 2018: Order 28 - Bolt Atlanta
- Car Mechanic Simulator 2018: Order 29 - Mayen M8
- Car Mechanic Simulator 2018: Order 30 - Smith 1500
- Car Mechanic Simulator 2018: Order 31 - Delray Custom
- Car Mechanic Simulator 2018: Order 32 - Castor Earthquake
- Car Mechanic Simulator 2018: Order 33 - Chieftain TBX
- Car Mechanic Simulator 2018: Order 34 - Bolt Reptilia R2
- Car Mechanic Simulator 2018: Story orders
- Car Mechanic Simulator 2018: Game Guide
You are not permitted to copy any image, text or info from this page. This site is not associated with and/or endorsed by the developers and the publishers. All logos and images are copyrighted by their respective owners.
Copyright © 2000 - 2025 Webedia Polska SA for gamepressure.com, unofficial game guides, walkthroughs, secrets, game tips, maps & strategies for top games.
