Alan Wake: Episode 1 Taken Part 1 - walkthrough
Elderwood National Park (1). This guide page for Alan Wake contains a walkthrough for Elderwood National Park (1) from Episode 2 - Taken.
 |  |
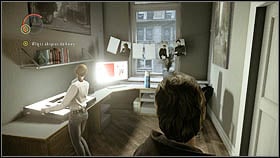
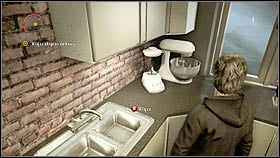
Talk with Alice for a while, then go to the kitchen and make some coffee. Come back to Alice. She will tell you that there are some cover projects on Alan's desk, in his study. Go to the room next door and take a look at those projects. Suddenly, the lights will go out and Alice will ask you to check the fuse box. It is located next to the front door. Well, you won't turn the bring the light back, but at least you'll find a flashlight. Pick it up and go back to Alice.
 |  |
Time to go back to Bright Falls. Alan is now at the police station, just got patched up by Doc. Take a look at the fish on the table and walk out of the room. Turn left and go to sheriff's office. Pick up the cell phone from the desk and watch the cut-scene.
 |  |
Go to the station's reception desk. A policewoman standing over there will allow you to use the corridor located next to cells in order to get behind the whole building. One of the inmates will ask you to turn the light on. If you want, do it by using the switch located next to the door. Leave the building and go towards the fence on the left.
 |  |
Get to the fence covered with boards. Kick them and walk on the other side of the fence. Take a look at the rusty, abandoned car. Barry will call. After the conversation return the police station, watch the TV show and leave the station by going through the front door.
 |  |
Barry will take you to Elderwood. Talk to him a while, then go to the balcony in order to talk with Rusty. He will ask you to bring some documents from the reception desk, located inside the building, in front of the mammoth skeleton. Take the papers and go back to Rusty. In exchange, you will get the key to your rented cabin. Walk out of the building through the same door you walked in here.
 |  |
Once you get to the cabin with Barry, you will have a flashlight with you. Walk downstairs. You will find some batteries in the kitchen. Pick them up and walk outside. Walk downstairs and keep walking the path. You can try entering the yellow car, but that won't really work. Continue the journey on foot. In a cabin on your right, you'll find some revolver ammunition in a wardrobe.
 |  |
Follow the path, go towards the bright light. A light bulb will break down, but don't worry about it, just keep walking. At some point, you will hear screaming and gunshots. Run straight forward. Enter the demolished building, from which Rusty's screaming comes. Walk up to the wounded man and watch another cut-scene.
 |  |
Walk out of the building and head towards the one in front of you. With Rusty's key, you will open and enter it without problems. Search the rooms for ammunition and batteries. Once you find the fuse box, you'll notice there's an axe stuck in it. This cannot be fixed. Leave the building and return to Rusty. You will encounter two enemies, but they should not pose a serious threat.
 |  |
Use your flashlight to eliminate all black goo lying on the ground. Then, enter the building, in which you left Rusty. You will notice a huge hole in the wall nearby. Walk through it outside. Rusty will join you in a minute, but as an enemy now. He's extremely fast and tough, yet quite easy to kill. All in all, he doesn't have other Taken to support him. After the fight, collect some extra ammo from the crate nearby. You can find it next to a wooden fence surrounding this area.
 |  |
A couple of enemies will show up after Rusty's death. Defeat them as well and walk the way they came to you. There will be a bright light on your left. Go towards it.
 |  |
Walk downstairs. Take a look at the surroundings and you'll find an emergency box and another set of stairs. Take everything from the box and walk downstairs. We're now on our way to Lover's Peak.
There's a wooden bridge down there, the path splits into two on the other side of the river. If you go left, you will find a cave with a supply crate inside.
 |  |
If you go right, you will reach a telephone booth. Pick up the batteries in that booth and kill three enemies that will come after you in this region. Walk through the next bridge. You'll notice a bright light on the left. Go towards it. There, you will find an arbor, a shotgun and some ammunition.
 |  |
Keep moving forward, in the direction pointed by "Lover's Peak" signs. On your way, you'll encounter a few enemies. Better save your ammo here. If you run out of bullets, start running towards the light post in front of you. Once you get close to it, the light will turn off. Turn on the generator in order to provide yourself with light.
 |  |
There's an emergency box with some ammunition inside. Take it all and keep walking towards Lover's Peak.
 |  |
You'll encounter a large group of enemies. There is no sense in fighting them. Turn right and run among your opponents as fast as you can, in order to reach another light post. Once you regenerate your health, take a look around. The gate nearby is blocked, but the fence on the left is damaged. Jump over it.
 |  |
Run forward. You'll reach a river and a cable car above it. Call it by pressing a button located nearby. Once the cable car gets to you, enter it and go to the other side of the river.
 |  |
After the cut-scene, take everything from the emergency box located nearby and follow your companion. By holding [RB], you can use flares in order to support your companion in the fight.
 |  |
You'll reach a wooden gate, Alan will figure out that the guy text to him must be the kidnapper. He will try to open that gate, but such thing takes some time and you must simply scare the enemies off. Take flares from the emergency box and keep using them, so the Taken will be too afraid to approach you. When the kidnapper opens the gate, walk right through to the next part of the level.
 |  |
You'll find another box with equipment inside. The light post in this area will turn off soon and you'll have to focus on using flares in combat. In cooperation with the kidnapper, eliminate all enemies.
After the cut-scene, collect the equipment lying around and move forward.
You are not permitted to copy any image, text or info from this page. This site is not associated with and/or endorsed by the Microsoft Game Studios or Remedy Entertainment. All logos and images are copyrighted by their respective owners.
Copyright © 2000 - 2025 Webedia Polska SA for gamepressure.com, unofficial game guides, walkthroughs, secrets, game tips, maps & strategies for top games.
