This is the Police 2: Tactical missions
Last update:
In This Is The Police 2, the developers included tactical missions. They pop up every now and then. They are marked brown on the map. Although tactical missions don't have a precise time limit, they will be considered ignored if you don't complete them before the day is over. Ignoring the missions also results in losing 25 badges from what you had accumulated over the day.
In tactical missions, you take direct control of the officers assigned to the job. The only exception being the officers who are not loyal to you. They don't follow orders and act on their own. This usually takes away the element of surprise that you would normally possess, as an out-of-control officer shoots first and asks questions later. If an officer is wearing a police hat, it means that they are loyal and won't cause any trouble.
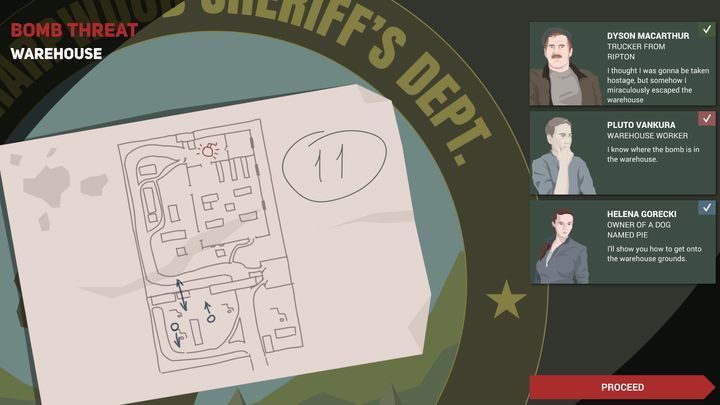
Before starting this type of mission, you will be able to use certain items. Without them, you won't be able to extract information from witnesses; and without that information, you won't know anything about the locations of enemies in the area. This means that you will have to go in blind.
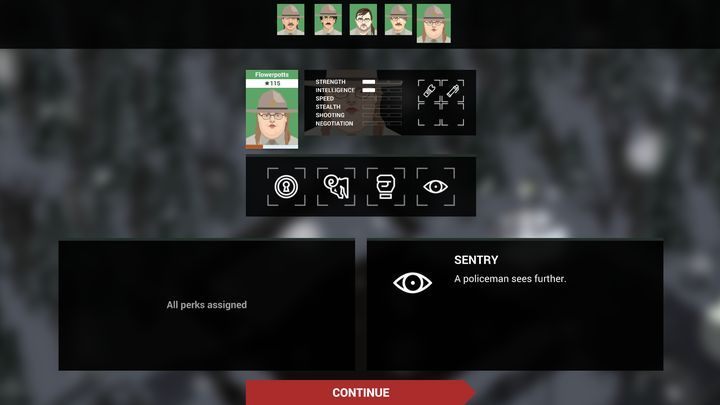
You will also have to assign talents to a particular officer. Along with acquiring experience, your officers will gain more talents. During missions, however, an officer can use only up to four of their talents. The talents available depend on the skills an officer had developed. It's important that at least two of your officers have a bare minimum of negotiation skills, as this lets you use negotiation to convince criminals to surrender. This way, you can arrest them without alerting the rest of your enemies, who are in different rooms.
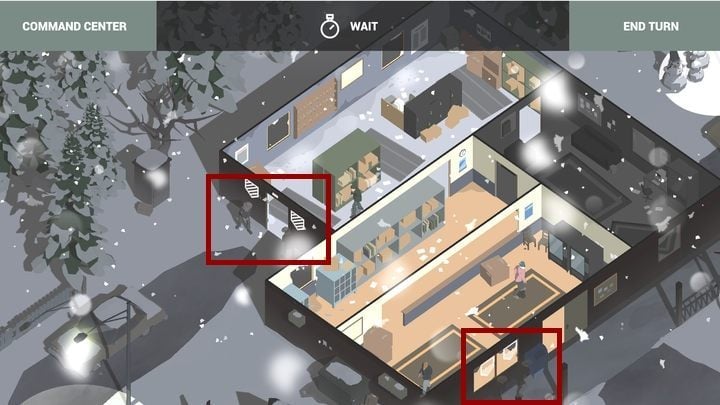
The missions are turn-based. Most officers can spend two action points per turn. You can use them to move around or do other things. If an enemy is nearby, clicking on them will display available options. Some options have a chance of success shown next to them. The fuller the bar the higher the chance of success.
It is possible that one of your officers can receive a wound. Notice the timer - it informs you how many turns this character has until they bleed out. To avoid losing this character you have to order one of your remaining police officers to escort the wounded to a safe zone near the police car. After that the wounded officer will be taken to a hospital.
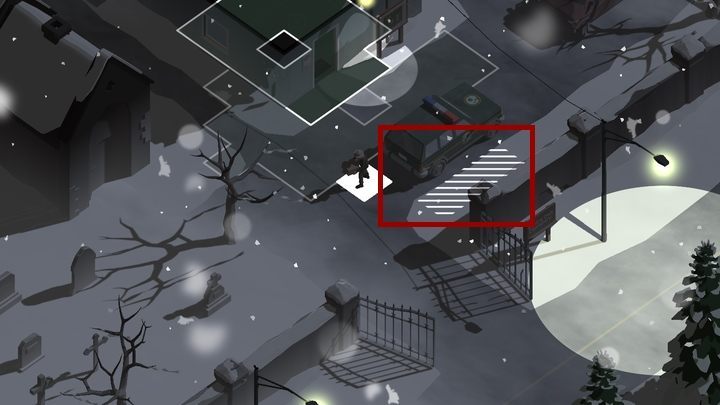
The same goes for evidence. When you find a box, one of your police officers will have to pick it up and carry to the police car.
You can find a description of the tactical missions available in the game below.
- Robbery (25 November)
- Bomb threat (26 November)
- Rescuing hostages (November, 30th)
- Murder Attempt (December 1st)
- Hostage Situation (November 30th)
- Attempted Murder (December 1st)
Robbery (25 November)
At the end of 25 October, you will receive a call to a post office robbery. Assign a minimum of 4 officers to this mission. You may want to include a sniper in the team, however, if you play it smart, you won't need to fire a single shot.
Take the following items for the job: peaches, a vacuum cleaner, and spices. This way, you will gain access to witness reports, which in turn give more detailed information on the mission area. There are six robbers in total. One of them is patrolling the path next to the statue. Another one is walking close to the car on the other side of the map. The four other robbers are inside the building. One of the robbers is inside the annex. Two are patrolling the main hall. And the last one is moving between the office and the main hall.
In the first turn, you have to send two officers toward the statue and hide them behind it. Now, one of the robbers, who is patrolling the path nearby, can be spotted. Send the rest of your officers to the main entrance.
Then using the officers next to the statue, neutralize the robber patrolling the path. Do this any way you like, however, do not use guns, as this will attract the attention of the other robbers to your position. Place the officers heading toward the building next to window close to the porch; this way you will be able to see what's going on in the main hall.
In the next turn do not move the officers from the porch. After conducting the arrest, the two officers standing next to the statue should be moved toward the annex door.
This way, you will be able to neutralize the robber inside the annex. However, you have to be careful. If you come too close to the office door (the room that's still behind the fog of war), you can get spotted by the goon who's patrolling the office and the main hall. If he sees you, he will open fire and alert the other robbers of your presence. Officers waiting next to the windows should move inside when the two patrolling bandits are on the opposite sides of the room. Now, you can neutralize and arrest them while still having enough time to prepare for the third robber in the main hall. At the door leading to the annex, you should place the remainder of your officers, which will make for a perfect ambush.
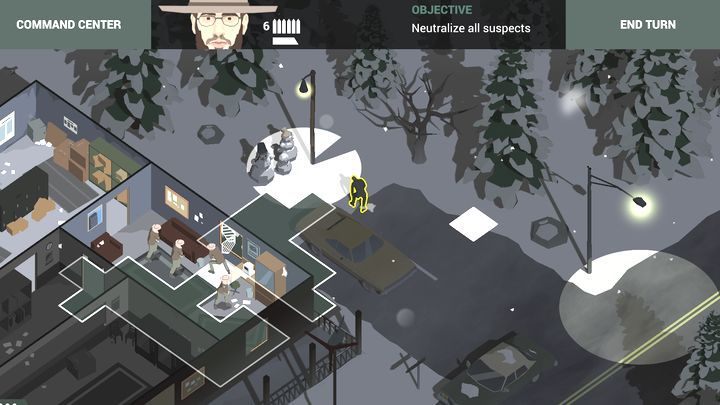
If you take the silent approach, you can neutralize the last robber, who is patrolling the area next to the car, from the office window. If you opted for a guns blazing approach, then the last enemy will run out of the office through the window (mentioned before) and you will have to neutralize him there.
Bomb threat (26 November)
In the evening, you will get a call about a bomb attack in a warehouse. Send at least four officers to the call. This time you won't have to choose any items.
This mission is limited to 12 turns. During that time you will either have to defuse the bomb or neutralize all suspects. Defusing the bomb is a much easier option.
If you're planning to defuse the bomb, send all your officers to the small room on the right in the first turn. Do NOT try to arrest the suspect patrolling the nearby area, as he can be later discovered by another goon, who will instantly sound the alarm.
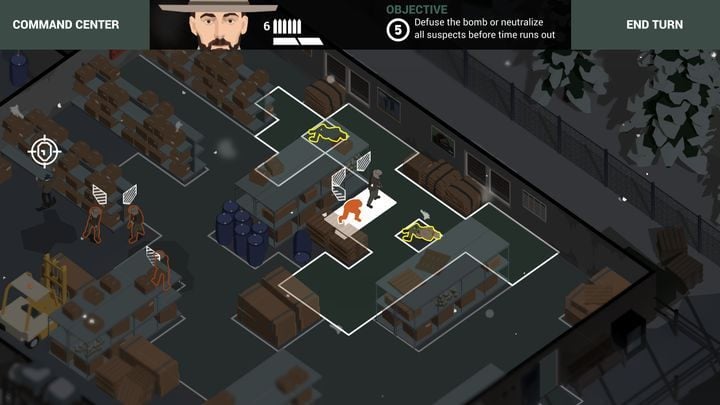
Neutralize the suspect inside the building. Then move your unit toward the carport, where you can find the main entrance. There are four suspects patrolling the area at the entrance and one suspect who is moving from room to room. For the most part, their patrolling paths do not intersect, thus you can split your team so that one officer is in charge of neutralizing one suspect. After you neutralize all the suspects in the warehouse, the way to the bomb lies open. Move to the room behind the warehouse. There, you will find the bomb.
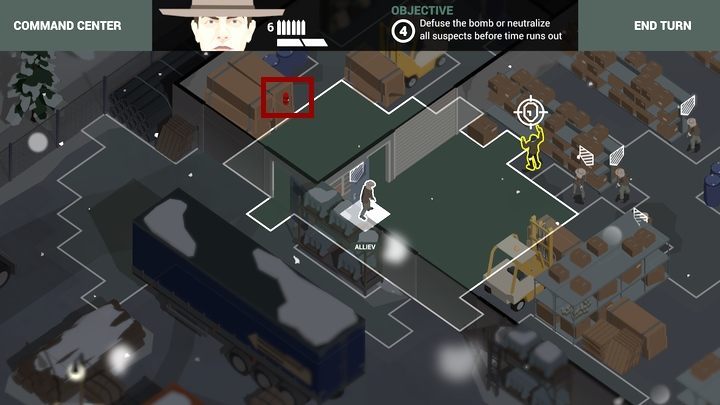
Attention: you have a 50% chance of defusing the bomb. If you fail, you will have to restart the mission.
If you are planning to neutralize all the suspects, you have to split your officers into two groups. The first group should go to the warehouse (just like described in the bomb defusing scenario), where they neutralize enemies and leave through the door next to the room with the bomb.
The second team should move to the left, towards the cars. When there, neutralize the two suspects. One of them is between the first and second row of cars. The second suspect is initially located behind the third row of cars, but after some time he starts patrolling the area along the fence. That's why you should avoid taking that path as you can get spotted.
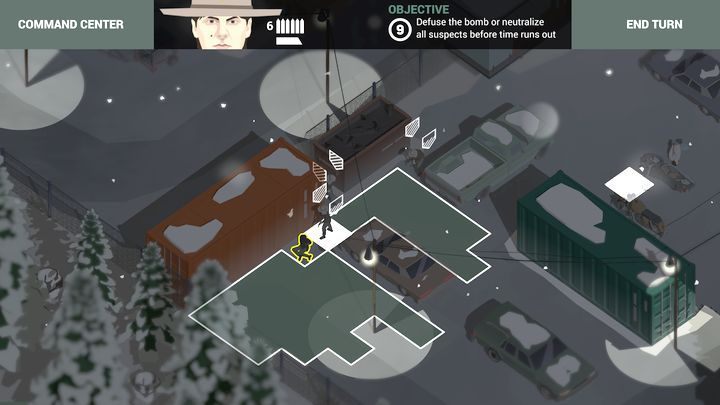
Move through the hole in the fence to the next yard. Be wary of the goon walking along the fence. He will be walking very close to the passage. It's best to neutralize him with a taser. After dealing with him, you can neutralize the rest of the suspects in the yard. Initially, there are three of them, later they are joined by another one coming from the room with the bomb. Because of this, do not attack the suspect walking next to the building, as neutralizing him will attract the attention of the goon exiting the room with the bomb. It's best to leave them until your other group leaves the building and deal with them when your team is in full strength.
Rescuing hostages (November, 30th)
Near the end of the day you will receive a call - someone has tried to break into a morgue. Send out at least four police officers but don't take a sniper with you. Discretion is highly important here. The criminals can kill hostages when they detect you.
As for evidence you will need Heroine, Coffee and Jewelry. Thanks to these items you will learn the location of the hostages and the number of suspects.
Divide your officers into two groups. The first group should go to the main entrance. Don't go inside. The second group should move to the side entrance. Here, you need a police officer with the ability that allows them to open doors without making noise.

Wait until there are only two suspects in the reception. Order the first group to neutralize the suspects when they get near each other. Meanwhile, the second group should enter the side room when the first is dealing with the criminals. This group should also be spread into two. One of the officers has to go to the adjacent room with one criminal inside. The suspect should be turned with his back to the door - you won't have problems with sneaking up on him. The second sub-group must neutralize the suspect who stands in the room that you have previously entered through the door. However, you have to do that when the criminal isn't in the same line as the central room (he can see you through the window in the door). Otherwise, this officer will be detected by another suspect who patrols the central room.

The first group should now go to the room located on the left from the reception. There, you will find one suspect. Neutralize him without alarming other suspects (they can see you through the window in the door). Otherwise, they will raise the alarm.
The second group should re-join and then move to the central room. Two criminals await you there. They have to be neutralized in the same moment. Otherwise, they can raise the alarm. From here you can access the hostage. He is guarded by one suspect. You shouldn't have problems with dealing with him.
The second group must deal with three suspects. Wait in the adjacent room until the suspect farthest from the entrance starts walking towards the wall in the back. When that happens, you have to neutralize the two other suspects.
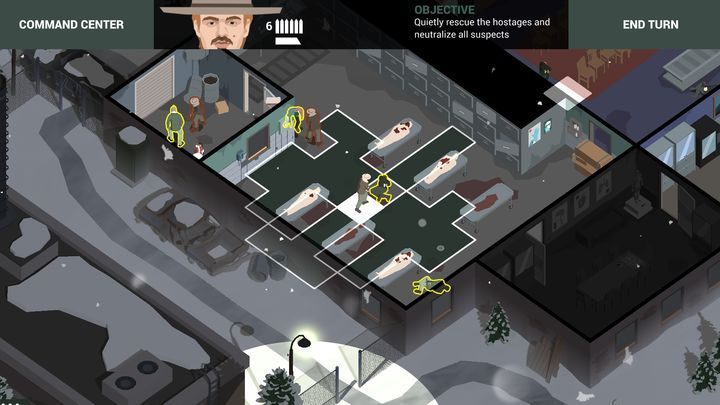
After that you only have to neutralize the third suspect in this room, and the criminal who guards the hostage. These two also have to be eliminated at the same time - they are standing opposite to each other. Stopping one of them will alarm the other suspect.
Murder Attempt (December 1st)
You get a call informing you that something has happened on the cemetery. There are 9 suspects but you only need 3 police officers and a sniper, just in case. Taking an officer who can detect traps is a good choice. By doing that you can avoid unnecessary casualties.
To get all the evidence you need to collect razor blades, marihuana and leather boots. Thanks to them you can learn the estimated location of the suspects and one of the traps.
Start with ordering one of your officers to enter the building. Inside, you can find one of the suspects and a box with evidence. Neutralize the hostile and take the box. The rest of the police officers have to go left - hide them behind the fountain and one of the tombstones. Thanks to that you will be able to quietly neutralize one of the suspects who is patrolling the front part of the cemetery.
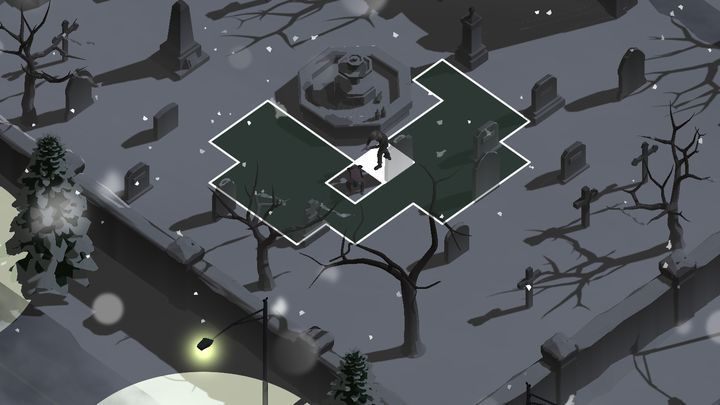
After that you have to order one of your officers to enter the shed - another suspect awaits you there. You have to neutralize him during a single turn. Otherwise, he will raise the alarm. Once you are done, you have to order this officer to leave the shed and then hide behind one of the tombstones. Do the same with another police officer - you want to have free access to the path in the middle (just like in the picture below). The police officer with the ability to detect traps should be moved left from the shed - order that person to neutralize yet another suspect.
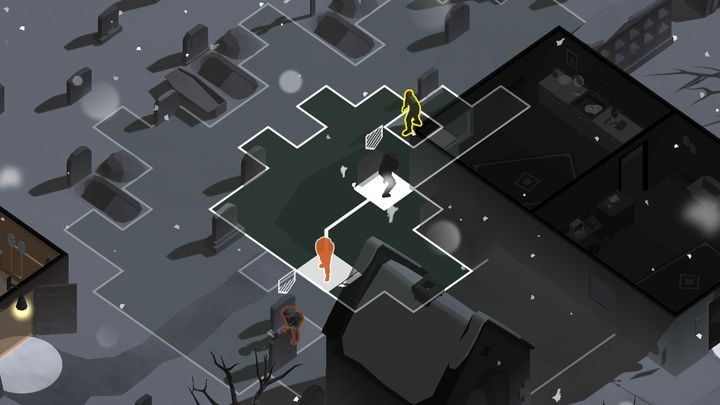
In the meantime, the police officers who secure the middle path have to neutralize two suspects walking along the shed. After that you should have 3 hostiles left. You can try to neutralize them all at the same time. Wait for the officer who neutralized the suspect standing left from the shed. If you don't want to wait, you can start with neutralizing the two hostiles located near the rear fence. After that you can take care of the criminal who walks along the fence and the building's rear wall.
Hostage Situation (November 30th)
At the end of the day, you get a call concerning a break and entry at the morgue. Again, send a minimum of four officers to the task. This time, don't bring along a sniper. Discretion is a must in this mission. Since, if you get discovered, the perpetrators will eliminate the suspects and this will cause the mission to end in failure.
To get a testimony, you will need Heroin, Coffee, and Jewelry. This way you will learn about the location of the hostages and the number of perpetrators at the scene.
You have to divide your team into two groups. The first one should head to the main entrance. However, they shouldn't move inside. The second group should move to the side entrance. You need an officer with the "lockpicking" skill, as this will allow you to open the door silently.
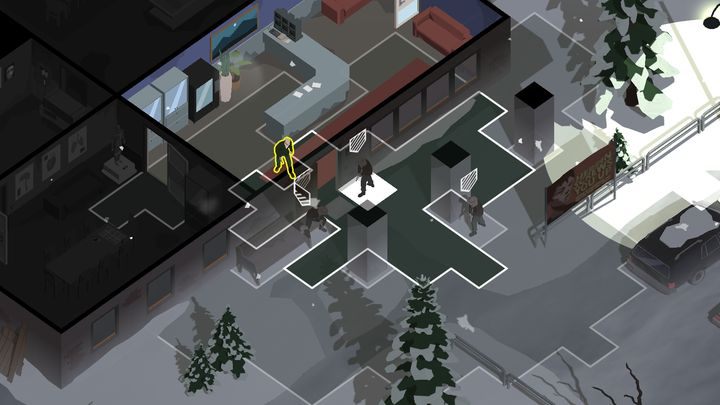
Wait until there are two suspects at the reception desk. When they are close to each other, let the first group inside to deal with them. At the same time second the second group to the room on the side. Now you have to split the second group. One part should go to the adjacent room, where another suspect is located. You will probably be facing his back, so it should be easy to incapacitate him. The second sub-group has to deal with the suspect in the room which you entered through the door. You have to do it in a way that during the arrest the suspect isn't visible from the central room. In other case, you may be noticed by the goon patrolling that area.
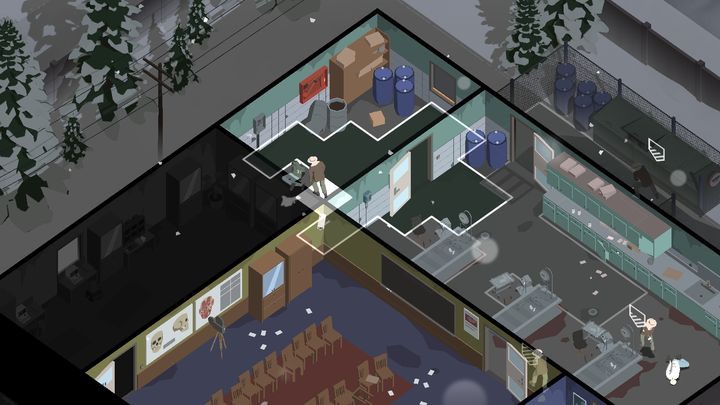
Now, move the first group to the room on the left from the reception desk. There's one suspect inside. You have to incapacitate him in such a way that makes it impossible for you to get spotted from the other room. If you fail at this, an alarm will go off.
Reform the original second group and send it to the central room. There are two goons inside. You have to take them out at the same time. Otherwise, there's a chance of sounding the alarm. The path to the first hostage is obvious from this point. The hostage is guarded by one goon. There shouldn't be any problems with incapacitating him.
The other group has to deal with three suspects. Wait in the adjacent room until the enemy located the farthest from the entrance starts moving toward the wall in the back. It's the perfect time to deal with the two other suspects.

This way, you have only three goons left to deal with in that room and one more suspect in the room with the hostage. You have to incapacitate them simultaneously, as they are in each others line of sight. This means that arresting only one will alarm the other.
Attempted Murder (December 1st)
At the time when the snowstorm hits, you are notified about a situation at the cemetery. Although there are 9 suspects on the map, you have to bring just 3 officers and a sniper as backup. It's a good idea to bring an officer who has the ability to detect traps. This way, you won't lose one of your officers.
///filmik do dodania: Assault - Attempted Murder (1 December)
To get the full statement, you need razor blades, marihuana, and leather boots. This way you learn about the approximate locations of the suspects and the placement of one of the traps.
After the mission begins, move one of your officers into the building. Inside, there's one suspect and a box full of evidence. Incapacitate the goon and take the box if you want to. Send the rest of your team to the left and hide them behind the fountain and one of the gravestones. This way, you should be able to deal with the criminals patrolling the front part of the cemetery quietly.

Then, send one of your officers to the shed, where you find another suspect. You have to deal with him over one turn so that he doesn't raise the alarm. Later, exit the shed and place your officer behind the gravestone. Do the same thing with one more officer so that you have easy access to the main path, as shown in the picture below. Send the officer with the trap finding ability to the shed on the left and incapacitate the goon.

At the same time incapacitate the two goons walking along the shed using the officers close to the main path. This way, there will be only three suspects left to deal with. You have to incapacitate them all at the same time. However, you have to wait until the officer dealt with the suspect in the shed on the left comes back. If you don't want to wait, first, incapacitate the two criminals at the back fence, and finally, the goon walking along the fence and the back wall of the building.
You are not permitted to copy any image, text or info from this page. This site is not associated with and/or endorsed by the developers and the publishers. All logos and images are copyrighted by their respective owners.
Copyright © 2000 - 2025 Webedia Polska SA for gamepressure.com, unofficial game guides, walkthroughs, secrets, game tips, maps & strategies for top games.
