Order 61 - Sceo LC500 | Orders - Third garage
CAR: Sceo LC500
TARGETS:
- Repair or replace worn out parts
REWARD: 6500 USD
PARTS:
- 2x Rubber Bushing - 220 USD
- Suspension Arm Front-Left - 300 USD
- 2x Outer Tie Rod - 200 USD
- Shock Absorber Rear - 100 USD
- Suspension Arm Rear-Right A - 500 USD
- Suspension Spring Rear - 150 USD
- 2x Brake Disc - 400 USD
- 2x Brake Pad - 100 USD
- Brake Caliper - 400 USD
- Exhaust Manifold V6 - 1300 USD
- Muffler V6 Rear-Left - 450 USD
- Timing Belt V6 - 220 USD
- Oil change - 100 USD + cost of new oil ca. 10 USD
After few attempts of independent repair, your client came to a conclusion that the best solution is to hand over the car to the professional mechanic - especially if car's condition is getting worse and worse. The driver has ruined his vehicle - we are going to spend an unusually long afternoon in the garage. Perform all necessary tests (OBD Test, Test Drive, Diagnostic Path Test) and turn on the Show parts conditions mode. It's time to start working:
FRONT SUSPENSION:
For repair we have:
- Rubber Bushing (left and right)
- Suspension Arm Front-Left
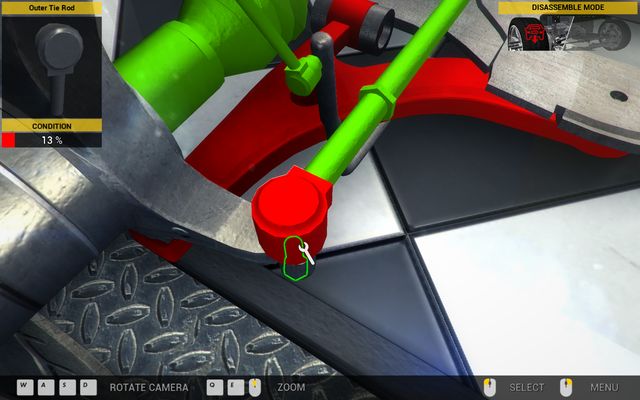
- Outer Tie Rod (left and right)
Buy all these parts and begin the replacement:
Tie rods:
- Go to the Wheel - inspect view mode.
- Turn on the Disassemble Mode.
- Twist off Sceo LX500 Left Wheel.
- Remove Outer Tie Rod.
- Go to the Assemble Mode.
- Assemble new Outer Tie Rod.
- Assemble Sceo LX500 Wheel.
Repeat the operation with the right wheel.

Suspension arm and rubber bushings:
- Use the Car Lifter and go to the view of the front chassis with the Engine - inspect option.
- Put out Rubber Bushing located in the Suspension Arm Front-Left.
- Remove Suspension Arm Front-Left and assemble a new one.
- Put in Rubber Bushing on it's place.
- Put out Rubber Bushing located in the Suspension Arm Front-Right and replace it with a new part.
REAR SUSPENSION:
For repair we have:
- Shock Absorber Rear-Right
- Suspension Arm Rear-Right
- Suspension Spring Rear-Right
- Rubber Bushing Right
- Brake Disc Right and Left
- Brake Pad Right
- Brake Caliper Left
Buy all these parts and begin the replacement:
Shock absorber, suspension arm rear-right, suspension spring:
- Remove Shock Absorber Rear located by rear right wheel of the car.
- Remove Muffler V6 Rear-Right.
- Remove Suspension Arm Rear-Right A.
- Put out worn Suspension Spring Rear and assemble a new one.
- Put in new Suspension Arm Rear-Right A.
- Assemble new Shock Absorber Rear.
Rubber bushing:
- Find Wheel Hub located by rear right wheel of the car.
- Put out worn Rubber Bushing and assemble a new one.
Rear right wheel (brake disc, brake pads):
- Twist off Sceo LX500 Rear Right Wheel.
- Remove Brake Caliper.
- Remove both Brake Pads.
- Remove Brake Disc and assemble a new one.
- Assemble two new Brake Pads.
- Assemble Brake Caliper.
- Assemble Sceo LX500 Wheel.
Rear right wheel (brake disc, brake calliper):
- Twist off Sceo LX500 Wheel.
- Remove Brake Caliper.
- Remove both Brake Pads.
- Remove Brake Disc and assemble a new one.
- Assemble Brake Pads.
- Assemble new Brake Caliper.
- Assemble Sceo LX500 Wheel.

EXHAUST:
You have to replace following parts here:
- Exhaust Manifold V6
- Muffler V6 Rear-Left
Buy these parts and start replacing:
Exhaust manifold, left muffler:
- Remove Muffler V6 Rear-Left and Muffler V6 Rear-Right.
- Remove Muffler V6 Middle.
- Twist off Exhaust Pipe V6 A.
- Remove Catalytic Converter V6.
- Twist off Exhaust Pipe V6 B.
- Lower the car with the Car Lifter and go to the Engine - inspect view mode.
- Twist off Exhaust Manifold V6 and assemble a new one.
- Screw Exhaust Pipe V6 B.
- Assemble Catalytic Converter V6.
- Assemble Exhaust Pipe V6 A.
- Assemble Muffler V6 Middle.
- Assemble new Muffler V6 Rear-Left and old Muffler V6 Rear-Right.
VALVETRAIN:
You have to replace:
- Timing Belt V6
Buy that element and perform it's replacement:
- Remove Serpentine Belt V6.
- Remove Belt Tensioner.
- Remove Timing Belt V6 and replace it with a new part.
- Assemble Belt Tensioner.
- Assemble Serpentine Belt V6.
The last step of the repair is the oil change:
- Use the Car Lifter and go to the view of the engine from below with the Engine - inspect option.
- Find Oil Pan V6 located on the bottom of the engine.
- Find Oil Drain Plug, twist it off and flush the old oil.
- Lower the car with the Car Lifter and go to the Engine - inspect view mode.
- Remove Plastic engine Cover V6.
- Twist off Engine Oil Fill Plug.
- Click on the oil jerrycan and pour the oil to the engine for a few seconds.
- Put out Oil Dipstick and check level of oil - point that connects gold and silver field should be as close to the scale's middle as possible.
- Assemble Plastic engine Cover V6.
You are not permitted to copy any image, text or info from this page. This site is not associated with and/or endorsed by the PlayWay or Red Dot Games. All logos and images are copyrighted by their respective owners.
Copyright © 2000 - 2025 Webedia Polska SA for gamepressure.com, unofficial game guides, walkthroughs, secrets, game tips, maps & strategies for top games.
