Collectibles - Intensive Treatment - part 3
 | ![[#3] Location: Decontamination (Intensive Treatment) - Collectibles - Intensive Treatment - part 3 - Collectibles - Batman: Arkham Asylum Game Guide & Walkthrough](/batmanarkhamasylum/gfx/word/312821953.jpg) |
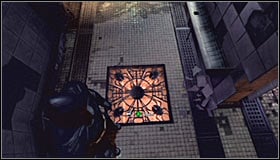
[#3] Location: Decontamination (Intensive Treatment)
Get rid of the toxins, head down and look around this entire area to find a floor panel. Move the panel and drop down to a small shaft.
 | ![[#4] Location: Secure Treatment Transfer (Intensive Treatment) - Collectibles - Intensive Treatment - part 3 - Collectibles - Batman: Arkham Asylum Game Guide & Walkthrough](/batmanarkhamasylum/gfx/word/312821984.jpg) |
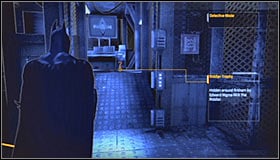
[#4] Location: Secure Treatment Transfer (Intensive Treatment)
Once you've survived the battle with the first mutant ignore a friendly guard and instead look around. Check the other control booth and the trophy will be hidden to your right.
 | ![[#5] Location: Maintenance Access (Intensive Treatment) - Collectibles - Intensive Treatment - part 3 - Collectibles - Batman: Arkham Asylum Game Guide & Walkthrough](/batmanarkhamasylum/gfx/word/312822015.jpg) |
[#5] Location: Maintenance Access (Intensive Treatment)
You can acquire this trophy once you've returned to the Intensive Treatment building (from Arkham North). Choose a nearby ventilation shaft (screenshot #1) and locate the treasure.
 | ![[#6] Location: Secure Transit (Intensive Treatment) - Collectibles - Intensive Treatment - part 3 - Collectibles - Batman: Arkham Asylum Game Guide & Walkthrough](/batmanarkhamasylum/gfx/word/312822046.jpg) |
[#6] Location: Secure Transit (Intensive Treatment)
Requirements: Batclaw
When you're about half way through the shaft find the grating, pull it off using the Batclaw and grapple up to collect the trophy.
 | ![[#7] Location: Patient Pacification Chamber (Intensive Treatment) - Collectibles - Intensive Treatment - part 3 - Collectibles - Batman: Arkham Asylum Game Guide & Walkthrough](/batmanarkhamasylum/gfx/word/312822078.jpg) |
[#7] Location: Patient Pacification Chamber (Intensive Treatment)
Requirements: Batclaw
Rip off a grating found on one of the walls using the Batclaw and head inside the shaft.
 | ![[#8] Location: Patient Pacification Chamber (Intensive Treatment) - Collectibles - Intensive Treatment - part 3 - Collectibles - Batman: Arkham Asylum Game Guide & Walkthrough](/batmanarkhamasylum/gfx/word/312822109.jpg) |
[#8] Location: Patient Pacification Chamber (Intensive Treatment)
Move the grating found near the floor panels and enter the shaft to find the treasure.
 | ![[#9] Location: Decontamination (Intensive Treatment) - Collectibles - Intensive Treatment - part 3 - Collectibles - Batman: Arkham Asylum Game Guide & Walkthrough](/batmanarkhamasylum/gfx/word/312822140.jpg) |
[#9] Location: Decontamination (Intensive Treatment)
Requirements: Cryptographic Sequencer
Break into one of the control panels (screenshot #1). Once it's safe head inside and find a hole in the wall. Grapple up and collect the trophy.
 | ![[#10] Location: Utility Corridor (Intensive Treatment) - Collectibles - Intensive Treatment - part 3 - Collectibles - Batman: Arkham Asylum Game Guide & Walkthrough](/batmanarkhamasylum/gfx/word/312822171.jpg) |
[#10] Location: Utility Corridor (Intensive Treatment)
Requirements: Explosive Gel
There's a breakable wall near the stairs. Plant the gel and detonate the charge.
Messages
 | ![[#1] Location: Secure Transit (Intensive Treatment) - Collectibles - Intensive Treatment - part 3 - Collectibles - Batman: Arkham Asylum Game Guide & Walkthrough](/batmanarkhamasylum/gfx/word/312822203.jpg) |
[#1] Location: Secure Transit (Intensive Treatment)
You will find this tablet during your ascent in the beginning of the game. You'll find it not long before you engage a group of convicts in direct combat.
 |  |
 | ![[#2] Location: Transfer Loop (Intensive Treatment) - Collectibles - Intensive Treatment - part 3 - Collectibles - Batman: Arkham Asylum Game Guide & Walkthrough](/batmanarkhamasylum/gfx/word/312822265.jpg) |
[#2] Location: Transfer Loop (Intensive Treatment)
Requirements: Batclaw
You'll have to start off by climbing on top of a few large objects (screenshot #1). Head forward and perform a single jump along the way (screenshot #2). Proceed to the platform located close to the grating and use the Batclaw to get rid of it (screenshot #3). You may now perform the last jump to find yourself standing close to the tablet.
You are not permitted to copy any image, text or info from this page. This site is not associated with and/or endorsed by the SCi / Eidos or RockSteady Studios. All logos and images are copyrighted by their respective owners.
Copyright © 2000 - 2025 Webedia Polska SA for gamepressure.com, unofficial game guides, walkthroughs, secrets, game tips, maps & strategies for top games.
