Batman Arkham Asylum: Collectibles - Caves #2 - part 3
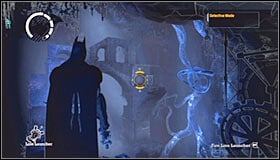 | ![[#11] Location: Main Sewer Junction (Caves) - Collectibles - Caves #2 - part 3 - Collectibles - Batman: Arkham Asylum Game Guide & Walkthrough](/batmanarkhamasylum/gfx/word/312669203.jpg) |
[#11] Location: Main Sewer Junction (Caves)
Requirements: Line Launcher
Keep heading towards the top until you'll be forced to reach a new platform seen in the distance (screenshot #1). Use the Line Launcher and pick up the item after you've landed. You can't really miss this one, because you'll have to get to other side if you want to proceed with your main quest.
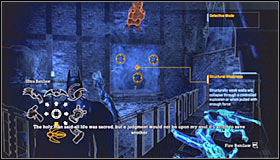 | ![[#12] Location: Control Room (Caves) - Collectibles - Caves #2 - part 3 - Collectibles - Batman: Arkham Asylum Game Guide & Walkthrough](/batmanarkhamasylum/gfx/word/312669234.jpg) |
[#12] Location: Control Room (Caves)
Requirements: Ultra Batclaw
Once you've defeated all the inmates use the Ultra Batclaw on a weak section of the wall. You can reach the alcove using the Line Launcher or by gliding from one of the gargoyles.
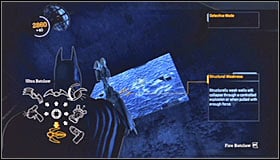 | ![[#13] Location: Pressure Control Junction (Caves) - Collectibles - Caves #2 - part 3 - Collectibles - Batman: Arkham Asylum Game Guide & Walkthrough](/batmanarkhamasylum/gfx/word/312669265.jpg) |
[#13] Location: Pressure Control Junction (Caves)
Requirements: Ultra Batclaw
Explore the left corridor leading to the Pump Room and be on a look out for a breakable wall. Use the Ultra Batclaw on the wall and head inside to find the trophy.
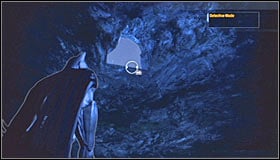 | ![[#14] Location: The Batcave (Caves) - Collectibles - Caves #2 - part 3 - Collectibles - Batman: Arkham Asylum Game Guide & Walkthrough](/batmanarkhamasylum/gfx/word/312669296.jpg) |
[#14] Location: The Batcave (Caves)
Requirements: Line Launcher
You'll have to make your way to the second island. Enter the cave and grapple up to the NEAREST ledge (screenshot #1). Head outside and glide to the north-east. It shouldn't take too long for you to notice a smaller island in the distance. You'll have to land on it and that's where you'll find the trophy. Use the Line Launcher when you'll want to return to the previous island.
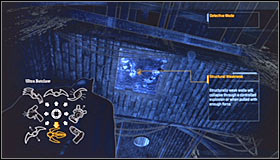 | ![[#15] Location: Old Sewer (Caves) - Collectibles - Caves #2 - part 3 - Collectibles - Batman: Arkham Asylum Game Guide & Walkthrough](/batmanarkhamasylum/gfx/word/312669328.jpg) |
[#15] Location: Old Sewer (Caves)
Requirements: Ultra Batclaw
Explore the area where you've defeated the inmates and find a weak section of the ceiling. Naturally you must use the Ultra Batclaw to create an opening. Use the hook afterwards and collect the trophy.
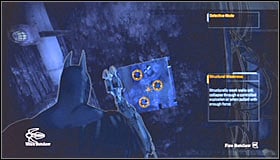 | ![[#16] Location: Crocs Lair (Caves) - Collectibles - Caves #2 - part 3 - Collectibles - Batman: Arkham Asylum Game Guide & Walkthrough](/batmanarkhamasylum/gfx/word/312669359.jpg) |
[#16] Location: Croc's Lair (Caves)
Requirements: Ultra Batclaw
Look around near the passageway leading to the Old Sewer. Find a breakable piece of the ceiling and rip it off using the Ultra Batclaw.
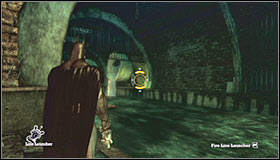 | ![[#17] Location: Crocs Lair (Caves) - Collectibles - Caves #2 - part 3 - Collectibles - Batman: Arkham Asylum Game Guide & Walkthrough](/batmanarkhamasylum/gfx/word/312669390.jpg) |
[#17] Location: Croc's Lair (Caves)
Requirements: Line Launcher
Explore the eastern section of the sewers and use the Line Launcher to make your way to an isolated ledge.
Messages
 | ![[#1] Location: Old Sewer (Caves) - Collectibles - Caves #2 - part 3 - Collectibles - Batman: Arkham Asylum Game Guide & Walkthrough](/batmanarkhamasylum/gfx/word/312669421.jpg) |
[#1] Location: Old Sewer (Caves)
Once you've quietly neutralized the first opponent turn around and make a few steps forward.
 | ![[#2] Location: Control Room (Caves) - Collectibles - Caves #2 - part 3 - Collectibles - Batman: Arkham Asylum Game Guide & Walkthrough](/batmanarkhamasylum/gfx/word/312669453.jpg) |
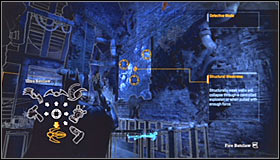
[#2] Location: Control Room (Caves)
Requirements: Ultra Batclaw
Once you've successfully secured this entire area use the Ultra Batclaw on a weak section of the wall (screenshot #1). You can make your way to the tablet either by using the Line Launcher or by gliding from one of the nearby gargoyles.
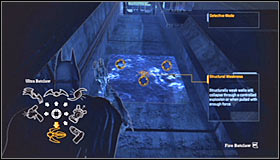 | ![[#3] Location: Pressure Control Junction (Caves) - Collectibles - Caves #2 - part 3 - Collectibles - Batman: Arkham Asylum Game Guide & Walkthrough](/batmanarkhamasylum/gfx/word/312669484.jpg) |
[#3] Location: Pressure Control Junction (Caves)
Requirements: Ultra Batclaw
Once you've defeated the mutant use the Ultra Batclaw on a nearby wall.
Riddles
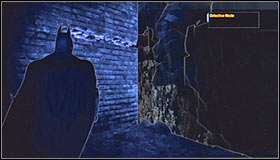 | ![[#1] A puzzle has many sides, but only some are visible - Collectibles - Caves #2 - part 3 - Collectibles - Batman: Arkham Asylum Game Guide & Walkthrough](/batmanarkhamasylum/gfx/word/312669515.jpg) |
[#1] A puzzle has many sides, but only some are visible.
Location: Main Sewer Junction (Caves)
Use the second collapsed column to get to the top. You'll now have to grab a nearby ledge (screenshot #1). Make your way to a new platform and stand correctly to put both pieces of the question mark together. Scan the whole thing to solve this riddle.
- Batman: Arkham Asylum Game Guide & Walkthrough
- Batman Arkham Asylum: Collectibles
- Batman Arkham Asylum: Collectibles - Introduction
- Batman Arkham Asylum: Collectibles - Arkham East - part 1
- Batman Arkham Asylum: Collectibles - Arkham East - part 2
- Batman Arkham Asylum: Collectibles - Arkham Mansion - part 1
- Batman Arkham Asylum: Collectibles - Arkham Mansion - part 2
- Batman Arkham Asylum: Collectibles - Arkham Mansion - part 3
- Batman Arkham Asylum: Collectibles - Arkham North - part 1
- Batman Arkham Asylum: Collectibles - Arkham North - part 2
- Batman Arkham Asylum: Collectibles - Arkham West - part 1
- Batman Arkham Asylum: Collectibles - Arkham West - part 2
- Batman Arkham Asylum: Collectibles - Botanical Gardens - part 1
- Batman Arkham Asylum: Collectibles - Botanical Gardens - part 2
- Batman Arkham Asylum: Collectibles - Botanical Gardens - part 3
- Batman Arkham Asylum: Collectibles - Botanical Gardens - part 4
- Batman Arkham Asylum: Collectibles - Caves #2 - part 1
- Batman Arkham Asylum: Collectibles - Caves #2 - part 2
- Batman Arkham Asylum: Collectibles - Caves #2 - part 3
- Batman Arkham Asylum: Collectibles - Intensive Treatment - part 1
- Batman Arkham Asylum: Collectibles - Intensive Treatment - part 2
- Batman Arkham Asylum: Collectibles - Intensive Treatment - part 3
- Batman Arkham Asylum: Collectibles - Intensive Treatment - part 4
- Batman Arkham Asylum: Collectibles - Medical Facility - part 1
- Batman Arkham Asylum: Collectibles - Medical Facility - part 2
- Batman Arkham Asylum: Collectibles - Medical Facility - part 3
- Batman Arkham Asylum: Collectibles - Medical Facility - part 4
- Batman Arkham Asylum: Collectibles - Penitentiary - part 1
- Batman Arkham Asylum: Collectibles - Penitentiary - part 2
- Batman Arkham Asylum: Collectibles - Penitentiary - part 3
- Batman Arkham Asylum: Collectibles - Penitentiary - part 4
- Batman Arkham Asylum: Collectibles
You are not permitted to copy any image, text or info from this page. This site is not associated with and/or endorsed by the developers and the publishers. All logos and images are copyrighted by their respective owners.
Copyright © 2000 - 2026 Webedia Polska SA for gamepressure.com, unofficial game guides, walkthroughs, secrets, game tips, maps & strategies for top games.
