Trek to Yomi: Chapter 3 - list of all secrets and collectibles
This page of the Trek to Yomi guide lists the secrets hidden in Chapter 3 - these are 10 artifacts, quiver upgrades, health and stamina.
This page of the Trek to Yomi game guide contains information about the secrets from chapter 3. We've included tips on where to find the most important collectibles, namely the 10 artifacts, as well as various upgrades (for the quiver, stamina, or health). Thanks to our guide, you'll be able to reach 100% completion in the 3rd stage.
- Artifact #1 - Swordsmith's Hammer
- Artifact #2 - Dove
- Health Upgrade
- Artifact #3 - Magatama Bead
- Quiver Upgrade; Artifact #4 - Fujin Print
- Artifact #5 - Fishing Rod
- Stamina Upgrade
- Artifact #6 - Ugajin
- Artifact #7 - Bronze Mirror
- Artifact #8 - Inarizushi; Stamina Upgrade
- Quiver Upgrade; Health Upgrade
- Artifact #9 - Moon Flask
- Stamina Upgrade
- Stamina Upgrade; Artifact #10 - Rice Bowl
Artifact #1 - Swordsmith's Hammer
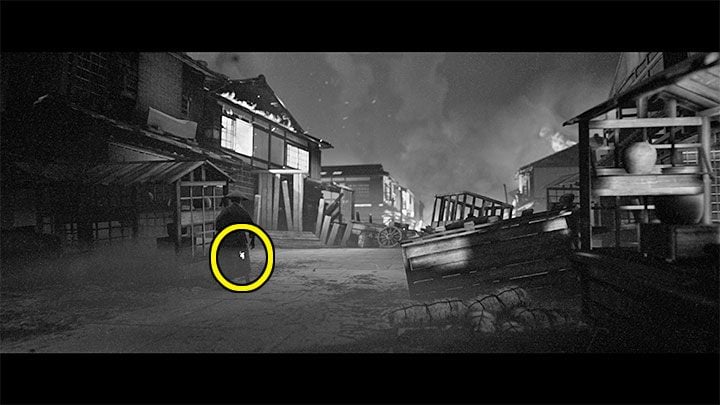
This artifact can be found soon after the chapter begins. You'll be able to spot it early on after you start crossing the ruined settlement (pictured above).
Artifact #2 - Dove
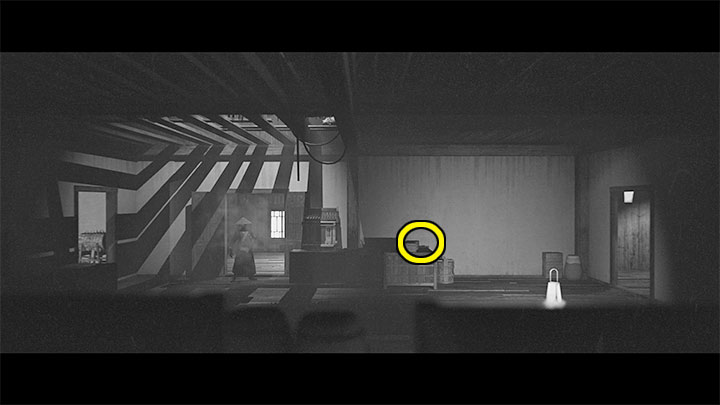
This secret may be found in the corridor accessible after sabotaging the structure stationed with enemies. In the same corridor, you'll also find a shrine.
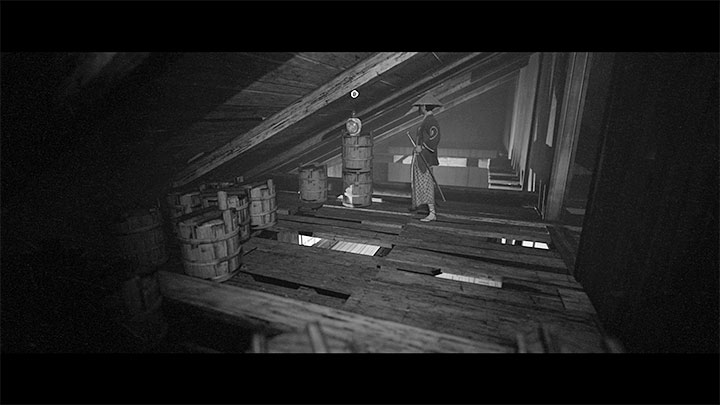
Health Upgrade
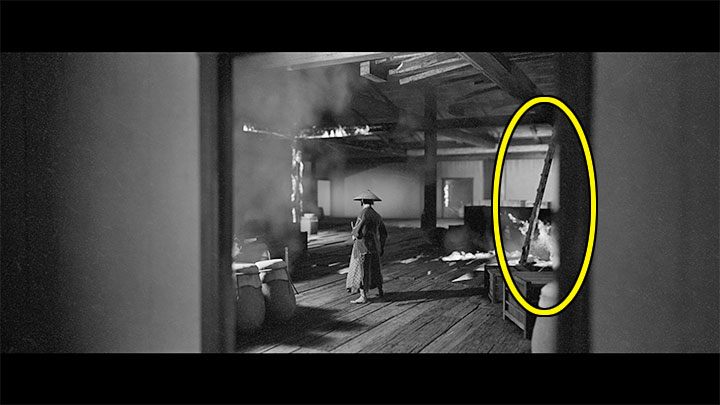
This upgrade is obtainable right after you get the second artifact described above. You'll need to head to the next room. Don't get too close to its center or you'll cause the floor to collapse, preventing you from being able to return for the secret. Use the ladder on the right from screenshot no. 1.
You'll reach the building's attic, from where you need to head right, defeating the enemy along the way. Continue to the section of the attic from screenshot no. 2 to find the collectible.
Artifact #3 - Magatama Bead
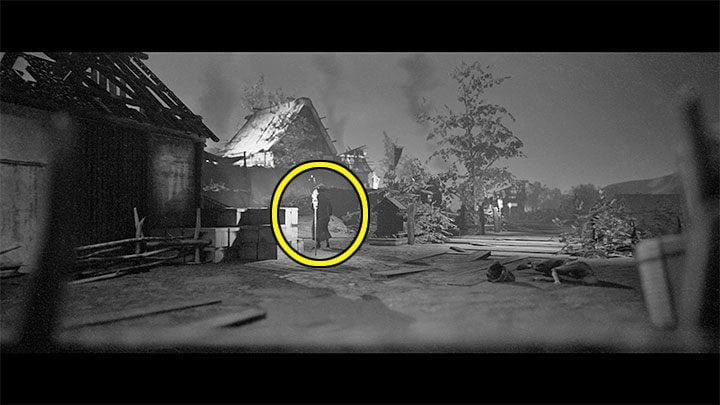
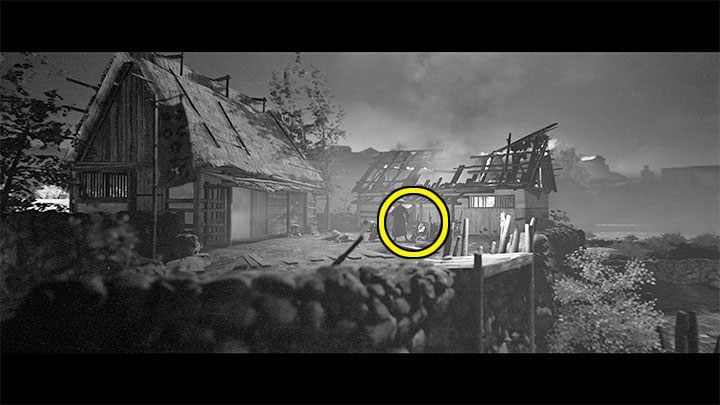
This secret can be obtained after crossing the battlefield targeted by archers from afar. You will eventually reach the area from screenshot no. 1. When you encounter the fork, choose the path to the left marked on screenshot no. 1.
Defeat the enemies, then head to the hut on the hill. On the right of it, you'll find the artifact (screenshot no. 2).
Quiver Upgrade; Artifact #4 - Fujin Print
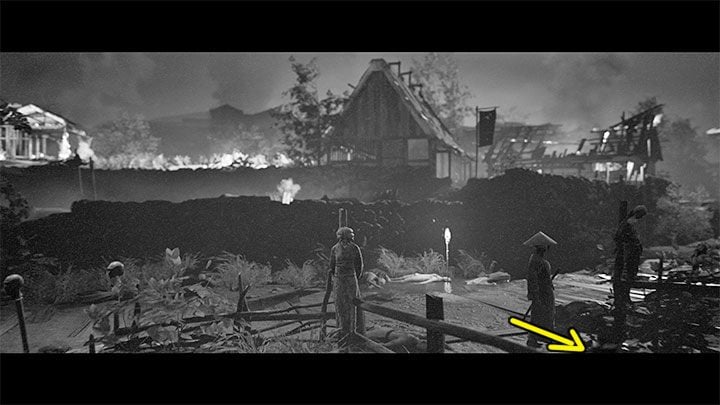
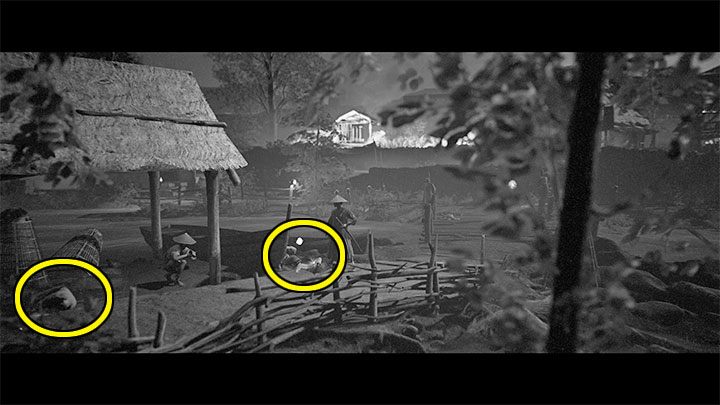
Two new secrets can be obtained shortly after finding the 3rd artifact described above. Go back to the fork in the road and take the right path. As soon as you get the chance, take the side path from screenshot no. 1.
You will reach the side area from screenshot no. 2, where we have marked the locations of both collectibles.
Artifact #5 - Fishing Rod
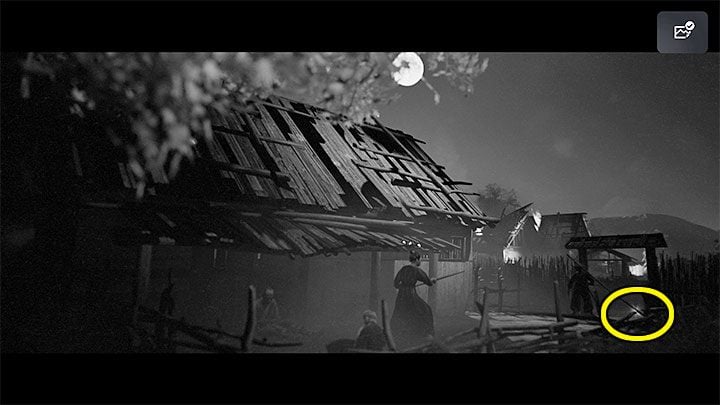
This secret can be obtained shortly after finding the two previous collectibles. The road through the village will lead you to the shrine. To the left of it, you'll find the entrance to the farm area from the screenshot above. Here you'll find the artifact, along with some hostile peasants.
Stamina Upgrade
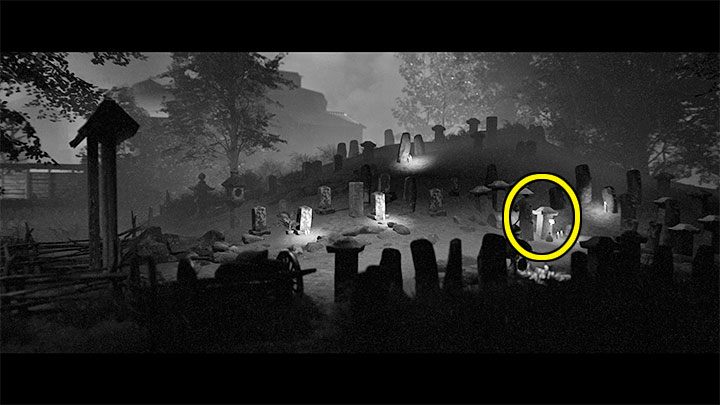
This upgrade can be found shortly after completing the section involving horse-mounted opponents. Keep traveling to the right. Ignore the path leading to the burning village and reach the cemetery from chapter 1. You'll find the collectible here.
Artifact #6 - Ugajin
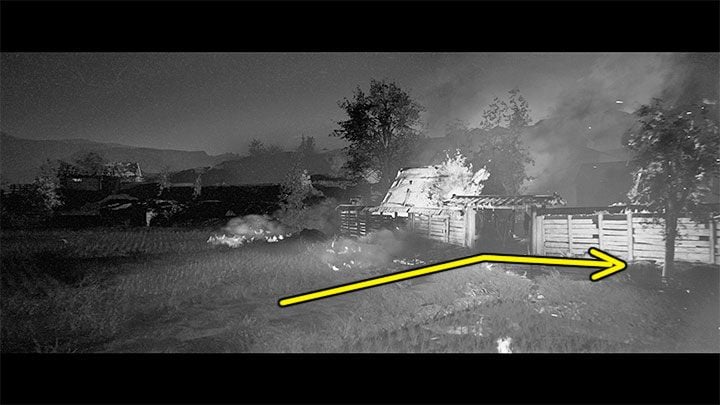
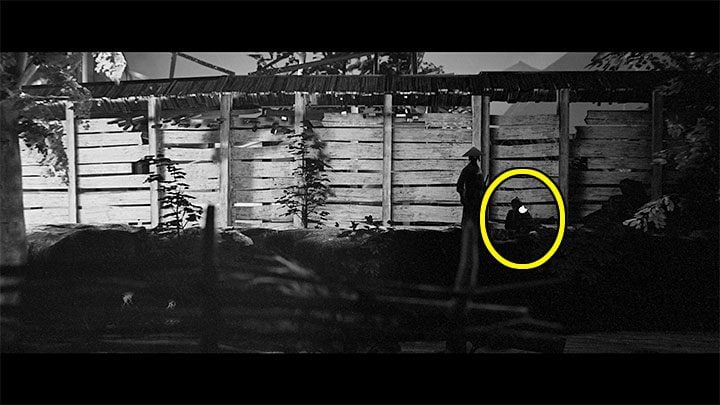
To get this secret, head towards the burning village, but before entering it, first follow the trail marked on screenshot no. 1. Travel along the village walls until you reach the artifact at the end of the path (screenshot no. 2).
Artifact #7 - Bronze Mirror
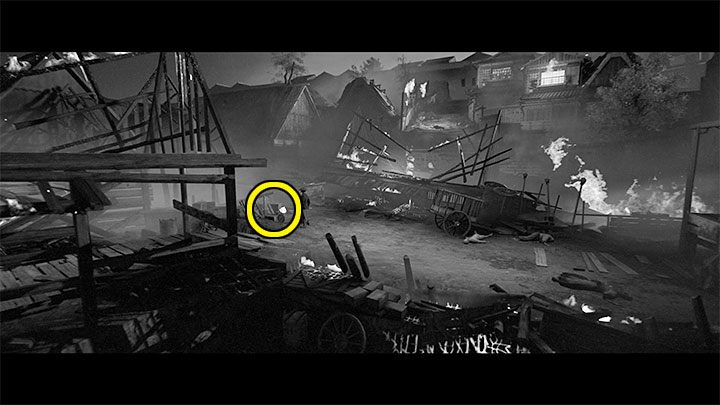
This secret can be found soon after you enter the burning village. After walking through the ruins of the building, you will find it on the left (pictured above).
Artifact #8 - Inarizushi; Stamina Upgrade
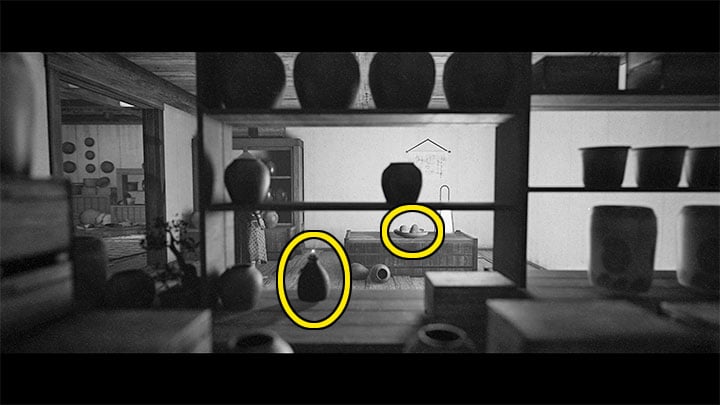
This secret can be found soon after defeating the spear-wielding enemy. Enter the ground floor room pictured above after breaking down the door of the building to the right of where the fight took place. You can collect an upgrade and an artifact here.
Quiver Upgrade; Health Upgrade
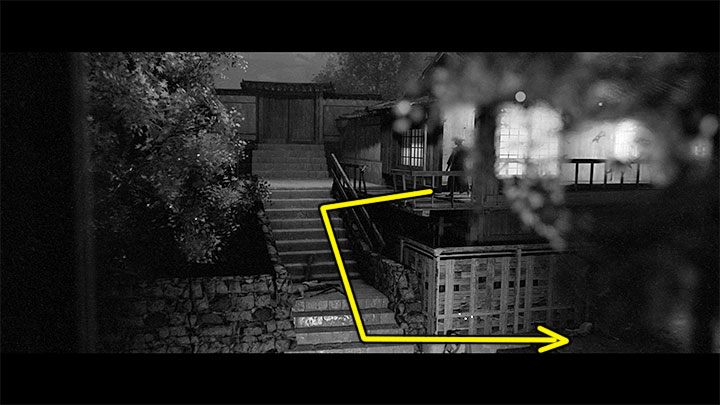
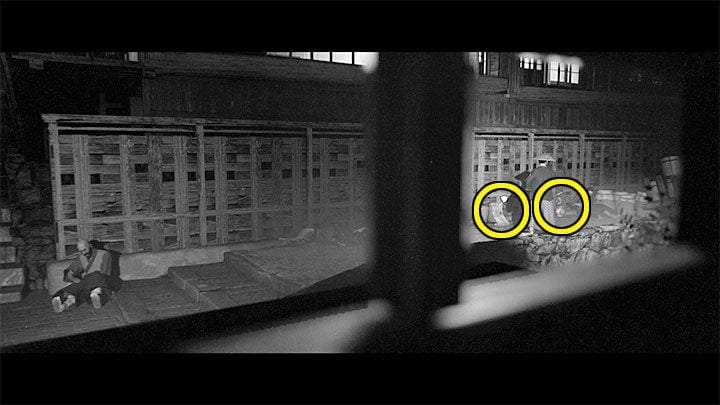
You'll be able to get this secret soon after completing the battles in the cover-filled area. From the area in screenshot no. 1, climb down the stairs and head right, passing by the dying samurai. The collectibles are at the end of the path on the right and we've marked them on screenshot no. 2.
Artifact #9 - Moon Flask
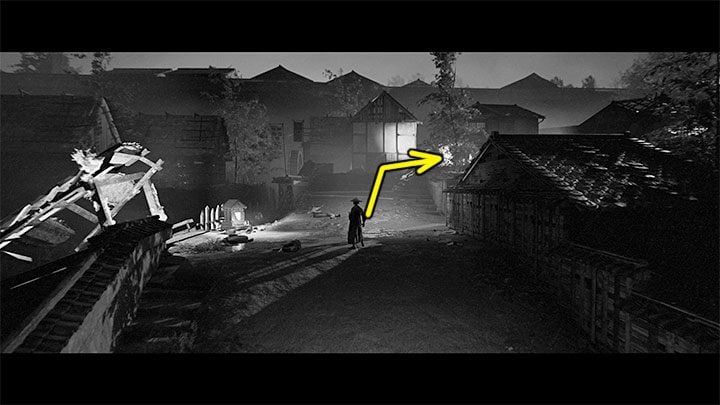
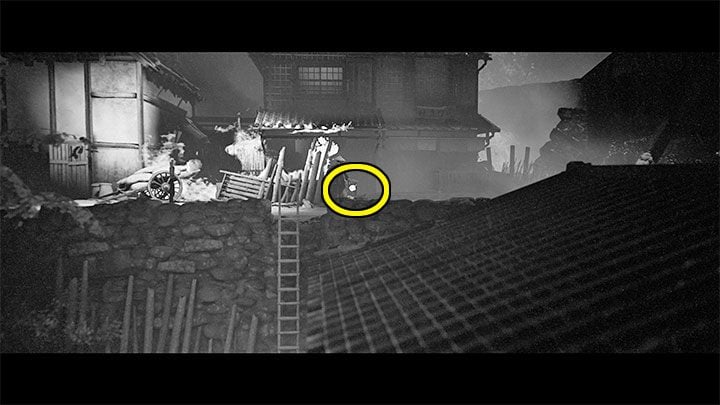
The artifact can be found in the upper part of the village. After reaching the area with the shrine from screenshot no. 1, go to the top part of the screen and turn right. Continue going right until you reach the collectible from screenshot no. 2.
Stamina Upgrade
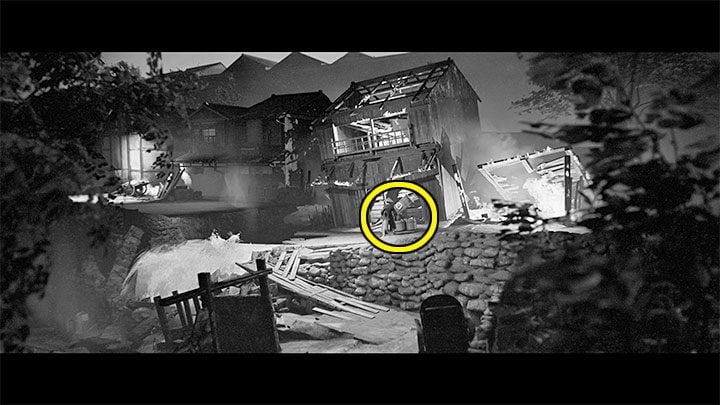
This upgrade can be obtained immediately after passing through the section where you can use an environmental trap to eliminate foes (by destroying the water blockade). Walk over the footbridges to reach the collectible from the screenshot above.
Stamina Upgrade; Artifact #10 - Rice Bowl
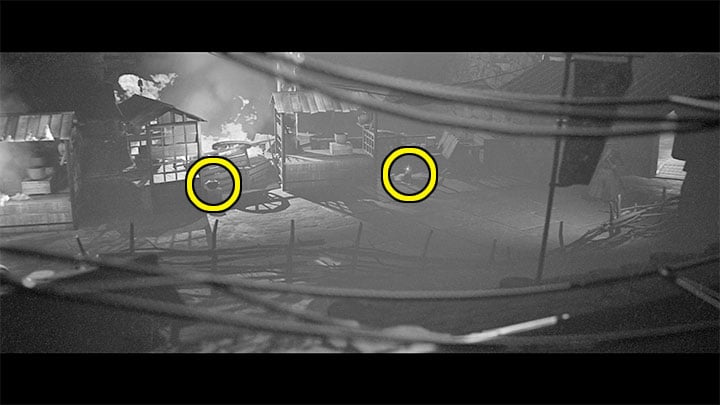
Both secrets can be found near the end of the quest in clearly visible spots along the main path to the left. After exiting one of the buildings, you will reach an area with damaged stalls. Approach the locations marked on the screenshot.
You are not permitted to copy any image, text or info from this page. This site is not associated with and/or endorsed by the Devolver Digital or Leonard Menchiari. All logos and images are copyrighted by their respective owners.
Copyright © 2000 - 2025 Webedia Polska SA for gamepressure.com, unofficial game guides, walkthroughs, secrets, game tips, maps & strategies for top games.
