STALKER Clear Sky: Red Forest - Quests - part 5
Upon return from Army Warehouses (third visit to the Red Forest):
13. Meet with Lebiediew #2
Received from: automatically (Army Warehouses)
Starting point: 8 on the map
Goal area: 2 on the map
Quest description:
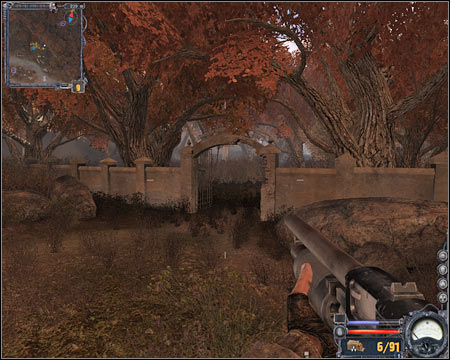
As you've probably noticed by taking a closer look at your personal map, you will have to go back to the southern checkpoint. This is where you've been ambushed by a group of thugs. You can ask the guide for assistance or you can walk to your new destination on foot. If you decide to go there by yourself, you'll have to get to a well-known gate in the first place (screen).
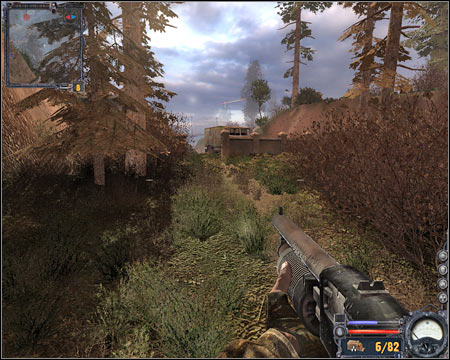
The most important thing for you to remember about while travelling through the woods is that you must avoid radiated zones and there are A LOT of those in the area. Also, if you're travelling by night, you must be ready to face off with invisible creatures. Prevent them from surprising you if possible. Eventually you'll return to a destroyed brick wall (screen). Listen to a short radio transmission and wait for new orders to be added to your list of assignments.
14. Assist Clear Sky in taking control over the bridge
Received from: automatically once you've finished thirteenth quest
Starting point: 2 on the map
Goal area: 10 on the map
Quest description:
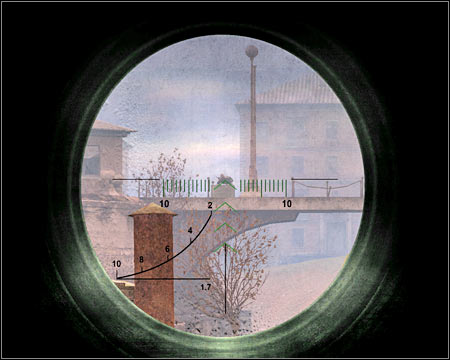
Choose a sniper rifle from your inventory and get to an area where the battle has already started. Clear Sky units are fighting with renegades. I'd strongly recommend that you start using the sniper rifle which you've received from the Woodsman. Try maintaining larger distance from your foes, so they won't take interest in you attacking their colleagues. You should be able to receive more precise orders eventually, however this quest will remain active for a longer period of time.
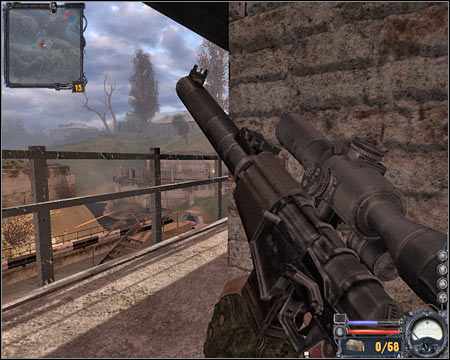
Once you've killed all visible units, try getting closer to the main building. Look at my screen - you should consider crouching behind the wall on the upper balcony. You should be safe here, as long as you don't expose yourself too much to enemy fire. Focus on eliminating renegades who are coming from the left. Fire single shots, instead of choosing longer bursts.
15. Wait for allied stalkers to arrive in the area
Received from: automatically once you've finished fourteenth quest
Starting point: 2 on the map
Goal area: 10 on the map
Quest description:
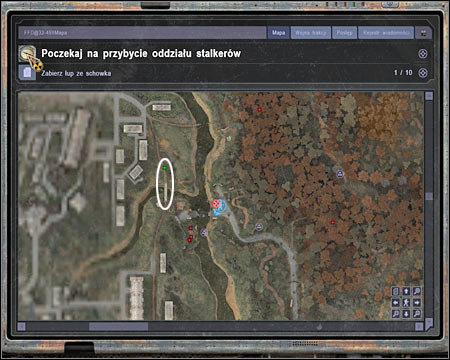
Nothing will change once you'll receive this goal. You won't have to protect members of this new group, but you can monitor their movement with your PDA (screen). Keep firing at enemy units, however remember to preserve your ammunition supplies.
- S.T.A.L.K.E.R.: Clear Sky Game Guide & Walkthrough
- STALKER Clear Sky: Game Guide
- STALKER Clear Sky: Walkthrough
- STALKER Clear Sky: Swamps
- STALKER Clear Sky: Swamps - Maps - part 1
- STALKER Clear Sky: Swamps - Maps - part 2
- STALKER Clear Sky: Swamps - Maps - part 3
- STALKER Clear Sky: Swamps - Quests - part 1
- STALKER Clear Sky: Swamps - Quests - part 2
- STALKER Clear Sky: Swamps - Quests - part 3
- STALKER Clear Sky: Swamps - Quests - part 4
- STALKER Clear Sky: Cordon
- STALKER Clear Sky: Cordon - Maps - part 1
- STALKER Clear Sky: Cordon - Maps - part 2
- STALKER Clear Sky: Cordon - Quests - part 1
- STALKER Clear Sky: Cordon - Quests - part 2
- STALKER Clear Sky: Cordon - Quests - part 3
- STALKER Clear Sky: Garbage
- STALKER Clear Sky: Garbage - Maps - part 1
- STALKER Clear Sky: Garbage - Maps - part 2
- STALKER Clear Sky: Garbage - Quests - part 1
- STALKER Clear Sky: Garbage - Quests - part 2
- STALKER Clear Sky: Garbage - Quests - part 3
- STALKER Clear Sky: The Dark Valley
- STALKER Clear Sky: The Dark Valley - Maps - part 1
- STALKER Clear Sky: The Dark Valley - Maps - part 2
- STALKER Clear Sky: The Dark Valley - Maps - part 3
- STALKER Clear Sky: The Dark Valley - Quests - part 1
- STALKER Clear Sky: The Dark Valley - Quests - part 2
- STALKER Clear Sky: The Dark Valley - Quests - part 3
- STALKER Clear Sky: The Dark Valley - Quests - part 4
- STALKER Clear Sky: Agroprom Institute
- STALKER Clear Sky: Agroprom Institute - Maps - part 1
- STALKER Clear Sky: Agroprom Institute - Maps - part 2
- STALKER Clear Sky: Agroprom Institute - Quests - part 1
- STALKER Clear Sky: Agroprom Institute - Quests - part 2
- STALKER Clear Sky: Agroprom Sewers
- STALKER Clear Sky: Agroprom Sewers - Quests - part 1
- STALKER Clear Sky: Agroprom Sewers - Quests - part 2
- STALKER Clear Sky: Yantar
- STALKER Clear Sky: Yantar - Map
- STALKER Clear Sky: Yantar - Quests - part 1
- STALKER Clear Sky: Yantar - Quests - part 2
- STALKER Clear Sky: Yantar - Quests - part 3
- STALKER Clear Sky: Red Forest
- STALKER Clear Sky: Red Forest - Maps - part 1
- STALKER Clear Sky: Red Forest - Maps - part 2
- STALKER Clear Sky: Red Forest - Maps - part 3
- STALKER Clear Sky: Red Forest - Quests - part 1
- STALKER Clear Sky: Red Forest - Quests - part 2
- STALKER Clear Sky: Red Forest - Quests - part 3
- STALKER Clear Sky: Red Forest - Quests - part 4
- STALKER Clear Sky: Red Forest - Quests - part 5
- STALKER Clear Sky: Red Forest - Quests - part 6
- STALKER Clear Sky: Army Warehouses
- STALKER Clear Sky: Army Warehouses - Map - part 1
- STALKER Clear Sky: Army Warehouses - Map - part 2
- STALKER Clear Sky: Army Warehouses - Quests - part 1
- STALKER Clear Sky: Army Warehouses - Quests - part 2
- STALKER Clear Sky: Army Warehouses - Quests - part 3
- STALKER Clear Sky: Limansk
- STALKER Clear Sky: Limansk - Map - part 1
- STALKER Clear Sky: Limansk - Map - part 2
- STALKER Clear Sky: Limansk - Map - part 3
- STALKER Clear Sky: Limansk - Quests - part 1
- STALKER Clear Sky: Limansk - Quests - part 2
- STALKER Clear Sky: Limansk - Quests - part 3
- STALKER Clear Sky: Limansk - Quests - part 4
- STALKER Clear Sky: Hospital
- STALKER Clear Sky: Hospital - Quests - part 1
- STALKER Clear Sky: Hospital - Quests - part 2
- STALKER Clear Sky: Nuclear Plant
- STALKER Clear Sky: Nuclear Plant - Quests
- STALKER Clear Sky: Walkthrough
- STALKER Clear Sky: Game Guide
You are not permitted to copy any image, text or info from this page. This site is not associated with and/or endorsed by the developers and the publishers. All logos and images are copyrighted by their respective owners.
Copyright © 2000 - 2026 Webedia Polska SA for gamepressure.com, unofficial game guides, walkthroughs, secrets, game tips, maps & strategies for top games.
