Heisenberg | Side missions
"Heisenberg" is divided into three parts which description can be found below.
- Heisenberg - Part 1
- The Highest Priest (Location Boss)
- Heisenberg - Part 2
- Colonel Fasthand (Location Boss)
- Heisenberg - Part 3
- The Lord of War (Location Boss)
Heisenberg - Part 1
Rewards for completing the quest
- 30k
- 1 skill point
- Hand of Fate - an amulet
- Eternal Infinitor - a sub-machine gun

Your objective is to gather two items necessary for completing the objective. However, before you begin, take a look around as you can find an optional boss in this area. If you've searched the whole area, and you can't find him, it means that he is in the further part of the area. When he is found and dealt with, follow the main objective. The sought items are guarded by monsters such as:
- Bellies
- Shade Fanatics
When you get the items, the door to the next part of the map will unlock. Once you've crossed them, your next objective is to get the last drug chest. When you've picked it up, return to Dragon Mountain. Completing this quest will unlock access to the next part.
The Highest Priest (Location Boss)

The location boss is a more powerful version of Treeface. First, eliminate all smaller enemies. Boss can regenerate his health, so they will only annoy you during the fight itself. He mainly works at melee range, using ranged abilities from time to time. Green lightning bolts from his hands can attack us only if we are in front of the boss, so if a bolt is flying your way, hide behind boss's back. Once you've taken 50% of his health, he starts spawning Mists. Eliminate them and end the priest.
Killing the boss yields following rewards:
- An automatic shotgun
Heisenberg - Part 2
Completing the task yields following rewards:
- 25k
- 1 skill point
- Shredders - melee weapon or The Purgator - a pneumatic shotgun

This time you'll find yourself on Zilla territory. Your task is to cook some "Shade". Before you proceed with the task, find the boss of the location, who should be nearby. Once you've killed him, follow the quest at hand. You'll reach an inactive portal - you need to find a key to activate it. It can be found in the chest guarded by enemies. Defeat them and return with the portal key.

When you cross through the portal, you'll find yourself in the location which you've visited before - the place where you had saved Kamiko from the attempted experiment. While moving, you'll encounter some Zilla soldiers. Once you defeat them, your next objective is to get four batteries required to power the device.
- Searching the remains of ZL-209 gives you 3 batteries
- One battery is found lying around
When you've found all four batteries, return to the mission zone. Place the batteries in the chosen location, and return to Dragon Mountain to complete the second phase of the mission.
Colonel Fasthand (Location Boss)

The boss is guarded by a large entourage in form of drones, Zilla soldiers, and robots. Eliminate them first, and then focus on the boss. He mostly uses ranged attacks, consisting of various projectiles. He is a fast enemy, who will dodge your attacks. Rocket Launchers are the weapons of choice versus this enemy. Once you've taken 50% of his health, he'll call for allies that need to be eliminated before you take care of the boss.
Killing this boss yields following reward:
- Perforator - an assault rifle
- 30k
- 2 skill points
- Ghidorah - a melee weapon Jigoku - a pistol
Heisenberg - Part 3
Completing this task yields following rewards:

In the final phase of this task, you need to deliver the distilled narcotic to the right location. Search the area first, as you can encounter the location boss here. When you've gathered and eliminated everything, proceed to the objective. The delivery area will be invaded by enemies that need to be eliminated.
- Bellies
- Hellhounds

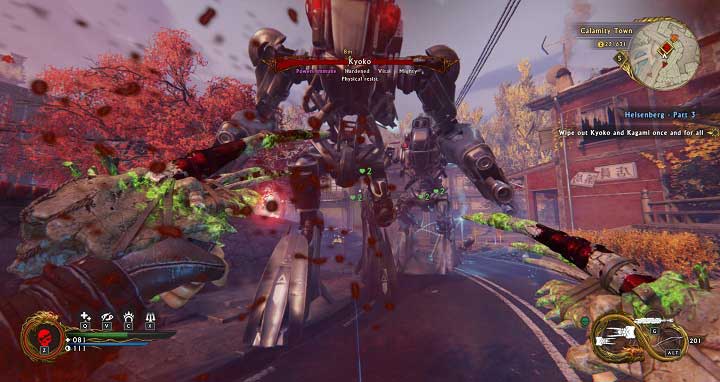
It turns out that you've been betrayed, and now you need to fight off your mission givers. Use rocket launchers or grenade launchers to eliminate them quickly. Take a look if there isn't any cars or explosive barrels around. If yes, use them during combat. They can attack from close range, as well as with cannons. Remember to avoid attacks. When they are defeated, return to Mezu to report the whole situation to him.
The Lord of War (Location Boss)

Remember that during the encounter with The Lord of War you need to keep your distance. It's mainly a melee range enemy. He can jump in our direction, and attack using his weapons. Once you've taken 50% of his health he calls Tumor to help him. Defeat additional enemies, and return to the boss encounter.
Killing the boss yields following rewards:
- Agent of Chaos - a gattling gun
You are not permitted to copy any image, text or info from this page. This site is not associated with and/or endorsed by the Devolver Digital or Flying Wild Hog. All logos and images are copyrighted by their respective owners.
Copyright © 2000 - 2025 Webedia Polska SA for gamepressure.com, unofficial game guides, walkthroughs, secrets, game tips, maps & strategies for top games.
