Nightmares from the Deep The Siren's Call: The Book of Davy Jones (bonus adventure)
This chapter is available if you have the Collector's Edition and you have finished the basic eight chapters.
![Talk to the fisherman[1] - The Book of Davy Jones (bonus adventure) | Walkthrough - Walkthrough - Nightmares from the Deep: The Sirens Call Game Guide & Walkthrough](/nightmaresfromthedeepsirenscall/gfx/word/977035275.jpg)
Talk to the fisherman[1]. Go to the Embankment[2].
![Talk to the captain [1], and to the Praetorian, that appeared in [2] - The Book of Davy Jones (bonus adventure) | Walkthrough - Walkthrough - Nightmares from the Deep: The Sirens Call Game Guide & Walkthrough](/nightmaresfromthedeepsirenscall/gfx/word/977035291.jpg)
Talk to the captain [1], and to the Praetorian, that appeared in [2]. From him, take the scroll emblem and return to the Yard.
![Again, talk to the fisherman [1] and use the key that you receive to open the door [2] - The Book of Davy Jones (bonus adventure) | Walkthrough - Walkthrough - Nightmares from the Deep: The Sirens Call Game Guide & Walkthrough](/nightmaresfromthedeepsirenscall/gfx/word/977035307.jpg)
Again, talk to the fisherman [1] and use the key that you receive to open the door [2]. Walk over to the Quarters.
![Approach the sea horse on the wall [1] - The Book of Davy Jones (bonus adventure) | Walkthrough - Walkthrough - Nightmares from the Deep: The Sirens Call Game Guide & Walkthrough](/nightmaresfromthedeepsirenscall/gfx/word/977035322.jpg)
Approach the sea horse on the wall [1]. Give its tail a twist for three times and put the scroll emblem in the place that reveals. Walk into the corridor that reveals.
![Collect the boathook[1] and use it to sweep cobwebs away in [2] and [3] - The Book of Davy Jones (bonus adventure) | Walkthrough - Walkthrough - Nightmares from the Deep: The Sirens Call Game Guide & Walkthrough](/nightmaresfromthedeepsirenscall/gfx/word/977035338.jpg)
Collect the boathook[1] and use it to sweep cobwebs away in [2] and [3]. Approach the shelf [4], collect the map and 2/2 flint stones. Then, examine the shelf [3] and read the note. Use the flint stones to light the candle. Walk over to the Cave[5].
![Collect 3/3 dynamite casing[1],[2],[3] and the bowl of glue[2] - The Book of Davy Jones (bonus adventure) | Walkthrough - Walkthrough - Nightmares from the Deep: The Sirens Call Game Guide & Walkthrough](/nightmaresfromthedeepsirenscall/gfx/word/977035353.jpg)
Collect 3/3 dynamite casing[1],[2],[3] and the bowl of glue[2]. Return to the corridor.
![Approach [1] and complete the HOP for which you will receive scissors - The Book of Davy Jones (bonus adventure) | Walkthrough - Walkthrough - Nightmares from the Deep: The Sirens Call Game Guide & Walkthrough](/nightmaresfromthedeepsirenscall/gfx/word/977035369.jpg)
Approach [1] and complete the HOP for which you will receive scissors. Then, approach the shelf [2] (bonus chapter: dynamite).
Collect the dynamite sticks and walk over to the Cave.
![Put the dynamite under the rocks [1] and put fire on the wick using the candle - The Book of Davy Jones (bonus adventure) | Walkthrough - Walkthrough - Nightmares from the Deep: The Sirens Call Game Guide & Walkthrough](/nightmaresfromthedeepsirenscall/gfx/word/977035385.jpg)
Put the dynamite under the rocks [1] and put fire on the wick using the candle. Move the rocks away and walk over into the Bay[2].
![Find the hidden objects [1] - The Book of Davy Jones (bonus adventure) | Walkthrough - Walkthrough - Nightmares from the Deep: The Sirens Call Game Guide & Walkthrough](/nightmaresfromthedeepsirenscall/gfx/word/977035400.jpg)
Find the hidden objects [1]. The lever that you obtain in this way, needs to be put into the mechanism[2]. Then, use it. Approach the islet that surfaces [3]. Sweep the seaweed away and collect the crowbar.
New Objective: Fix the pillar
![Return to the cave and use the crowbar on the chest [1] - The Book of Davy Jones (bonus adventure) | Walkthrough - Walkthrough - Nightmares from the Deep: The Sirens Call Game Guide & Walkthrough](/nightmaresfromthedeepsirenscall/gfx/word/977035416.jpg)
Return to the cave and use the crowbar on the chest [1]. Read the note and collect the stained-glass quill and 1/5 golden gear. Go to the Bay again.
![Put the feather into [1] - The Book of Davy Jones (bonus adventure) | Walkthrough - Walkthrough - Nightmares from the Deep: The Sirens Call Game Guide & Walkthrough](/nightmaresfromthedeepsirenscall/gfx/word/977035431.jpg)
Put the feather into [1]. Then, go into the Shipwrecked hull[2].
![Pick up the cannon ball [1], and use the boathook to release the cannon[2], which will fall onto the ground - The Book of Davy Jones (bonus adventure) | Walkthrough - Walkthrough - Nightmares from the Deep: The Sirens Call Game Guide & Walkthrough](/nightmaresfromthedeepsirenscall/gfx/word/977035447.jpg)
Pick up the cannon ball [1], and use the boathook to release the cannon[2], which will fall onto the ground. Approach it and load it with the cannonball, and set the wick on fire. After the cannon is discharged, sweep the planks away and go on the deck (Barrels)[3]. Collect the pickaxe blade from a barrel, return and approach the pond [4] (Bonus Chapter: Lilies)
Collect 2/5 golden gear and return to the cave.
![Use the pickaxe on the rocks [1] and collect lump of coal - The Book of Davy Jones (bonus adventure) | Walkthrough - Walkthrough - Nightmares from the Deep: The Sirens Call Game Guide & Walkthrough](/nightmaresfromthedeepsirenscall/gfx/word/977035463.jpg)
Use the pickaxe on the rocks [1] and collect lump of coal. Return to Barrels.
![Approach the desk [1] and read the note, then use the coal on the book - The Book of Davy Jones (bonus adventure) | Walkthrough - Walkthrough - Nightmares from the Deep: The Sirens Call Game Guide & Walkthrough](/nightmaresfromthedeepsirenscall/gfx/word/977035478.jpg)
Approach the desk [1] and read the note, then use the coal on the book. Read the code (739), and put it on the door [2].
Find all of the items (Chapter Bonus: Hidden 1) and approach the wall with the plates that you have obtained [3] (Bonus Chapter: Plate).
From the box, collect the stained-glass hat.
![Return to Bay and put the glass hat in [1] - The Book of Davy Jones (bonus adventure) | Walkthrough - Walkthrough - Nightmares from the Deep: The Sirens Call Game Guide & Walkthrough](/nightmaresfromthedeepsirenscall/gfx/word/977035494.jpg)
Return to Bay and put the glass hat in [1]. Through the passage that appears, make it to the beach [2].
![Approach the wrecked boat [1], move the nets away and grease the spinning wheel, and roll it up - The Book of Davy Jones (bonus adventure) | Walkthrough - Walkthrough - Nightmares from the Deep: The Sirens Call Game Guide & Walkthrough](/nightmaresfromthedeepsirenscall/gfx/word/977035509.jpg)
Approach the wrecked boat [1], move the nets away and grease the spinning wheel, and roll it up. Collect the marine seal and 3/5 golden gear. Examine the pedestal [2] and collect the chisel from it. Go to Armoire[3].
![Collect the pirate hat[1] - The Book of Davy Jones (bonus adventure) | Walkthrough - Walkthrough - Nightmares from the Deep: The Sirens Call Game Guide & Walkthrough](/nightmaresfromthedeepsirenscall/gfx/word/977035525.jpg)
Collect the pirate hat[1]. Approach the chest [2] and collect the thread cutter from the sand . Then, read the note [3] and rip the pillow open. Collect the belt.
![Return to the Bay and complete the HOP in [1] - The Book of Davy Jones (bonus adventure) | Walkthrough - Walkthrough - Nightmares from the Deep: The Sirens Call Game Guide & Walkthrough](/nightmaresfromthedeepsirenscall/gfx/word/977035541.jpg)
Return to the Bay and complete the HOP in [1]. You will receive a rapier.
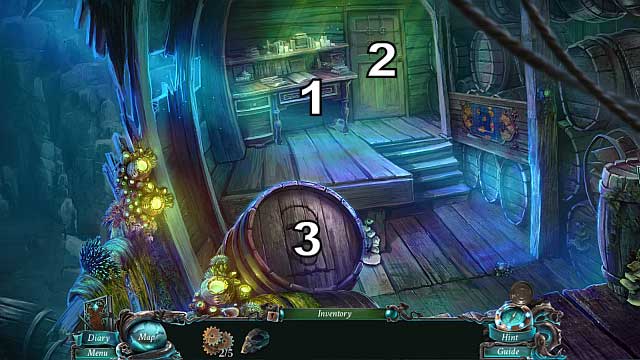
Walk over to the Barrels. Approach the desk [1] and put the marine seal in it. Keep spinning the dials in such a way, as to make an octopus appear. Collect the flintlock pistol from the locker that opens. Approach the door [2] and complete the HOP, for which you will receive a hammer. Then, go to the barrel [3] and use both the hammer and the chisel on it. Collect the mannequin head and 4/5 golden gear.
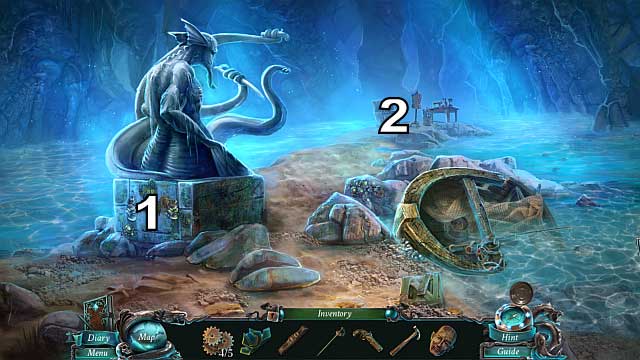
Return to the Beach. Use the hammer on the pedestal for three times [1]. Collect the coat and go ahead [2].
![Approach the mannequin [1] and dress it (mannequin head => pirate hat => coat => belt => flintlock pistol => rapier) - The Book of Davy Jones (bonus adventure) | Walkthrough - Walkthrough - Nightmares from the Deep: The Sirens Call Game Guide & Walkthrough](/nightmaresfromthedeepsirenscall/gfx/word/977035587.jpg)
Approach the mannequin [1] and dress it (mannequin head => pirate hat => coat => belt => flintlock pistol => rapier). This will open a locker that you should collect the stained-glass island from.
![Return to the bay and put the glass island in [1] - The Book of Davy Jones (bonus adventure) | Walkthrough - Walkthrough - Nightmares from the Deep: The Sirens Call Game Guide & Walkthrough](/nightmaresfromthedeepsirenscall/gfx/word/977035603.jpg)
Return to the bay and put the glass island in [1]. Go to the Entrance[2].
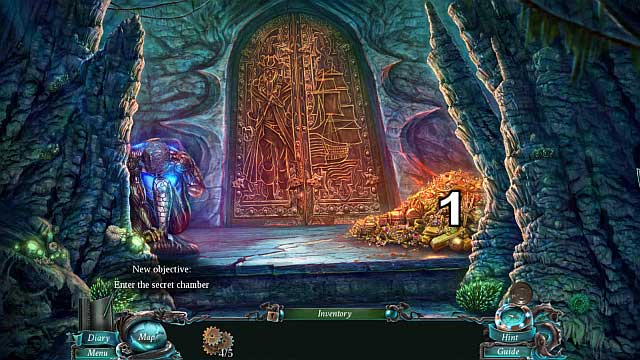
Objective completed: Fix the pillar
New objective: Enter the secret chamber
Activate a HOP in [1]. You will receive the last golden gear.
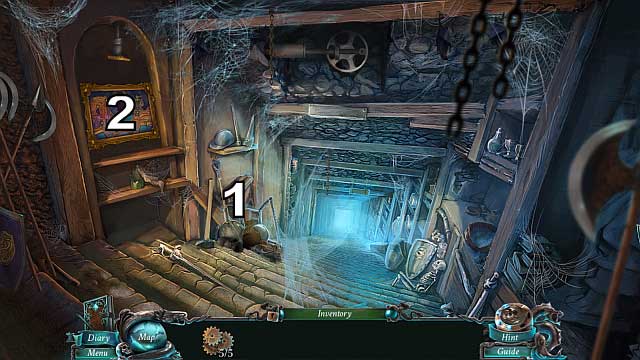
Return to the Corridor. Approach [1] and find all the items (Bonus Chapter: Hidden 2). You will receive stone pieces. Then, approach the painting [2] and put the golden gears in it.
Arrange the gears correctly (Bonus Chapter: Gears).
Return outside of the entrance and approach the golem (Bonus Chapter: Golem).
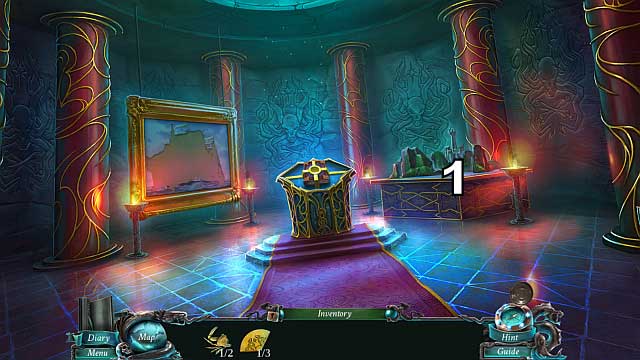
Enter Expositions. Approach the table [1] read the note and collect 2/2 crab halves.
Objective completed: Enter the secret chamber
Objective completed: Find all translations
Exit to the entrance and approach the treasure. Find the items (Bonus Chapter: Hidden 3). You will receive a small island model.
![Enter the Expositions again and put the island model in [1] - The Book of Davy Jones (bonus adventure) | Walkthrough - Walkthrough - Nightmares from the Deep: The Sirens Call Game Guide & Walkthrough](/nightmaresfromthedeepsirenscall/gfx/word/977035665.jpg)
Enter the Expositions again and put the island model in [1]. Collect 2/3 seal parts.
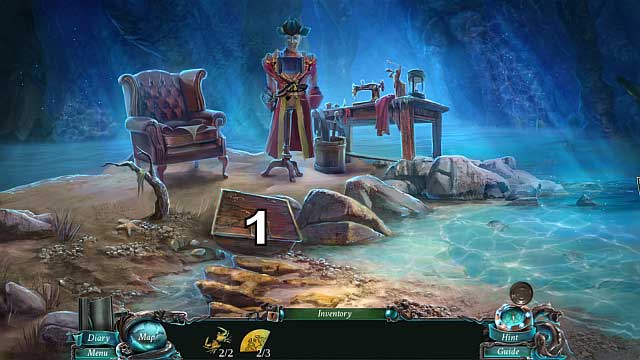
Return to Armoire. Arrange the crab halves in the chest [1]and collect the painting strips.
Return to the Expositions for the last time and approach the painting. Use the painting strips on it to put the entire painting together. (Bonus Chapter: The Ship) and collect 3/3 seal parts. Use them on the book and collect the The Book of Davy Jones. Return to the Yard.
![Talk to the fisherman [1] and walk over to the Embankment[2] - The Book of Davy Jones (bonus adventure) | Walkthrough - Walkthrough - Nightmares from the Deep: The Sirens Call Game Guide & Walkthrough](/nightmaresfromthedeepsirenscall/gfx/word/977035697.jpg)
Talk to the fisherman [1] and walk over to the Embankment[2].
![Give the book to the Praetorian [1] and talk to the captain [2] - The Book of Davy Jones (bonus adventure) | Walkthrough - Walkthrough - Nightmares from the Deep: The Sirens Call Game Guide & Walkthrough](/nightmaresfromthedeepsirenscall/gfx/word/977035712.jpg)
Give the book to the Praetorian [1] and talk to the captain [2].
Objective completed: Recover the Book of Davy Jones
Objective completed: Leave the island
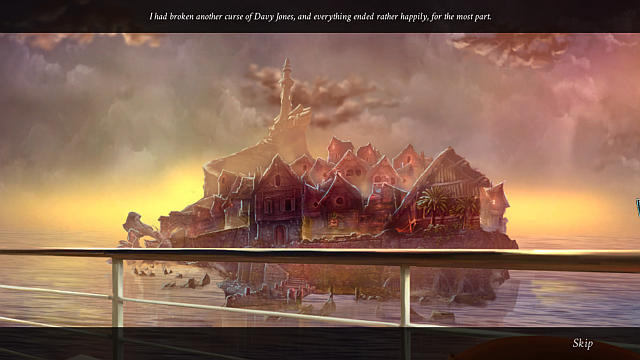
Congratulations! This is the end of your adventure with Nightmares from the Deep: The Siren's Call.
- Nightmares from the Deep: The Siren's Call Game Guide & Walkthrough
- Nightmares from the Deep The Siren's Call: Game Guide
- Nightmares from the Deep The Siren's Call: Walkthrough
- Nightmares from the Deep The Siren's Call: An Unexpected Guest
- Nightmares from the Deep The Siren's Call: Boats Away
- Nightmares from the Deep The Siren's Call: Beneath the town
- Nightmares from the Deep The Siren's Call: The Labyrinth
- Nightmares from the Deep The Siren's Call: The Shipwreck cemetery
- Nightmares from the Deep The Siren's Call: The Lighthouse
- Nightmares from the Deep The Siren's Call: Find Calliope
- Nightmares from the Deep The Siren's Call: Get Kraken!
- Nightmares from the Deep The Siren's Call: The Book of Davy Jones (bonus adventure)
- Nightmares from the Deep The Siren's Call: Walkthrough
- Nightmares from the Deep The Siren's Call: Game Guide
You are not permitted to copy any image, text or info from this page. This site is not associated with and/or endorsed by the developers and the publishers. All logos and images are copyrighted by their respective owners.
Copyright © 2000 - 2026 Webedia Polska SA for gamepressure.com, unofficial game guides, walkthroughs, secrets, game tips, maps & strategies for top games.
