Necropolis: Bestiary
The following chapter includes details on enemies that one can come across in the game. Some of them have different variations and they can differ in terms of behavior and attacks.
- Pyramid worker
- Naguals
- Pyramid warriors
- Mechanical knights
- Hoardmen
- Screamer
- Skeletons
- Sandakar
- Grines
- Tainted creatures
- Pyromaniac Hoardman
- Diggers
- Beast
- Shadowborn
- Spiders
- Giant Skeleton Spider
- Boss
Pyramid worker
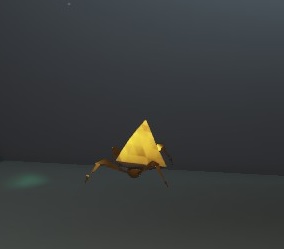
They appear in three different variations. They shouldn't cause a lot of trouble, especially that they are very loud and you will easily notice them from afar.
Variant | Description |
Empty | Won't pose a threat. You may kill it but you will not receive any items. |
Full | It's easy to recognize it due to the glowing red light at the top of its pyramid. It's not going to look for you, but if you get too close to it, it will explode. If you kill the creature before it actually explodes, you will earn a lot of jewels and pieces of equipment. |
Overloaded | It's easy to recognize it due to blue rocks coming out of the top of its pyramid. This worker will chase you and explode when he gets close enough. Kill it before that happens. |
Be careful and don't let them come too close. Overloaded workers can be lured near other groups of enemies and used to deal damage when they explode.
Naguals
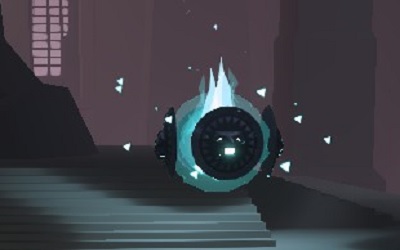
Immaterial creatures covered with shields from all sides. They appear randomly in three possible variations.
Endurance: Weak
Attack power: Medium
Weaknesses: Physical attack
Variant | Description |
Blue | Sends a simple beam of light that causes minor damage. They will often attack other creatures and drag their attention away from you. |
Red | Apart from the beam of light, they will often use spinning attacks that will deal damage to all the units surrounding them. They deal medium damage. |
Green | Sends a beam of energy that can automatically lock-on the player. Once it gets close enough to the player, it explodes and deals severe damage. |
The best way to neutralize the opponents is to come closer to them with your shield raised up. In case of the first two variations, the block should not slow you down or stop you, so you should shorten the distance. However, it's not that simple when it comes to the green creature. It's crucial to deal with this opponent right away, because allowing it to inflict damage, and fighting other monsters instead, can quickly lead to your death.
Pyramid warriors
Brass knights around player's size. They appear in several variations and may carry short swords, spears, or spears and shields.
Endurance: Medium
Attack power: Medium
Weaknesses: Element attack
They usually perform rapid strikes with their weapons. Due to their size, they often turn their shoulders and weapons perpendicularly towards their own axis and move towards the hero. They are not very enduring but they can hide behind large shields, and thus block most of the blows. They appear in groups of 2-4.
You ought to watch out for their armed shoulders. If they are spinning with their weapons, it's best to wait till they stop. Moments after, the warrior should be dizzy, which makes him vulnerable to damage. Even though they don't deal tremendous damage, try to lure them out one by one.
Mechanical knights

Brass knights of great endurance and power. They appear in several variations.
Endurance: High
Attack power: High
Weaknesses: Element attack
Variant | Description |
Damaged | Very poor ability to detect the player. Its only attack is raising his arm and trying to hit you. Very predictable and easy to avoid. |
Normal | Can perform several different attacks. One of them is an upper sword strike, similar to the one performed by damaged knights. Apart from that, there is also the spinning attack and thrust. |
Four-legged | This one can roll over, or jump which may result in squashing the hero. It often strikes with its front legs and may go berserk which results in smashing the surrounding area blindly. |
Emerald | Apart from the standard moves, this one can strike from a distance. This would be the same attack as the one of Green Naguals. The beam of energy that they create can detect the player, explode and throw you back. |
Move around them patiently and attack right after it performs a strike. Despite being huge, the enemy will rapidly turn towards you. Circle around them with your shield up in the air, and strike when possible. If you need to replenish your HP, move to a safe distance. Despite their rapid attacks, knights tend to move rather slowly.
Hoardmen
Endurance: Medium
Attack power: Weak
Weaknesses: Physical attack
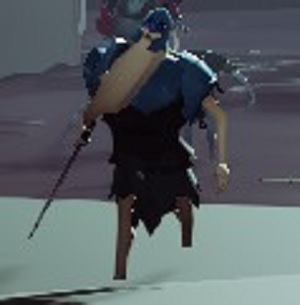
Hoardmen will appear in larger groups and often come from nowhere. Watch out for them as their strength is in their numbers. Try to lure them out one by one and kill. They are not very enduring but can be deadly if you have to fight several of them at the same time.
Remember that each of them has a unique set of moves. Learn to distinguish their combos and move to a safe distance when they perform their strikes.
Screamer
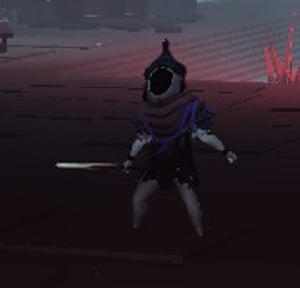
Endurance: Weak
Attack power: Weak
Weaknesses: Physical attack
Screamers usually appear alone and are not very dangerous. A couple of single blows should be enough to kill one. Their main ability is their scream which is also their greatest weapon. They use it to lure other monsters and it seems to make more of them appear. Kill them as quickly as possible.
Skeletons
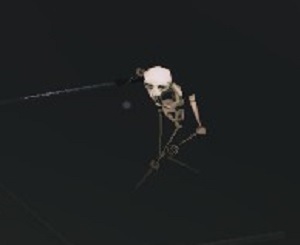
Endurance: High
Attack power: Weak
Weaknesses: Element attack
Skeletons can be found in random places throughout the entire gameplay. Although they have a lot of HP, their strikes are weak. They tend to appear in groups of 2-3. It's best to run around them and strike when they lower their guard. When fighting more of them at once, remember to keep safe distance and avoid them getting surrounded.
Sandakar
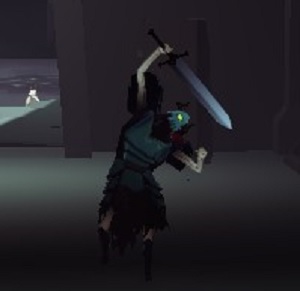
Endurance: High
Attack power: Medium
Weaknesses: Physical attack
One of the deadliest "humanoids". Sandakar can perform rapid and powerful strikes without alerting about it. Furthermore, they can perform quick counter-attacks when you lower your guard, and thank to the greatsword they are wielding, they can knock you down. You will often come across Sandakars surrounded by Hoardmen, and if that happens, all you can do is keep a safe distance and strike when possible.
Grines
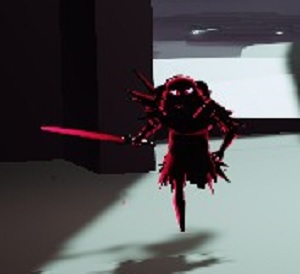
Endurance: Medium
Attack power: Medium
Weaknesses: Physical attack
Weaker reflections of our hero. They often appear in groups of 2-6. Don't underestimate them. They have as many HP and the same armor as our main hero, but their attacks are not as strong. You may come across units that will carry shields but they are armed in a single weapon most of the time. Keep them at a safe distance, reflect their strikes and dodge. It's best to lock your camera on them, as they can dodge as well.
Tainted creatures
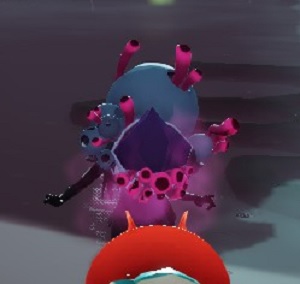
Endurance: Weak
Attack power: Weak
Weaknesses: Physical attack
They use melee attacks for most of the time, and they explode when killed. When that happens a toxic cloud covers the area.
Keep them at a safe distance. You should try to perform single blows and move away from the creature. If you are far enough from the creature when it dies, the toxic cloud won't reach you.
Pyromaniac Hoardman
Endurance: Weak
Attack power: Medium
Weaknesses: Physical attack
Its main strike is to get close to you and explode. It's easy to recognize the opponent due to its humanoid shape and flames that surround its body.
Keep this enemy at a safe distance and take it down with a distance weapon or a two-handed one. The very opponent doesn't have too many HP, so you shouldn't face too many problems to kill it before it gets too close to you. You may as well wait for it to cone closer and jump away right before it explodes.
Diggers
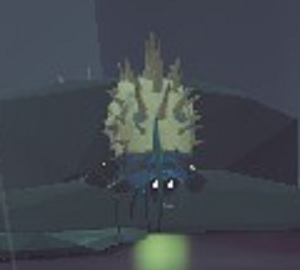
Endurance: Medium
Attack power: Medium
Weaknesses: Physical attack
You will find this enemy in the swamp, but it is possible to come across it in other locations as well. You can face different types of this creature.
Variant | Description |
Teleport | As soon as it sees you, it will cast teleport to appear behind you as close as possible. It will constantly shorten the distance which can be very irritating if you want to e.g. heal yourself or use an item. Try to eliminate the creature as quickly as possible. Its melee attacks can deal a lot of damage or even knock you down. |
Laser | The enemy has a scythe that shoots laser. Any shield will be just right to deflect the projectiles. Watch out for the creature as it will try to shoot at you, even when standing next to you. |
Summoning | The enemy will summon two tainted creatures. Slay them and deal with the summoner as quickly as possible, because it can be very frustrating in the long run. The summoner should summon new creatures once the previous ones are killed. |
Beast
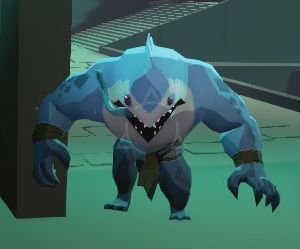
Endurance: High
Attack power: High
Weaknesses: Physical attack/Elements
You will encounter many beasts starting from the 5th level of the catacombs. Once again, there are different types of them.
Variant | Description |
Two-footed | Such enemies will perform powerful strikes with both arms, and may try to land a jump attack from time to time. As they are not the quickest opponents in the game, try to attack their backs. |
Four-legged | Four-legged enemies will perform charge attacks. You should dodge such attacks, because an accurate charge can knock you down. They are especially deadly in open areas, as they can throw you beyond boundaries of a level. |
Diving | Apart from charge attacks, such creatures will try to swoop down on you. If you manage to dodge the attack, the beast will dive under the ground and jump out in a way that will knock you down. If the enemy disappeared under the ground, you should change your position immediately. |
Shadowborn
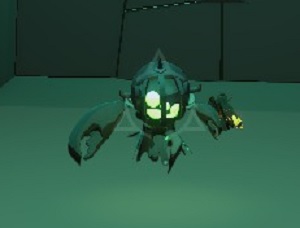
Endurance: Medium
Attack power: High
Weaknesses: Physical attack/Elements
You will encounter many shadowborns once you reach the 5th level of the catacombs.
Variant | Description |
Small | The only enemy in the game that uses a range magic attack (apart from the boss). You will recognize it by its crossbow that spits bolts that form a wall of fire. Get close to the creature right away because it can cause a lot of trouble when supported by other monsters. |
Normal | This one has two swords or a scythe and a sword. It has a basic set of melee attacks and shouldn't cause too much trouble. |
Large | This creature will have similar weapons to the normal version but it is definitely bigger than the hero. The monster specializes in combos that combine a charge and a thrust. It can also perform rapid counter-attacks if you lower your guard. Do not underestimate this opponent. |
Spiders
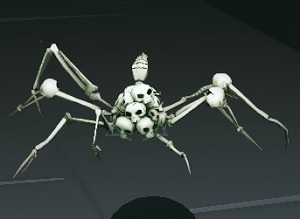
Endurance: Medium
Attack power: Medium
Weaknesses: Physical attack/Elements
As most enemies, there are different types of spiders.
Variant | Description |
brisk | This type may cause a lot of trouble especially at the early stages of the game. Its agility makes it a difficult target. Avoid its jump attacks and take it down with a couple accurate blows. |
Skeleton | These spiders have greater resistance and can perform rather powerful attacks. Fortunately, they are not as agile as brisk spiders. |
Web-spitting | This can be a very frustrating opponent, especially when it appears with other monsters. It's bigger than the previous two spiders and apart from basic physical attacks, it can spit its web. It often performs this attack in mid-distance and if you get hit, you will be vulnerable to all sorts of damage for a couple of seconds: you can't move, use your shield or perform any attacks. Do whatever you can to avoid its projectiles and kill it as soon as possible. |
Giant Skeleton Spider
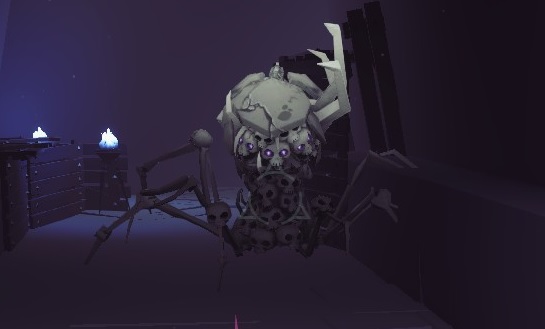
Endurance: High
Attack power: Very High
Weaknesses: Physical attack/Elements
One of the strongest enemies in the game. Although, you won't across it too often, you may sometimes face two of them at once. Try to lure them out one by one, as fighting both of them at once is pure suicide. A single blow can take half of your HP and only if you have armor of highest quality. It does not perform any special attacks; just a basic strike and charge. The latter makes the creature especially vulnerable to your strikes.
Don't face the monster directly, but rather make circles around it. This is the best way to avoid the charge and will grant you a chance to attack its back. Always keep your shield up, or you will die in a matter of seconds.
Boss
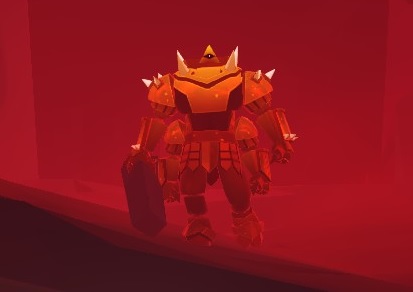
The final enemy in the game may cause a lot of problems. The fight is divided into two phases that come one after another, and will not end until one of you dies.
Warm-up
Perform single strikes, while remaining at a safe distance. Each of your strikes should soften the creature, which means that they don't really cause any damage but rather leads to a situation when the beast will lower its guard. If your strikes are fast enough, the enemy will lose balance and will bend for a moment.
Finishing off
The enemy will get tired and become vulnerable to your blows for a moment. When that happens, perform a powerful blow, and get to a safe distance. You need to be close enough as the beast will soon get on its feet, and if you are unable to deliver damage, you will need to start the entire sequence from the beginning. If you do deal the damage, the creature will get up again, but the number of strikes required to get it to the ground will be much lower
Agony
When the beast receives critical damage, it will tremble, and bend to the side, and not to the back. When that happens, perform a high attack and take him down, collect the items, and head to the last level.
Physical attacks
Single rock strike
Turn around 360 degrees and perform rock strike
Striking with the other pair of arms
stomp (throws the hero into the air and back)
Elements
fireball (slow, can be avoided)
fast fireball ( hard to avoid)
A burning circle surrounding the boss (does not deal a lot of damage to the boss and may burn you).
Tips
The boss will not treat you seriously, so if you throw a couple of hits and move to a safe distance, it won't chase after you. Equip yourself with as many potions that grant you temporary immortality, and food or health potions as possible. Choose a weapon with medium speed, as you won't have a lot of time to perform strikes. You can use a range weapon from time to time, but don't get too far, because the boss will throw fireballs at you.
Your first encounter with the boss may end with a failure, but the second one should be victorious for you. Don't underestimate its range and power. Get to a safe distance before you use healing potions. Dodge its attacks, keep your shield up, and you should win in no time.
You are not permitted to copy any image, text or info from this page. This site is not associated with and/or endorsed by the developers and the publishers. All logos and images are copyrighted by their respective owners.
Copyright © 2000 - 2026 Webedia Polska SA for gamepressure.com, unofficial game guides, walkthroughs, secrets, game tips, maps & strategies for top games.
