Fallout Shelter: Rooms
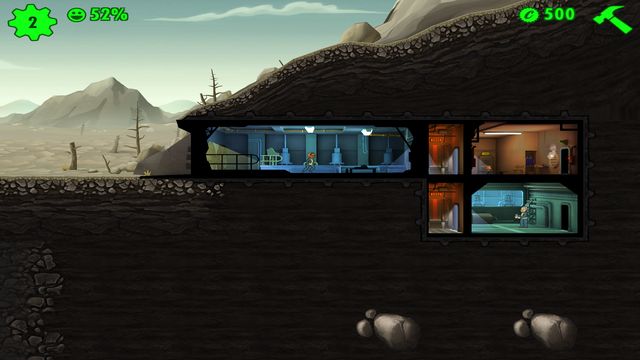
When you start the game you have a possibility to fill two levels of the Vault. You will devote it to resource generating rooms and for living quarters. Subsequent rooms will be unlocked with development of population and will allow you to produce Stimpaks and Antiradars or improve your dwellers skills. It is an appropriate building, merging and improving further rooms that decide of efficient operating of the Vault.
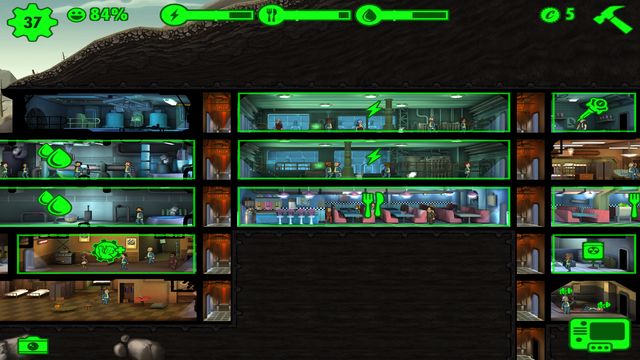
Most of all you have to care for resources: energy, food and water. The first one is used by all rooms. If you run out of energy, your rooms start to lose it starting from those most remote from the power source. Keep it in your mind as every new building need the power to work, make sure that the number of power generators is sufficient. Lack of water and food causes injuries and finally leads to death. Keep the supply on a high level all the time, especially if you plan a "baby boom".
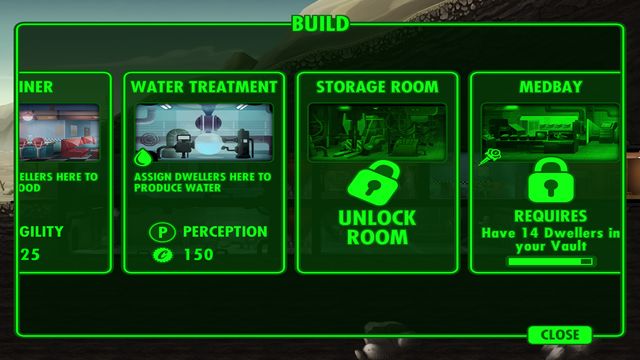
There are three categories of rooms:
- Access rooms (access to wasteland and lower levels): Vault Door and Elevator. Vault Door can be improved like any other room - it impacts positively on frequency of raiders' attacks, on better strength and also provides more time to organize defense. Elevator let you get to the lower level of your Vault. Expansion of it proceeds mostly in a down direction so remember to provide enough of elevators (two for each level sounds good) to make it possible to move between levels efficiently.
- Resource production and storage rooms - available from the beginning. Remember to assign right dweller to the right room as each of them desires different S.P.E.C.I.A.L skills (strength is useful when producing energy, perception when gaining water and agility in the restaurant). This category also contains rooms in which you can produce Stimpaks and AntiRadars. Dwellers with well-developed intelligence are welcome to work in one of them.
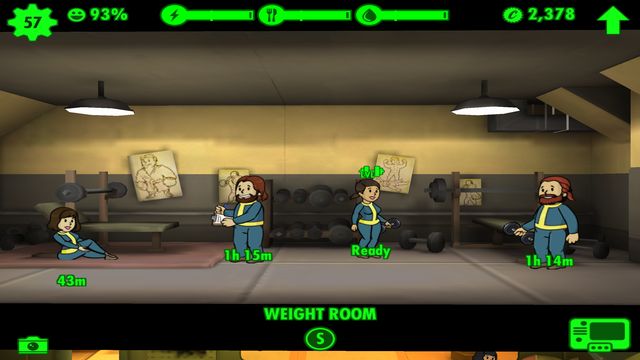
- Special stat training rooms - when you reach 24 dwellers you get access to your first training room in which your dwellers can work out their skills. These rooms don't produce any resources. When you send your dweller there, he or she can work out their skills for some time and then it gets improved permanently by one point up. Keep in mind that the higher the level you try to work out, the more time it takes, so train only these skills that are useful in the dweller's job.
Merging rooms

Every room can be merged to another one from the same category. It happens automatically, provided that both are the same level and built next to each other. It is a good idea to merge them straight away (if you have enough of money) or to leave space to do it in the future. The larger the room is, the more dwellers can work at the same time, it is also more efficient than single rooms, so merging them is always profitable.
Upgrading rooms
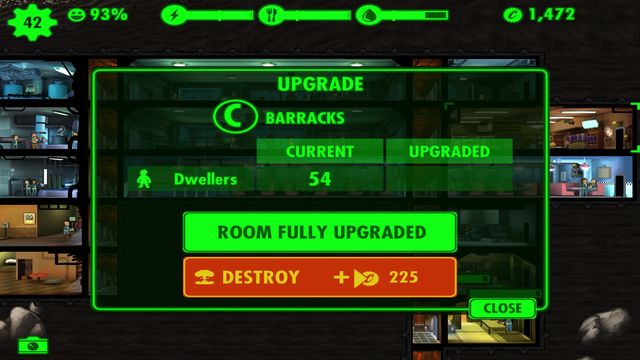
Not only can you merge your rooms but you can upgrade them as well. There are two upgrade options and its cost depends on the room's category as well as on size - upgrading two rooms of the same kind but of different sizes has different cost. To find upgrading menu, select the room, and then click on the arrow that will appear instead of a hammer (upper right corner). As an effect of upgrading, the capacity of the room and its production increases. It also influences positively on the radio signal (radio station) or shorten the time you need to work out a skill. If it's possible you should strive to have as high level of your rooms as possible by improving the existing ones and then building new, similar ones.
As mentioned above, rooms merge automatically under condition that they are on the same level. If it didn't happen, that means you have to upgrade one of them.
Removal of rooms
If you need to reorganize your Vault, it is possible to remove your rooms, provided that you meet two conditions:
- there are no dwellers assigned to the room
- it can't be placed between two other rooms or you must make sure that there is other way to get in them than through the room you want to remove, e.g. another room on the other side or elevator. If not, you have to arrange that connection or remove all of them.
If you plan building of the Vault reasonably, you don't need to remove rooms later on. What you should do is to divide the Vault into "segments", and for example destine the middle segment only for resource production and storage rooms. Generally, it is not profitable to use a removal option too often because you don't get all caps you had to invest in building it back.
"Rush" - acceleration of work
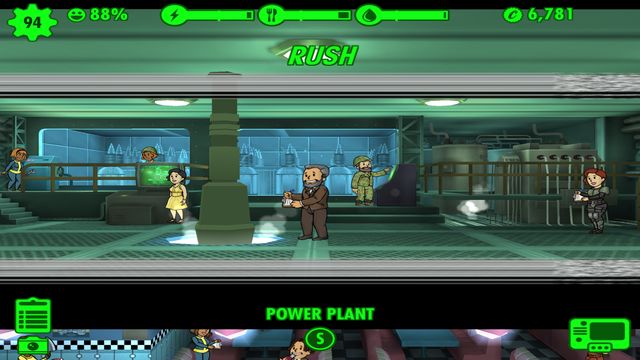
You can use a "rush" option to accelerate work in resource production and storage rooms. Its strong point is that if you succeed, you get your resources, extra experience points, satisfaction bonus and caps straight away. The only disadvantage of it is the possibility of a disaster and it is estimated in percentage. The estimation consists of the amount of people in the room, sum of their skills (essential for the room, e.g. agility for the restaurant) as well as the level of their luck. Generally, the better trained and happier the crew, the possibility of a disaster is lower. Use it only when the estimated risk is lower than 40%, or even 30%. Using the "rush" option too often will increase the risk of a disaster so try not to overuse it.
List of rooms
- Vault Door - you can use them to send dwellers to the wastelands, they are also the first place the raiders will attack
- Elevator - it is important when expanding the Vault deeper down
- Power Generator - where you produce the energy
- Water Treatment - where you produce the water
- Diner - where you produce food
- Living Quarters - increase limit of the population, this is where dwellers can flirt and women get pregnant
- Medbay - where you produce Stimpaks
- Science Lab - where you produce AntyRads
- Storage Room - increases the maximum amount of weapons and outfits
- Radio Station - lets you send the signal that attracts new dwellers to your Vault, also contributes positively to the satisfaction of you dwellers.
- Nuclear Reactor - more efficient room where you can produce more energy
- Water Purification - more efficient room where you can produce more water
- Garden - more efficient room where you can produce more food
- Nuka-Cola Bottler - room where you can produce food and water
- Special stat training rooms (Weight Room - strength, Athletics Room - agility, Armory - perception, Classroom - intelligence, Fitness Room - endurance, Lounge - charisma, Game Room - luck)
You are not permitted to copy any image, text or info from this page. This site is not associated with and/or endorsed by the developers and the publishers. All logos and images are copyrighted by their respective owners.
Copyright © 2000 - 2026 Webedia Polska SA for gamepressure.com, unofficial game guides, walkthroughs, secrets, game tips, maps & strategies for top games.
