5. Crafting
In this chapter you will learn about crafting in Wildstar. Here you will find the connections between various paths of crafting. You will also get to know the tabs in your character menu.
General Info
You can get the ability of crafting at level 10, after receiving a proper quest. Then, you talk to an NPC and choose up to two Tradeskill paths. Here you should remember that when you want to for example craft weapons, you will need resources. To gather them, you have to obtain the Mining Tradeskill, as well as buy a proper tool from a vendor. This is just to indicate that some paths are connected and you have to be careful with your choice.
Remember, that you can switch one of your Tradeskill Paths once every 24h.
The table below shows the connections:
Weaponsmith | Mining |
Armorer(Heavy armor) | Mining |
Outfitter(Medium armor) | Survivalist |
Technologist | Relict Hunter |
Architect | Survivalist |
Tailor(Light armor) | No pair |
Cooking | No pair |
To create better items, you have to get to a higher level in your crafting skill. To achieve that, you should just create new items. It doesn't matter what you craft, because every item earns you experience.

There are three tabs:
Schematics - Here you can view the schematics that you have. They are sorted out according to their type and materials required for creating them. If you have everything that is needed, you can click "Preview" to start crafting, but only when standing near a crafting station.
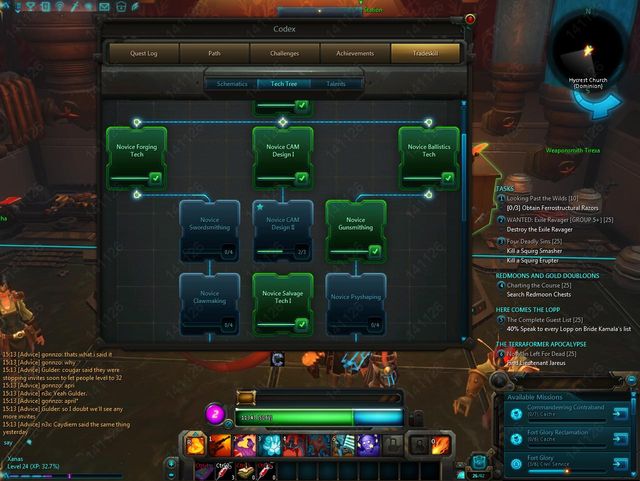
TechTree - It shows what items you should create and how many times, in order to get stars and new recipes. You will need the stars for the third tab - Talents. The tasks are often connected and in order to complete one from the bottom, you will first need to complete the previous ones. On the top, you can see the name of the tree in which you are currently creating. There you can also switch between different levels and view information about the experience you have. When you achieve the highest level of experience, a new level will unlock. New recipes can be unlocked when completing tasks from the TechTree or just found randomly, while exploring the world.
Talents - they improve your crafting skills. Each level requires a certain amount of stars to unlock. For example, the first level requires four stars. The stars are obtained when completing quests from the TechTree. You can choose only one talent from a given level.
Creating Items

To craft an item, you have to choose the proper Tradeskill, which will provide with the required schematics and materials. Some materials can be bought from a vendor, near a crafting station, but some need to be excavated using tools or bought from other players.
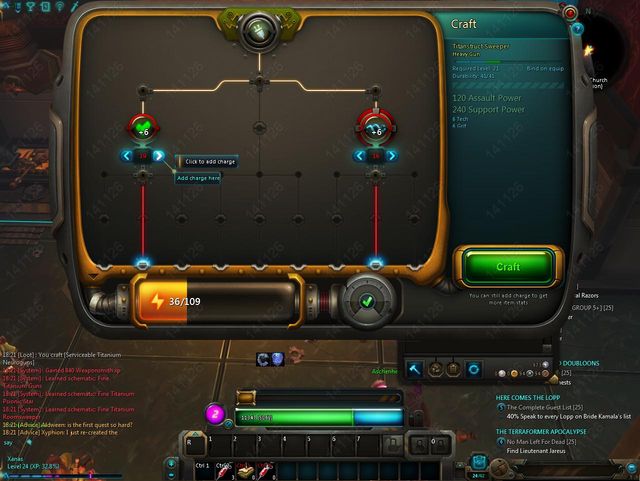
When you have your resources, you may proceed to crafting. Click on a schematic and then click "Preview" to enter the crafting window.
Each slot that has a "+" sign should be filled. There are two types of slots: requiring an item or a statistics bonus. If there is for example a slot that requires and item called Powercore, then you have to have such item in your equipment. This one can be usually acquired from a vendor standing nearby.
Notice the orange power bar at the bottom. If it's not full, you can still add some statistics bonuses. If you exceed it, your chance for successfully crafting the item will get lower.

Besides the main paths, there is also Cooking, which can be used by everyone, and Rune Craft, which allows you to create item enhancing runes.
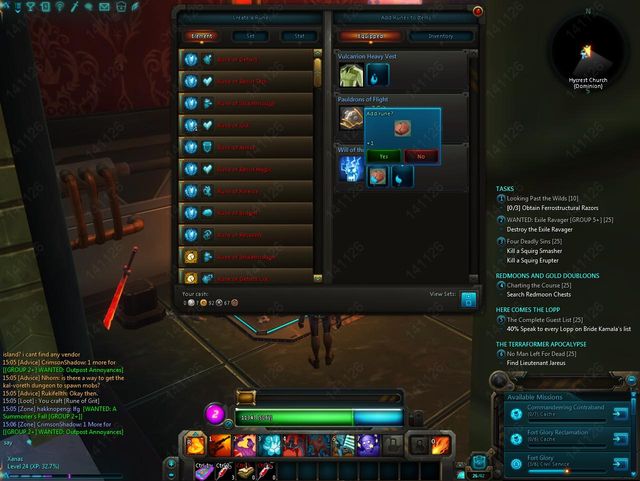
To create a rune, you will require the proper components. The whole list is displayed when you approach a rune crafting station. During rune crafting, the items that can be enhanced are displayed on the right. You have to pay attention to what kind of runes can be put into which slot in a given item.
Example: a Water Rune cannot be inserted into a Fire slot.
Tools and Salvaging
Some items cannot be neither bought, nor found. To obtain them, you will need the "Salvage" option, available in your equipment. Every weapon or piece of armour can be salvaged in order to retrieve materials from it. You just have to drag an item onto the proper icon, which is displayed next to your Tradeskill Bag.
If you've chosen a Tradeskill such as Mining or Relic Hunter, you will need tools to collect resources. You can buy them from vendors, who usually stand near crafting stations. There are three types of tools:
Laser Pickaxe - Mining
Relic Blaster - Relic Hunter
Laser Chainsaw - Survivalist
Using these tools, you will be able to collect materials from deposits outside the city. If you come close to them, the will be marked with a blue icon on your map.
You are not permitted to copy any image, text or info from this page. This site is not associated with and/or endorsed by the NCsoft or Carbine Studios. All logos and images are copyrighted by their respective owners.
Copyright © 2000 - 2025 Webedia Polska SA for gamepressure.com, unofficial game guides, walkthroughs, secrets, game tips, maps & strategies for top games.
