Stronghold Crusader 2: Mercenaries

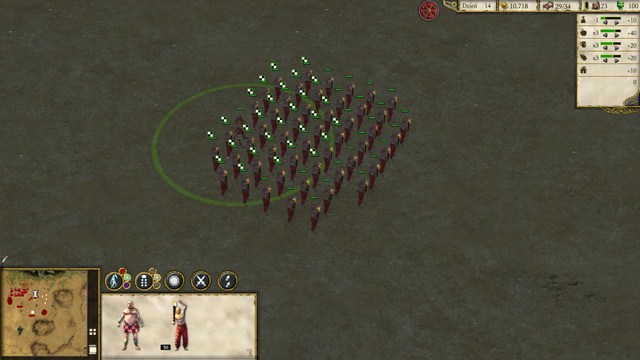
Mercenaries are the only units available to the Arabic side of the conflict. The biggest difference between them and the units available to Crusaders is the fact that they don't need weapons for recruitment - all they need is gold, but they need it several times more. In one way it limits the player, who does not have enough gold, but it also allows you to recruit huge armies in a matter of seconds, provided that you have enough gold in your treasury.
Mercenary units are relatively weaken than those of Crusaders (especially the most expensive ones), but they are easier to recruit, because you don't have to manufacture weapons for them. It means that you will have more numerous, though weaker, armies at your command.
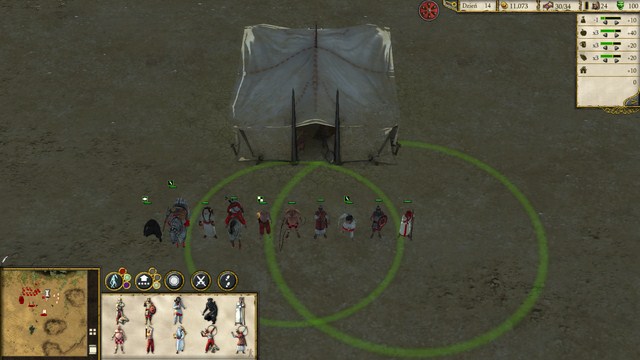
There are 10 different mercenary units in the game. Those are: Slave, Slave Driver, Arabian Archer, Horse Archer, Oil Pot Thrower, Healer, Arabian Swordsman, Whirling Dervish and Sassanid Knight. Mercenary units are hired at a Mercenary Post.
Slave
Cost: 5 gold
The cheapest unit available at the Mercenary Post. Alone, Slaves can't do anything - their nonexistent durability makes them die from a single attack. In high numbers, which is easy to achieve, given their extremely low costs, they can cause some turmoil, if the enemy won't be able to stop their advances. The reason is simple - they are able to set fire to buildings. All you have to do is to force your way through and watch as the enemy buildings burn to the ground.
Slaves are made to make the lives of your enemies miserable - most of the maps in the game won't let them protect their whole bases with a wall (especially Stone Quarries and Iron Mines, very often oases too), meaning that a small group of Slaves can cause some huge resource losses to the enemy. If the enemy is cramping his/her buildings tightly, setting them ablaze can end the whole match - there's nothing more demotivating as watching dozens of buildings burning and being unable to do anything about that.
Slave Driver
Cost: 80 gold
Slave Driver on his own is relatively weak - he's fairly expensive, and he can't hold his own in combat even against weaker units. However, he has a very interesting special ability - Buff Units. It allows him to increase the armor of Slaves (only Slaves, unlike Sergeant at Arms who can buff every unit) in his close vicinity, making them harder to kill.

Sending a Slave Driver together with several dozens of Slaves to attack the enemy is extremely effective, especially in the beginning of the game, when enemy has not yet surrounded his whole base with a wall. Thanks to increased durability, Slaves will have an increased chance to get to the enemy buildings and set them under fire.
Arabian Archer
Cost: 18 gold
The equivalent of an Archer from the Crusader side. The biggest merit of this unit is the extremely low recruitment cost - it requires almost the same amount of gold to hire as the Archer, while the latter requires bow as well.
There are two flaws of Arabian Archers - the first one is that they are extremely ineffective in melee combat and most of units (even Conscripts and Slaves) can easily kill them if they manage to get close enough. The other thing is their low damage against heavily armored targets - they have problems with every unit equipped with any armor. Fortunately, they make up for that flaw with their incredible firing range - excluding some of the siege equipment, there's no unit in the game that can outrange them.
Additionally, Arabian Archers (like Archers and Rangers) have a special ability called Volley. It allows them to fire upon a specified area until the order is canceled. What is important about that ability, is the fact that they are able to shoot at places normally beyond their reach, like behind walls - in normal scenario their arrows would just hit the wall. It's not the most accurate and dangerous attack in the game, but it certainly may come in handy.
Horse Archer
Cost: 30 gold
Horse Archer can be simply described as a normal Archer mounted on the back of a horse, with all the disadvantages and most its advantages. This unit is extremely mobile, being one of the fastest in the game, meaning that most enemies won't be able to keep up with them. The other one, and probably the biggest virtue of this unit, is the fact that Horse Archers can fire at their enemies while moving, making them ideal in hit & run tactics to harass your enemies.
Unfortunately, this unit has more flaws than good points. First things first, lack of armor penetration. It does almost zero damage against heavily armored units, making this unit effective only against weaker ones. The second one - firing range. Horse Archers have significantly lower attack range (which is similar to that of a Crossbowman), making them extremely vulnerable to enemy Archers, which is in turn what makes them ineffective at sieges. Another thing is their recruitment cost - if you are planning to make a small squad to harass your enemy, it may work. If you, however, want to make a huge striking force, their recruitment cost make that extremely ineffective - you can hire almost twice as many Arabian Archers. The last and the most important thing is their durability - or lack of thereof. Horse Archers are only effective against lightly armored melee units - even a smaller group of Archers, not to mention Crossbowmen, can make a short work of them.
Oil Pot Thrower
Cost: 50 gold
An interesting, but quite dangerous unit. Oil Pot Throwers are able to hurl a cask filled with oil, which sets a small piece of land ablaze, inflicting serious damage to any unit standing on it. This weapon is lethal against lightly armored units - it can burn them to death in a matter of seconds - but it can also be used against the most durable units, still dealing quite a lot of damage, especially because the most durable units in the game are also the slowest one, meaning that it will take some time before they can get away from the burning ground. Oil Pot Throwers are effective when stationed on the walls - they can get rid of those pesky soldiers who managed to get under your walls and are now hacking their way in.
This unit has a couple of flaws. The first one is their short range - Oil Pot Thrower must get really close to the target before he can hurl his cask, exposing himself to attacks (not to mention that Archers will rip them to shreds). Additionally, there's a high risk of attacking your own units, as the pots have quite a wide range and are hard to control. Another serious drawback is the fact, that those units aren't very good in groups - the fact that you throw a single oil cask, or 50 of them at once, doesn't change much and units standing in the fire will still take the same damage.
Healer
Cost: 80 gold
Definitely one of the most original units in the game. Healers lack any combat ability, they cannot attack any units or buildings. Instead, they have a special ability called Healing Radius. It allows the Healer to restore lost health of a unit in his close vicinity. Given the fact that there's no way to regenerate health in any other way, it's the only method of restoring the health of your units. This makes the Healer one of the most interesting defensive units in the game - it can be stationed on a wall, near Archers / Crossbowmen to negate the wounds they sustain, or simply be placed deep behind your walls to heal your units (which, for instance, were just used in an attack or defense).

Healers are not suited for sieges. There are couple of reasons behind that. First things first - they have low movement speed, making them vulnerable to attacks, which is even more problematic as they have one of the lowest durability in the game. The last flaw is the healing itself - contrary to the name, or the animation around the Healer, it's not a healing circle, as it allows the Healer to heal a single unit, not a group of them. The healing is also quite slow, which is especially severe when you are trying to heal stronger units - it may take over a minute to heal a single one!
Arabian Swordsman
Cost: 60 gold
Arabian Swordsman is the Crusader counterpart. He moves with the same sluggish speed, but he's slightly less durable and weaker than a normal Swordsman. It's compensated with lower recruitment costs - it requires slightly more gold, but you don't need a Sword and an Armor to hire one.
Arabian Swordsmen are the backbone of the Arabian army - they are practically the most durable unit from that side. The only flaw is the mentioned movement speed and slightly lower stats than a 'normal' Swordsman, which makes them quite vulnerable to enemy Crossbowmen, as well as Tower Ballistae.
Assassins
Cost: 60 gold
A very useful unit, but not because of its combat ability. The effectiveness of this unit lies in its special ability - Stealth. It allows the Assassins to remain undetected and invisible to the enemy unless they get very close to their troops. The process of "unstealthing" is represented by an appropriate icon near the health bar of an Assassin - a closed eye means that the unit is invisible, partially opened means that the enemy is starting to notice it, while a fully opened eye means that the Assassin has been spotted. They can enter stealth again if they are able to get away from the enemy.
Their stealth ability would be nothing without their another ability, which allows them to climb enemy walls. You can order them to climb enemy walls - after a few seconds they will open the gate, allowing your troops to enter the enemy castle. Given the lack of Ladderman, who were present in previous installments of the game, they are the only way to get past walls without bursting through them with siege equipment, especially when the wall is not protected by Archers and they are able to climb it up without betting noticed.
Assassins, unfortunately, aren't very useful in combat - they are overshadowed by quite a number of units and should not be used in open combat. Their best purpose is to sneak past enemy defenses. They can also be used to Assassinate the enemy Lord - a group of over 10 of them can easily bring a Lord down in a matter of seconds.
Whirling Dervish
Cost: 140 gold
One of the offensively strongest units in the game, especially when dealing with a large group of moderately armored targets. This is due to their special ability - Area Attack. After issuing an attack order, Dervishes will start whirling (hence their name) with their weapons, inflicting serious damage to every enemy around them. Thanks to this ability they are able to defeat a group of enemies several times stronger than them - provided that the enemies will be close to one another.
Another ability of Dervishes is the Sprint attack, the same available to the Macemen. After selecting Dervishes and issuing an attack order, they will begin a short charge at the enemy, during which they have significantly increased movement speed and the first attack after a charge deals additional damage. It works especially well during sieges, when you want to get rid of dangerous enemies (Archers, Crossbowmen), as well as in the defense of your castle - you can send a group of Dervishes, destroy the enemy siege equipment and quickly retreat them behind your walls again. Sprint Attack requires several seconds to be ready again, which is signaled by a 'lightning' icon next to their health bar.
One of their drawbacks is their recruitment cost - 140 gold for a single unit is a lot and you won't be able to make a huge group of them, unless you are able to generate insane amounts of gold. Their main flaw is their durability - despite the damage they are able to deal, they are extremely vulnerable to ranged attacks, as well as melee, if the enemy is able to force them to use their area attack before the combat starts.
Sassanid Knight
Cost: 300 gold
Without a doubt the most expensive unit in the game. Additionally, it's the fastest unit available, as they are mounted on horses. Their mobility is further increased because of the Sprint Ability - the same as with Macemen and Whirling Dervishes. In their case, it allows them to move at astonishing speeds, enabling them to cover extreme distances in a matter of seconds. It comes in handy when you want to make a lightning fast attack, to, for instance, get rid of a group of unprotected Archers, Crossbowmen or siege equipment - if the enemy won't react in time, there's no chance that he will prevent you from killing them off.
They are also quite formidable in open combat - regular Crusader Swordsman won't stand a chance and only Templar Knights and Sergeants at Arms will be able to defeat them, but they won't be able to catch them. There are two major drawbacks to this unit - the first one being the absurd recruitment cost. Unless you have huge amounts of gold stored in your treasury or you are able to generate vast quantities of it in a short time, you won't be able recruit many of them. The other one is their vulnerability to Pikemen - they can literally kill themselves off Pikemen if they charge at them when the latter have their pikes set up.
You are not permitted to copy any image, text or info from this page. This site is not associated with and/or endorsed by the developers and the publishers. All logos and images are copyrighted by their respective owners.
Copyright © 2000 - 2026 Webedia Polska SA for gamepressure.com, unofficial game guides, walkthroughs, secrets, game tips, maps & strategies for top games.
