SnowRunner: Crane - how to use
Last update:
In this part of the SnowRunner game guide you will learn how to use the crane. We present step-by-step instructions on how to use the crane to load the goods.
Not all types of cargo in SnowRunner allow automatic loading with one click. Sometimes you'll have to find them in the field and load them with a crane. At first, the simplest and cheapest solution is a small, additional crane just behind the cabin, allowing you to load and transport goods straight away. The crane will be installed in the garage after purchasing a proper upgrade.
Goods requiring loading by crane shall have an appropriate icon with an upward arrow.
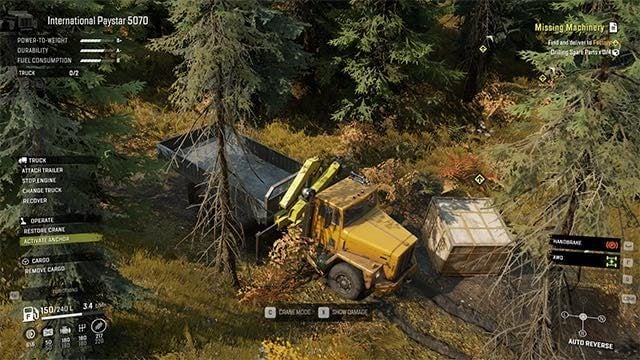
The first action before using the crane is to pull the handbrake (by default the space key or Y right bumper on the pad) and deploy the "anchors" or external supports to immobilize the vehicle in place. You can find them in the function menu (activate anchor). Otherwise, the truck will begin to roll or tilt under the weight of the load.

Then select "crane mode" (C or x on pad by default). Then you take direct control of the crane arm and all the buttons you need will be displayed on the screen. Maneuver the crane to lower the cargo onto the truck platform.

Once you've loaded everything, select the Exit button to take back control of the vehicle. Hide crane in the function menu by selecting "restore crane".

Once the cargo has been placed on the platform, you still need to confirm that it has been loaded so that it does not fall on the way and can be automatically unloaded at the destination. To do this, select the "pack cargo" function in the menu.

You are not permitted to copy any image, text or info from this page. This site is not associated with and/or endorsed by the Focus Home Interactive or Saber Interactive. All logos and images are copyrighted by their respective owners.
Copyright © 2000 - 2025 Webedia Polska SA for gamepressure.com, unofficial game guides, walkthroughs, secrets, game tips, maps & strategies for top games.
