Immersive Cam – The Witcher 3 in FPP, and all your camera might wish for. The best mods for The Witcher 3: Wild Hunt – January 2017 Edition

- The best mods for The Witcher 3: Wild Hunt – January 2017 Edition
- Preparations – before you start downloading
- The Daily Monster Hunt Challenge – new adventures ersatz
- Witcher Book Collection – more books to read
- Forgotten Worlds – revisit fantastical worlds
- Random Encounters – even more dangerous trail
- Better Call Ciri – second playable character
- Gwent Plus Plus, or Gwent: Enhanced Edition
- Skilled Humans – the bandits learn how to handle a sword
- The Gwent Card Dealer – buy ‘em all!
- All Quest Objectives on Map – the most useful small mod
- Extra Animations – not very useful but utterly awesome
- Witcher 2 Gear – so classy!
- Lore-friendly Witchers – Less-friendly (looking) Witchers
- Immersive Cam – The Witcher 3 in FPP, and all your camera might wish for
- The Witcher 3 HD Reworked Project – textures sharp as a witcher’s sword
Immersive Cam – The Witcher 3 in FPP, and all your camera might wish for
- Creator: ksolberg
- Size: 0.33 MB
- Release date: September 2015
- Current version: 4.2 (December 2016)
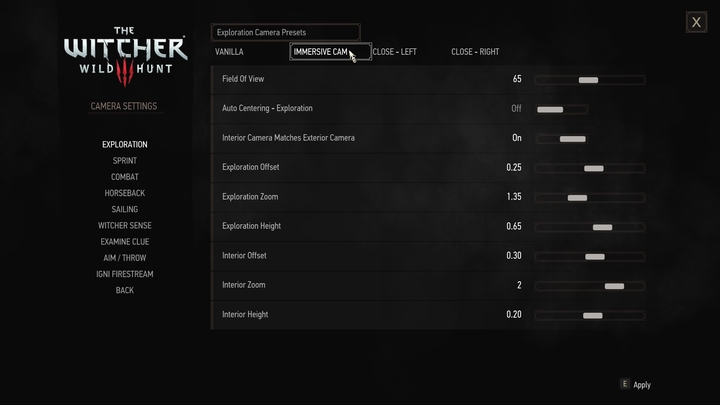
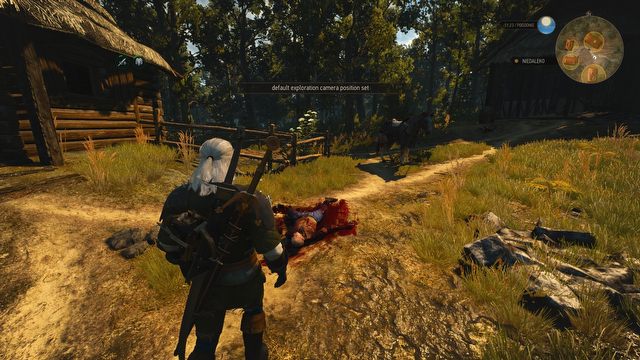
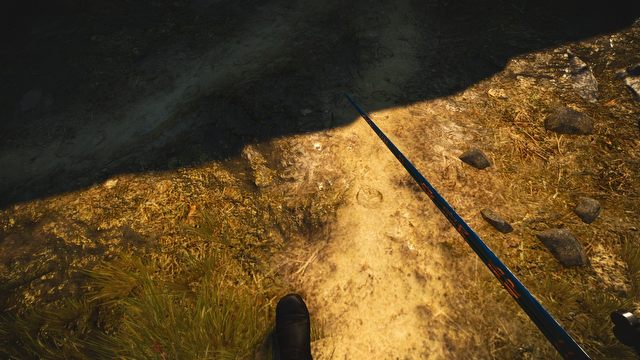
At some point, we were all very excited about the first-person mod for The Witcher 3, so this article wouldn’t be complete without a tool allowing some camera manipulation. However, instead of that modification (called First person mode), I decided to discuss a much more complex tool called Immersive Cam. The number of possible configurations of the camera perspective is quite astonishing.
You prefer the camera to be over your shoulder? No problem. Would you like to switch to FPP inside buildings? Got it. Maybe you’d like to reduce the witcher-senses zoom? Look no further. You can even have some sweet slow-mo effects during combat. Installing and configuring this mod is quite time-consuming, but it’s definitely worth it. As if this weren’t enough, the author also made sure this mod is compatible with projects such as Friendly Hud or Immersive Meditation (details below). Mad respect!
Installation guide
- The procedure begins as usual – download “Immersive Cam v 4.2”, and extract the archive to the “Mods” folder in the game’s directory. (You can also use Nexus Mod Manager).
- Then, go to the folder called Mods/modImmersiveCam/gui_setup and copy the “ImmCamMenu.xml” file into the following location: bin/config/r4game/user_config_matrix/pc.
The mod will now be ready to use. However, adjusting the camera with sliders isn’t the coolest experience – you can bind some keys to control the point of view. Theoretically, you just have to swap “input.settings” and “input.xml” with their counterparts provided with the mod, but it’s safer to just edit them, so that you don’t override any other modifications.
- Open input.xml with the Notepad – it’s located in Mods/modImmersiveCam/keybind_setup, and copy the entire text from <!-- Immersive Cam Begin --> to <!-- Immersive Cam End --> (including these two lines).
- Open the original file „input.xml” (it’s in bin/config/r4game/user_config_matrix/pc) and paste the copied content into the analogical place (above the line “<!-- [BASE_CharacterMovement] -->”).
- Now you have to define key binds in the “input.settings” file. As always, I recommend the Input.Settings Patcher – if you haven’t used it yet, you can get it here. Unzip it anywhere on the disk and launch the .exe file.
- Tick the five following entries on the list on the left: “[Combat]”, “[Diving]”, “[Exploration]”, “[Horse]” amd “[Swimming]”.
- In the “insert key” field on the right write “IK_Insert”, and in the “Insert action name” field below write “CamSet”. Then press “Add Keybind”.
The same procedure (fill in two fields and press “add keybind”) applies to the next seven cases
- IK_End – CamReset
- IK_PageDown – CamHeightDecrease
- IK_PageUp – CamHeightIncrease
- IK_Up – CamDepthIncrease
- IK_Down – CamDepthDecrease
- IK_Left – CamOffsetDecrease
- IK_Right – CamOffsetIncrease
Thanks to this, you will be able to freely manipulate the camera during the game by simply pressing the bound keys. Pressing “Insert” will save current settings as default, and pressing “End” will reset the camera to those settings. Of course, if you want to, you can bind some other keys to these functions. Remember that keys have to be bound to different situations separately (combat, horse riding, exploration, interiors etc.)
The last important thing. Right after installing it, the mod has to be configured in the game: Options/Mods/Immersive Cam/Camera settings). This applies both to the Field of View setting – if it’s set to 0, you may be unable to play the game. Selecting the “vanilla” option will reset the settings to the game’s defaults.
It seems that this mod isn’t compatible with the Extra Animations mod, since I didn’t manage to run the game with both of these active. Conflicts with mods: Forgotten Worlds and Random Encounters were solved with the Script Merger.


