Chapter 1 - Breach of Darkness | Episode 4 - What Ails You
Last update:
The beginning of episode four is heavily influenced by the choice from the end of episode three, where you had to confess that Catwoman has stolen Riddle's laptop or take the fall by yourself. Depending on your choice, the events of Breach of Darkness look a bit different. Below is a list of available outcomes:
- You've blamed Catwoman
- You've taken the blame
You've blamed Catwoman
In this case, the game begins in "Bodhi Spa" - a location which you had visited in the previous episodes. Bruce and Harley will begin a conversation with the clerk:
Dialogue |
[Knock him out] |
We'd like a massage. |
Just walk away. |
... |
Choosing any other option than [Knock him out] will continue the conversation:
Dialogue |
Don't make this difficult. |
[Bribe him] |
[Deck him] |

Regardless of your choice, the action will continue. Bruce and Harley are joined by the rest of the team. Time for a few sequences in which you'll need to press the buttons appearing on the screen.

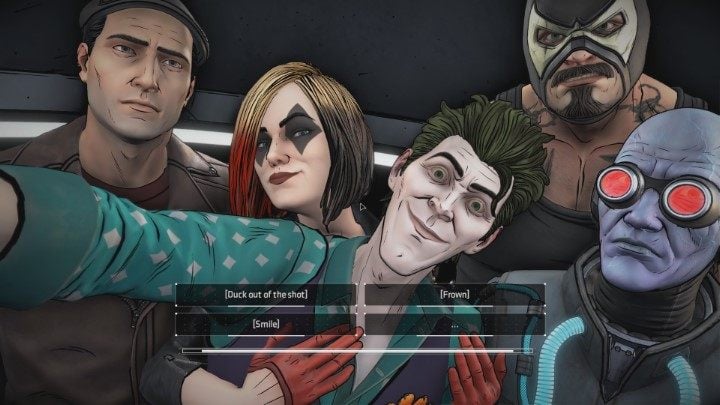
The group will reach the elevator. John attempts to make a picture:
Dialogue |
[Duck out of the shot] |
[Frown] |
[Smile] |
... |
You'll receive an opportunity to talk to John one on one - Harley will be the topic of the conversation.
Dialogue |
We'll still have each other. |
Harley won't leave you. |
Let's sabotage her plan. |
... |

When you return to the rest of the group, you'll have to use the pendrive on a nearby computer. The action will activate the alarm and security systems, so get ready for a few sequences during which you'll need to press the buttons appearing on the screen as fast as possible.

You'll soon reach a room with the virus. Your task is to destroy all samples - to do so you need to activate three terminals. The first terminal is located next to you (see the screenshot above), and the next ones are right behind it.


Every terminal requires you to choose the right wireframe which will connect all points found on the right side of the screen. The screenshots above show the correct wireframes for all three terminals.

Once you've unlocked all the terminals, Bruce will proceed to the main computer - continue pressing the buttons appearing on the screen. After a moment, the rest of the team will enter the room - Bane will attack Bruce. You'll be facing a few scenes in which you need to press the buttons appearing on the screen. Harley will steal a vial of the virus, while the laboratory will be raided by Waller and her agents. Chapter 1 ends here.
You've taken the blame
In this case, the game begins in Harley's group hideout. Bruce is imprisoned in a freezing capsule. You need to press the circles appearing on the screen and look around your surroundings until Bruce finds a way to escape.

It turns out you can break into the fuse box using your phone. You need to set the switches as shown in the screenshot above.

The action will be taken to "Bodhi Spa", where you'll assume control of Batman. The attacked building contains a living employee who can unlock the elevator leading to the laboratory.
Dialogue |
Do it or else... |
Help me stop them. |
[Force him] |
... |
Once you've made it to the laboratory, you'll begin a phone conversation with Waller:
Dialogue |
I made a mistake. |
I'm stopping the Pact. |
Catwoman would've died. |
... |

You need to find the keycard that will unlock the door. It is located next to a scientist crushed by debris - you need to remove the debris and take the keycard. Return to the door and use the keycard. You'll be subjected to a short scene that sees you press a button followed by a conversation with Catwoman:
Dialogue |
I'm glad you're okay. |
You let this happen? |
Thanks for the warning. |
... |
Dialogue |
We fight together. |
You're too injured. |
I don't need your "help". |
... |

Batman, along with Catwoman, will find the room with the virus. You'll fight the mercenaries and engage in a conversation with Harley's group:
Dialogue |
I know all your tricks. |
I only want the virus. |
I'm not alone. |
... |
The conversation ends with a fight. Press the buttons appearing on the screen (more than ten sequences) to fight Harley's group. Unfortunately, Harley will manage to get the virus and run away, while the lab will be stormed by Waller and her agents. You've just completed
You are not permitted to copy any image, text or info from this page. This site is not associated with and/or endorsed by the Telltale Games or Telltale Games. All logos and images are copyrighted by their respective owners.
Copyright © 2000 - 2025 Webedia Polska SA for gamepressure.com, unofficial game guides, walkthroughs, secrets, game tips, maps & strategies for top games.
