The Amazing Spider-Man 2: Jameson's Photo (during missions)
Raid on OSCORP
Photo #1 (Level 1)

You need to take the first photo in the room with the prisoners (Level #1), of the steel wings hanging behind a glass pane, on the wall opposite the fan.
Photo #2 (Level 2)
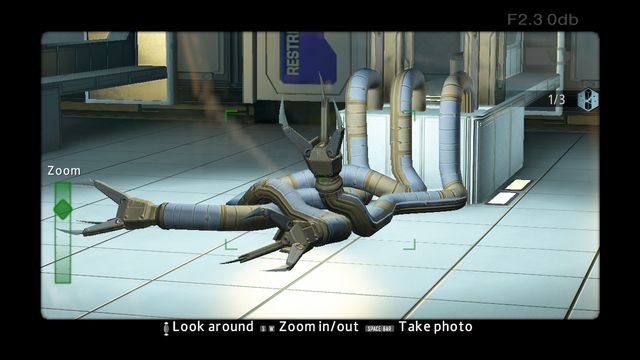
Another photo to take are the tentacles ended with pincers, in the reactor room (Level #2) on the right, behind the glass pane on the third floor.
No one is safe!
Photo #3 (Level 1)
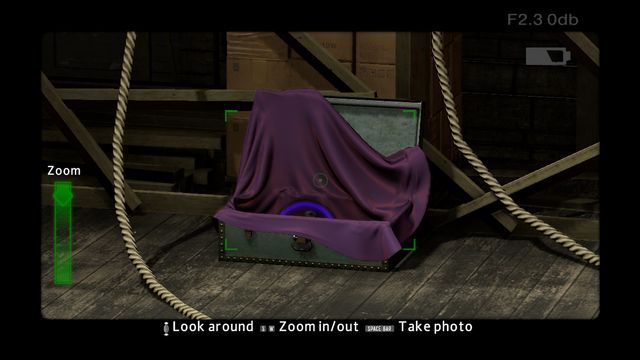
Take the photo of the chest with violet cloth, to obtain Jameson's Photo #3. It is on the floor, in front of the wall with the model, after you walk through the venting shaft, from the theater room.
Photo #4 (Level 2)
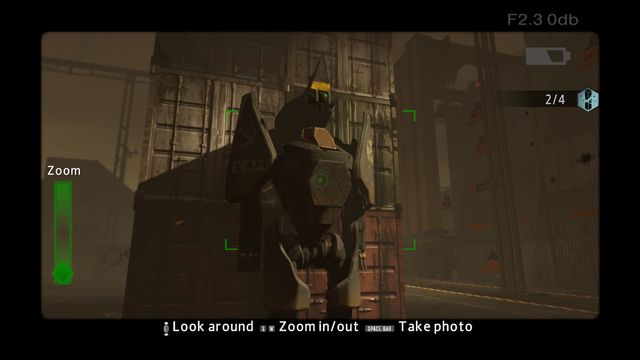
Take a photo of the robot at the containers, opposite the hangar (opposite the entrance).
Claws of the cat!
Photo #5 (Level 2)
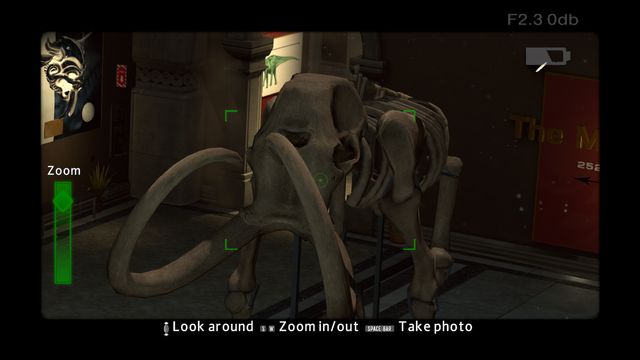
You need to take this photo at the museum. You need to capture the skeleton of the animal, in the center of the hall.
My ally, my enemy!
Photo #6
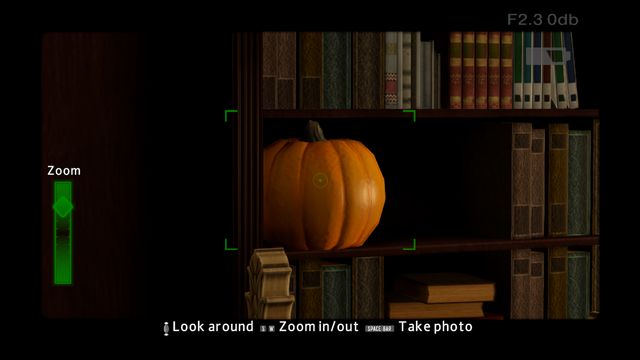
Take the Jameson Photo in Harry's room. You need to capture the pumpkin on the bookshelf.
The Kingpin of crime!
Photo #7
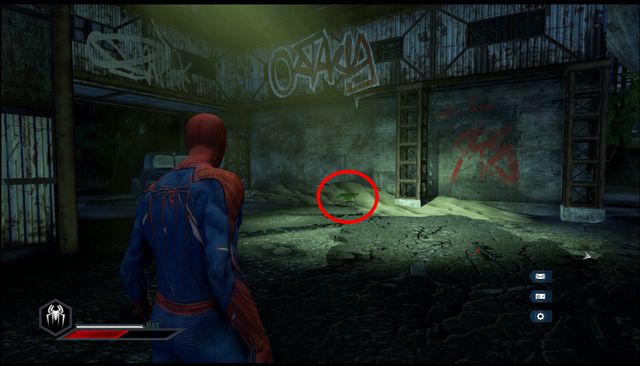
This photo is the green shirt in front of the building, on the left side of the location, on the sand, at the place illuminated by the lamp.
Maximum Carnage!
Photo #8 (Level 2)
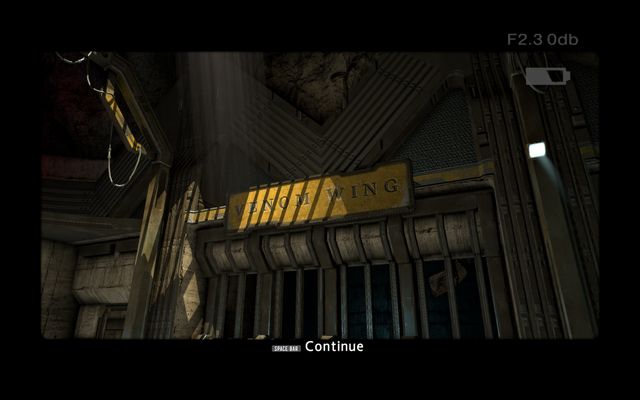
Inside the building, after you go past the room with the electric cage, follow the corridor, by jumping between the wall and the rocks, while minding the mines. Finally, you will notice a yellow sign on the right, reading "Venom Wing" - take a photo of it (Jameson's Photo #8).
- The Amazing Spider-Man 2 Game Guide & Walkthrough
- The Amazing Spider-Man 2: Game Guide
- The Amazing Spider-Man 2: Side missions
- The Amazing Spider-Man 2: Races and combat challenges
- The Amazing Spider-Man 2: Photo Investigation
- The Amazing Spider-Man 2: Hideouts
- The Amazing Spider-Man 2: Optional missions
- The Amazing Spider-Man 2: Audiologs and OSCORP crates (in the world)
- The Amazing Spider-Man 2: Audiologs (in missions)
- The Amazing Spider-Man 2: Jameson's Photo (in the world)
- The Amazing Spider-Man 2: Jameson's Photo (during missions)
- The Amazing Spider-Man 2: Comic pages
- The Amazing Spider-Man 2: Achievements
- The Amazing Spider-Man 2: The Amazing Spider-Man 2 - system requirements
- The Amazing Spider-Man 2: Side missions
- The Amazing Spider-Man 2: Game Guide
You are not permitted to copy any image, text or info from this page. This site is not associated with and/or endorsed by the developers and the publishers. All logos and images are copyrighted by their respective owners.
Copyright © 2000 - 2025 Webedia Polska SA for gamepressure.com, unofficial game guides, walkthroughs, secrets, game tips, maps & strategies for top games.
