Resistance 3: Chapter 12 - p. 2

Leave the tunnel and take the stairs leading to the bigger cave. The monster will attack you once more. This time it will catch and hurt the pastor [1].
 |  |
The cave's ceiling is supported by two wooden pillars. If you hide behind them the beast will destroy them and they will be replaced by the useful covers made of stones [1]. Behind them you'll be safe enough to shoot at the beast's eyes. When you shoot at them enough they will become red [2]. The beast will stop attack with its limbs and use them as the cover. Then it will start spitting the poisonous substance.
 | ![Run towards the chest with the explosives [1] which is in the corner on the left - Chapter 12 - p. 2 - Walkthrough - Resistance 3 - Game Guide and Walkthrough](/resistance3/gfx/word/1853089593.jpg) |
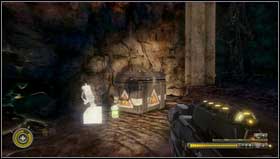
Run towards the chest with the explosives [1] which is in the corner on the left. Take the gas bottle and throw it at the beast's mouth [2]. Now shoot at it and detonate it. That will scare the monster. The pastor can't accompany you anymore so you need to chase the beast alone.
 | ![When you jump down at the tracks go left and enter the flooded tunnel [1] - Chapter 12 - p. 2 - Walkthrough - Resistance 3 - Game Guide and Walkthrough](/resistance3/gfx/word/1853089625.jpg) |
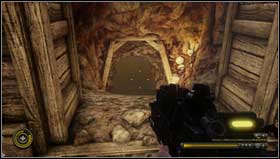
When you jump down at the tracks go left and enter the flooded tunnel [1]. Pass the room full with water and eliminate few Grims. Pass the crumbling tunnel and climb the steep slope. At the top jump to the wide tunnel [2] and go left.
![At the end of the path you'll find the tape recorder with the Whos Boss message [1] - Chapter 12 - p. 2 - Walkthrough - Resistance 3 - Game Guide and Walkthrough](/resistance3/gfx/word/1853089640.jpg)
At the end of the path you'll find the tape recorder with the Who's Boss message [1].
 | ![When you go back the beast will attack you [1] - Chapter 12 - p. 2 - Walkthrough - Resistance 3 - Game Guide and Walkthrough](/resistance3/gfx/word/1853089671.jpg) |
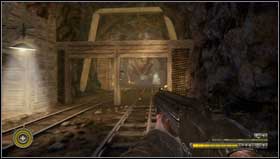
When you go back the beast will attack you [1]. Get to the narrow tunnel on the left quickly. The beast will attack the entrance you've just used. Go to the other one and run through the main tunnel to the next narrow one on the right [2].
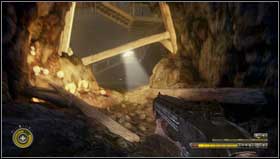 | 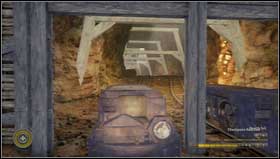 |
Remember that the beast is busy so you can run through the tracks to the next cave. When you leave it run along the tunnel. You'll enter the staircase [1]. You need to get at its top before the beast will destroy the stairs. Then run towards the wagons [2] and jump into one of them.
- Resistance 3 Game Guide & Walkthrough
- Resistance 3: Walkthrough
- Resistance 3: Chapter 1
- Resistance 3: Chapter 2
- Resistance 3: Chapter 3
- Resistance 3: Chapter 4
- Resistance 3: Chapter 5 - p. 1
- Resistance 3: Chapter 5 - p. 2
- Resistance 3: Chapter 6 - p. 1
- Resistance 3: Chapter 6 - p. 2
- Resistance 3: Chapter 6 - p. 3
- Resistance 3: Chapter 6 - p. 4
- Resistance 3: Chapter 7 - p. 1
- Resistance 3: Chapter 7 - p. 2
- Resistance 3: Chapter 8
- Resistance 3: Chapter 9 - p. 1
- Resistance 3: Chapter 9 - p. 2
- Resistance 3: Chapter 10 - p. 1
- Resistance 3: Chapter 10 - p. 2
- Resistance 3: Chapter 11 - p. 1
- Resistance 3: Chapter 11 - p. 2
- Resistance 3: Chapter 11 - p. 3
- Resistance 3: Chapter 12 - p. 1
- Resistance 3: Chapter 12 - p. 2
- Resistance 3: Chapter 12 - p. 3
- Resistance 3: Chapter 13
- Resistance 3: Chapter 14
- Resistance 3: Chapter 15 - p. 1
- Resistance 3: Chapter 15 - p. 2
- Resistance 3: Chapter 15 - p. 3
- Resistance 3: Chapter 16 - p. 1
- Resistance 3: Chapter 16 - p. 2
- Resistance 3: Chapter 17 - p. 1
- Resistance 3: Chapter 17 - p. 2
- Resistance 3: Chapter 18 - p. 1
- Resistance 3: Chapter 18 - p. 2
- Resistance 3: Chapter 19 - p. 1
- Resistance 3: Chapter 19 - p. 2
- Resistance 3: Chapter 20
- Resistance 3: Walkthrough
You are not permitted to copy any image, text or info from this page. This site is not associated with and/or endorsed by the developers and the publishers. All logos and images are copyrighted by their respective owners.
Copyright © 2000 - 2025 Webedia Polska SA for gamepressure.com, unofficial game guides, walkthroughs, secrets, game tips, maps & strategies for top games.
