Walkthrough - Chapter 7
 |  |
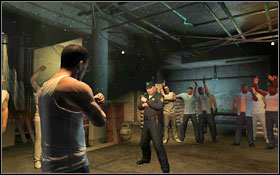
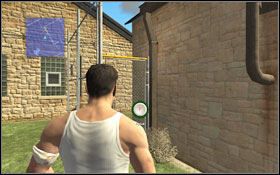
You will learn that the place in Scofield's cell is for sale. Go speak with Geary for more info. The price is considerably high - $500. Head over to Mr. King so that he can arrange you a fight for this amount. The only enemy priced so high is Bellick. If you've built up your character to the maximum, the fight shouldn't be hard #1. Unfortunately you won't get your payment, so the only way is to sneak into the office and take what's yours. Firstly head to the Brigade's garden #2.
 |  |
Open the door to the warehouse #1 while making sure the guard doesn't spot you. Change your clothes and sneak out of the yard #2.
 |  |
Jump down and go past the warehouse keeper #1. Wait for the guard and the warehouse keeper to finish talking and go into the guards' room #2.
 |  |
Once inside, break into Bellick's locker #1 and take the money he owes you. Return to the garden, turn right and then go into a narrow path. You will reach a warehouse keeper standing by a forklift #2. As he goes away, use the forklift to climb onto the wall.
 |  |
Jump down and head to the warehouse to return the clothes. Get out through the rear exit right behind the guard and jump through the fence onto the yard. Get to Geary and give him the money #1. Having access to Scofield's cell, all that's left now it to steal a guard's uniform from the laundry. Head towards it #2.
 |  |
Since you've lost the ID card, you have to get yourself a false one in order to get into the laundry. Sneak behind one of the guards #1 and leave through the other side of the room. Open the back door leading to the laundry #2 and take the ID from the board.
 |  |
Jump over the fence. You have to stay cautious, as one of the guards is searching the terrain using binoculars. While he's taking a break, slide under the car #1 and then get in through the door. Use the pipe by the ceiling #2 to get behind the fence.
 |  |
Turn off the radio to draw the guard's attention and sneak by to the yard. Now you have to obtain a photo. Head to the post office, wait hidden near the door until the guard approaches and turns back and then open the lock #1. Go up the stairs while keeping an eye on the camera #2. Quickly go through the door while it's directed towards the other side.
 |  |
Around the middle of the passage you will find a pipe by the ceiling - use it to cross to the other side. Go down the ladder, open the door leading to the empty room #1 and enter it to find a fuse box. Once the lights are out and the guard moves, exit the room. Jump to the other side from behind the boxes #2 and climb up the ladder.
 |  |
Return to the other side using the pipe. You have to get to the large fan - keep an eye on the guard who lightens our only path #1. Once in the second part of the warehouse, jump down onto a platform and then use the pipe to get to the other side. Go down the stairs and through the gate. Jump from cover to cover to get past the warehouse keepers unnoticed #2.
 |  |
Jump onto the roof #1 and exit through the window. Move onto the second building. Once more you have to keep an eye on a guard watching the terrain with binoculars #2.
 |  |
Slide down the pipe to the ground and jump over the fence, behind which you will find the entrance to the boiler room #1. Once inside turn right and don't climb anywhere. Pass by the cleaner #2 and turn the valve to stop the steam.
 |  |
Slowly go pass the mechanic #1. Eventually you will reach your ID #2.
 |  |
Go back following the same path. Watch out for a mechanic lurking around past the first turn. Wait until he asks another one about the numbers of a machine and then sneak past them #1. Once more go pass the cleaner, this time climbing onto the higher level. Go through the door and exit outside #2.
 |  |
Sneak beneath the car and come out on its other side. Use the forklift #1 to climb onto the wall and jump down to the Brigade's yard. You will be noticed by Charles, who will decide to help you and lure the guards' attention. Hide from doctor Tancredi and return to the prison yard as she passes by #2.
 |  |
Head to the laundry - now you can enter it freely. Take the clothes #1 and leave the building. Take the laundry to the kitchen, where a guard will take it from you. Follow him to regain the guard's uniform. Open the closed door #2.
 |  |
Go forward all the time and you will come across one of the cooks #1 walking amongst the pallets. After going through the door, you can choose one of two paths - I'd recommend going left. Wait for the camera to turn and disable it. Go through the next door, into the kitchen. Very slowly sneak by the cooks' posts #2.
 |  |
There's an additional guard by the laundry, but luckily he's just staring in one direction. Once the cook walks away from your position, get behind the guard #1. Wait for the cook to return to his position and take the uniform. You can now exit through the double door to the left of the guard #2.
 |  |
Turn left in the corridor and open the door visible at the end #1. The lock has numerous pins and additionally there's a guard approaching, so you must be fast about it. If you can't make it in time, hide inside a locker and then follow the guard. In the next room he will sit down on a chair, with his back turned towards you. Drop the uniform into the sewer. Return to the main hall - this time a cleaner is there. Sneak by him by moving between the columns and constantly staying hidden #2.
 |  |
Wait for one of the cooks to leave the kitchen. Use the boxes #1 to sneak by another worker undetected. There are two cameras before you. You can pass by the first one while it's turned right or just run towards it disable it. As for the second one, wait until it's not facing the door. In the warehouse you will come across a cook. Follow him as he goes to the other side and go through the door #2.
 |  |
Leave the cell, jump down and then use the pipe #1. Wait for the guard to take a look around before going through the gate. Move on and use the pipes on the wall to pass above the guard #2.
 |  |
Cut off the power to avoid getting electrocuted. Unscrew the screws slowly so that you don't alarm the guard. Go through the door, turn right and go down the stairs. You will reach a hole in the wall covered with a locker #1. Push it aside and go through. Go forward all the time until you reach a dead end - turn the valve and use the pipe to get through the small window #2.
 |  |
Look out for the steam while hanging from the next horizontal ladder #1. Jump onto the platform and then take the ladder outside. Pass by the guard and searchlights onto the drainpipe in the corner #2.
 |  |
Climb to the roof and approach the windows. Take the further, covered ones. Climb up the mouldings and then move right, to the next covered window #1. Keep an eye on the searchlights. After getting to the top, run across to the other side and climb down. Once again look out for the searchlights and which window you choose - take only the covered ones #2.
 |  |
You have to get to the other side. Running is probably wiser than sneaking, as you have to avoid the searchlights. You can run along the middle #1. After getting to the rower climb it and go down to the ground on the other side #2. Watch out for Bellick.
 |  |
Hide behind the containers and once the guards turns, head towards the next building while avoiding the searchlights #1. The door to the administration is guarded by a camera #2.
 |  |
Unfortunately the door is locked; you have to open it in time before the guard arrives #1. Inside there are two cameras and two guards to pass by #2.
 |  |
Sneak right below the first camera #1, meanwhile one of the guards will go down into the room and sit of the chair. Once the camera is facing the opposite direction, jump by the entrance or pass beneath the camera. Either way, you'll end up in the archive room #2.
 |  |
Go out to the corridor and turn right towards the exit. You have a large section to pass. First of all, look out for the searchlights. Follow the guards and jump over the fence #1. Move on and hide behind the container on the left #2. Once the guard passes by, go behind the small building on the left.
 |  |
You will find a drainpipe right by the door #1, use it to the other side. Approach the drain, where you will destroy all the evidence that the prison had against you #2.
You are not permitted to copy any image, text or info from this page. This site is not associated with and/or endorsed by the Koch Media or Zootfly. All logos and images are copyrighted by their respective owners.
Copyright © 2000 - 2025 Webedia Polska SA for gamepressure.com, unofficial game guides, walkthroughs, secrets, game tips, maps & strategies for top games.
