Prey 2006: The Complex
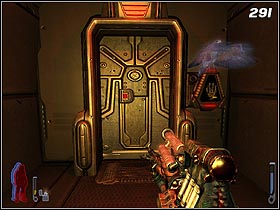
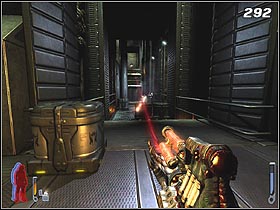
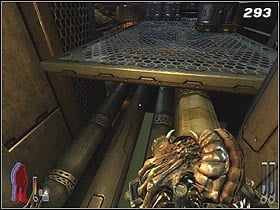
At the first junction go left (there's some ammo on the right, so if you need it, just go for it) and open the door (#291). At the end of the chamber there're a few hunters, who'll try to snipe you (#292). Get rid of the problem and continue on. At the end turn around and find a way down the pipes (#293).
 |  |
 |  |
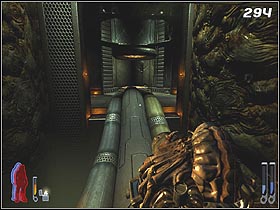
Go forth and a few steps further turn left, to get to other pipes (#294). You'll end up in a room with a portal in it. You can't reach it right now, so turn left (if you decide to go through the right door, you'll have to fight some technicians, but in return you'll get some ammo and a health regeneration spot for you to use).
Wall walk (#295) up and go forth until you see a barely visible sun on the right wall (#296). There's an ammo locker here that you can reach by spirit walking.
 |  |
 |  |
After a short trip you'll find yourself in a room protected by motion sensors (#297). Spirit walk to find a control panel (#298) that'll turn off the security systems. Return to the Indian's body and head further.
Go forth, eliminating the enemies. In a huge hall (#299) you'll have to handle some hunters, who'll try to hide behind the crates and throw living grenades towards you. When you're done, run towards the edge of the platform and jump down (#300). Stand on the force field and wait for the machinery to place a peculiar box in front of you.
 |  |
When it's ready, the force field will disappear and you will fall inside the box. Escaping the trap can be quite troublesome, so let's do this in detail. Look around first. There's a grav-switch on each wall of the box. If you shoot it, you'll be attached to the surface it's on.
 |  |
If you haven't changed the position after being trapped, you'll notice a small, glowing spot on the floor (#301). You'll have to do something about it. You have to guide it along the box's walls - it changes its position each time you switch gravity. When you make the right move, you'll hear a sound confirming it and the element will leave a glowing trail behind it. It's hit or miss.
When you manage to guide the element in a proper way, you'll be able to go back to a wall walk (#303). Go further, dealing with all the hunters around.
 |  |
After a long walk you'll be somewhere around where you first started. Jump down the pipes and once again go below the pipe platform. At the first junction go left. You'll notice a pillar of light in the next room (#304). Enter it to be teleported to the other part of the ship.
 |  |
After leaving the portal, you'll have to fight off some annoying spiders (#305). Don't take too long, just charge up your energy gun using one of the batteries around. Its projectiles will deal with the enemies quickly. Before you leave this place, you'll have to fight some flying enemies as well. Destroy them and use the portal visible nearby (#306).
 |  |
Push the button (#307) and notice that the platforms actually form a bridge across the room. The problem is that they immediately return to their original positions. Approach the edge and spirit walk. Push the button once again and immediately return to your body. When the two platform meet a the center (#308), jump from one to another and wait patiently until you're delivered where you want to be.
 |  |
Kill the enemies and go through the door. In the next room you'll see a large force field (#309) that cuts you off from the way out. Spirit walk to push the button (#310) that alters the gravity. Now you have to be very quick.
There are two boxes in this room. Move the smaller one towards the tunnel on the other side of the room, thus avoiding the force field. In a moment gravity will change once again - push both boxes towards the wall (#311) and use them as stairs.
 |  |
After a short walk you'll find yourself in a labyrinth. To get to the other side, first go left, then right, right, then left. Use the door, kill all the monsters around and be on your way.
 |  |
In the next room push the button to change the gravity (#313). On one of the walls you'll see moving, metal elements (#314). Enter them and wait to be delivered to the lower level. The wall walk here (#315) will lead you to a portal.
 |  |
 |  |
In a long corridor you'll have to deal with the flying enemies. When your opponents are dead, move the egg (#316) towards the platform at the back of the room, and then destroy it. You'll get rid of the green ooze that blocked the platforms here. Head down (#317) and push the grav-switch. Use the bridge in order to get to the next gate (#318).
 |  |
 |  |
You'll reach a room in which you'll find shuttle landing sites (#319). Activate one of the ships and destroy the monsters (#320) that occupy the surrounding platforms (grab those spiders and throw them into the abyss). Land on the platform with a hunter on it and kill it (#321). Behind the door there's a portal (#322) that will let you leave the complex.
- Prey (2006) Game Guide & Walkthrough
- Prey 2006: Walkthrough
- Prey 2006: Last Call
- Prey 2006: Escape Velocity
- Prey 2006: Downward Spiral
- Prey 2006: Rites of Passage
- Prey 2006: Second Chances
- Prey 2006: All Fall Down
- Prey 2006: Crash Landing
- Prey 2006: Sacrifices
- Prey 2006: There are Others
- Prey 2006: Guiding Fires
- Prey 2006: The Old Tribes
- Prey 2006: Hidden Agenda
- Prey 2006: Jen
- Prey 2006: The Dark Harvest
- Prey 2006: Following Her
- Prey 2006: The Complex
- Prey 2006: Ascent
- Prey 2006: Center of Gravity
- Prey 2006: Resolutions
- Prey 2006: Oath of Vengeance
- Prey 2006: Facing the Enemy
- Prey 2006: Mother's Embrace
- Prey 2006: Walkthrough
You are not permitted to copy any image, text or info from this page. This site is not associated with and/or endorsed by the developers and the publishers. All logos and images are copyrighted by their respective owners.
Copyright © 2000 - 2025 Webedia Polska SA for gamepressure.com, unofficial game guides, walkthroughs, secrets, game tips, maps & strategies for top games.
