Diablo 3: Farming Boss
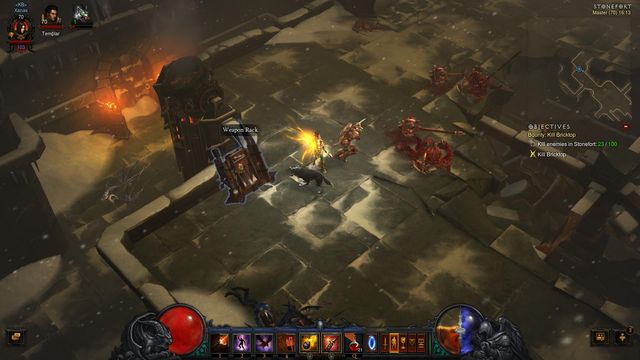
Farming of legendary items
Of course, there are no better, or worse, spots where to farm legendary items. Still, there are places where you are more likely to encounter larger groups of opponents. The items can be quickly obtained in small locations and small locations, where there are many monsters. This prevents the situation, in which you run across the entire map and you have to fight single opponents and a larger group appears only occasionally. My favorite places to farm items are:
Act I
Festering Woods - a small location with a decent amount of monsters and at least 2-3 elite packs. What is more, there are also 2 crypts here, where you can encounter additional elite packs, as well as shrines. Another benefit of this location are numerous quests and events, which will reward you with a lot of experience points.
Northern Highlands - this location is divided into two parts. Each one of them has at least 3-4 elite packs, as well as a possibility of finding a shrine. What is more, there are numerous chests, boxes and other destructible elements of environment which can be destroyed to find a legendary item inside. Cursed Chests are a common sight - you can activate them to start a quick event, which will reward you with a lot of experience points and loot. You can transit from Northern Highlands directly into Leoric's Mansion, where an additional elite pack, as well as a shrine, awaits.
Weeping Hollow - a relatively small place with high mob intensity. The monsters are encountered in large groups, so it's easier to eliminate them. What is more, you can also find a Cursed Chest, or get inside a Scavenger Narrow - on the second level of that cave you can find a Resplendent Chest! Another benefit of this location is the nearby Cemetery, with 3 Defiled Crypts. Each one of them hold at least 1 elite mob pack, in addition to massive amounts of containers.
Act II
Dalgur's Oasis - a relatively large location, holding massive amounts of mobs and well above 10 elite mob packs! What is more, you will frequently stumble upon chests, goblins, Cursed Chests and events here. Another benefit of Dalgur's Oasis is the possibility to kill a Keywarden, as well as the access to two tombs - Tomb of Khan Dahab and Sandar's Tomb. You can increase the amount of elite monsters by activating numerous shrines while wearing Nemesis Bracers.
Act III
Keep Depths (levels 1 to 3) - one of the best places, with insane amounts of easy to kill mobs. What is more, given a relatively small size of it, there's a huge amount of elite mobs here (well over 10) and unique champions. Your drop will be additionally increased by numerous chests and goblins, who can be frequently found here. By selecting this area to farm, you should stick to one rule: begin your journey on the 1st level and run around it until you find an entrance leading to a lower level. Keep Depths are like a maze, so it's not worth to clear the whole area - finish your run and start from the very beginning. Keeping up to this rule will save a lot of time, and, as we all know time = money.
Bridge of Korsik - another interesting place. You should start your journey from a Waypoint (Bridge of Korsik) and scan around the surrounding area, which, usually, holds some elite mob packs (from 3 to 5). What is more, you can stumble upon Barracks and/or various caves, where you will be able to find a Resplendent Chest. After finishing this location, you should transit to Rakkis Crossing - another pleasant place, as you will be running through a straight, narrow corridor. You will stumble upon additional elite mob packs and/or Cursed Chests here. If it's open, you should always enter Bridge Stores, which ALWAYS hold a single elite mob pack.
It should be noted, that each and every mentioned location in Act III holds (almost always) an act-specific task, which can be done for additional, huge experience bonus.
Nephalem Rifts
Nephalem Rifts are the most popular farming places at the moment. They can be done swiftly and they offer a huge elite mob pack intensity. What is more, your legendary item drop chance is increased while being inside a Rift (compared to "normal" locations). At the end of each Nephalem Rift (after filling Rift's progress bar) you will have to deal with a Nephalem Guardian, who has a relatively high chance to drop a legendary item upon death.
The following table represents the percentage bonus to legendary item drop chances in Nephalem Rifts and outside of them. Remember, that it's only a bonus, and the overall chance for a legendary item drop is the second value. Those values can change in the future. The table is updated to the February 2015 version of the game.
Difficulty level | Outside of the Rift (bonus percentage/ general chance for the drop) | The Rift (bonus percentage/ general chance for the drop) |
Normal - Master | 0% = 1% | 25% = 1.25% |
Torment 1 | 15% = 1.15% | 44% = 1.44% |
Torment 2 | 32% = 1.32% | 65% = 1.65% |
Torment 3 | 52% = 1.52% | 90% = 1.90% |
Torment 4 | 75% = 1.75% | 119% = 2.19% |
Torment 5 | 101% = 2.01% | 151% = 2.51% |
Torment 6 | 131% = 2.31% | 189% = 2.89% |
Nephalem Rifts +tasks
You select a game with an accurate difficulty level, that is the one in which you will be able to execute orders without too much trouble. Familiarize yourself with tasks available in the chosen act and decide if they suit you or not. Start with using the Keystone of Trials to get a keystone to Greater Rift.
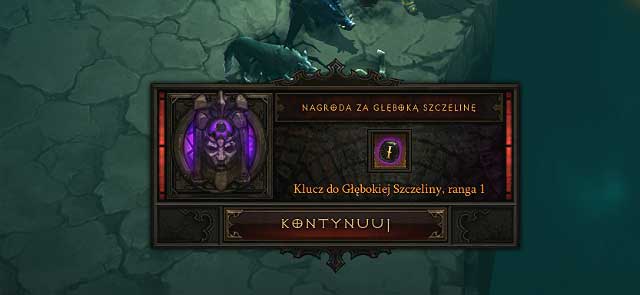
Try to avoid as many fights as possible to complete the trial within the first wave of the monsters and obtain the Greater Rift Keystone rank 1. Having talked to Orek in the town, you can open the Greater Rift with the keystone.

Having entered the Rift, you've got 15 minutes to complete it. It's not a big challenge so don't worry - in fact, it will go smoothly. The important thing is to OMIT the first fragment of the map (generally the first group of elite adversaries). You will need them a bit later.

Remember to finalize the Rift's progress at about 95%!! This is of great importance so it is better not to overlook it! Then check how much time is left until the completion of the Rift. In the picture of a screen above you can see that there are 12 minutes 43 seconds left. Your aim is to complete the Rift in not less than 4 minutes 30 seconds to upgrade the Rift Keystone to an only ONE LEVEL higher keystone and that is level 2!! If you complete the Rift too soon, the keystone level will be much higher. Count time to make sure it's 4:30 and take care of completing tasks.
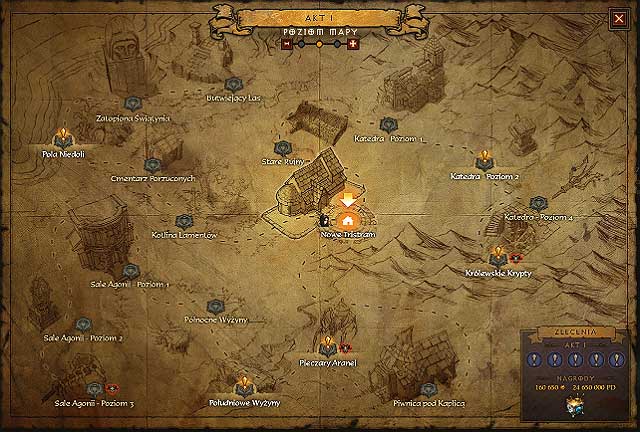
A couple of minutes should be enough to complete not less than about 2 to 3 tasks but pay attention not to overlook the right moment to come back to the Rift opened before! When the left time runs out, come back to the Rift by the opened portal in the town.
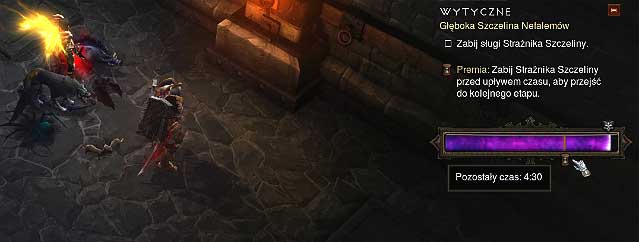
Now the opponents left at the beginning will come in handy. Kill them to complete the event and evoke a Boss. After killing him, collect loot and upgrade the keystone to next level.
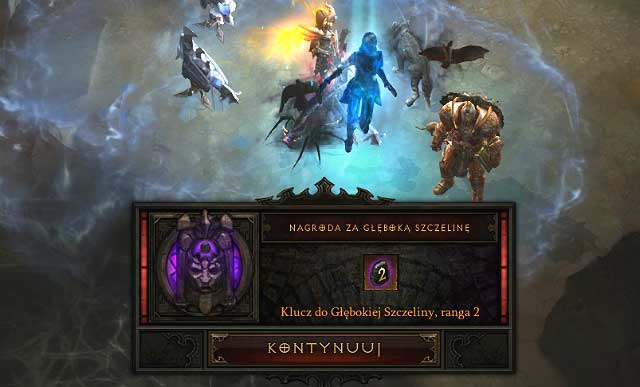
You can now complete the event, open the next Greater Rift level 2 and pursue the scheme until you complete all tasks you want within the Acts chosen by you. This is a very efficient way of farming - you collect legendary items, Rift Keystones, Blood Shards and, what is more, you get a chance to obtain exclusive items that you want from Horadric Caches.
Farming while completing tasks
You can also farm legendary items by joining, or creating a game in Adventure Mode. Each player teleports in a specific place to complete a mission associated with it. After each mission is complete, you can simply teleport to any location which held those missions and scan around the map to see if a mob dropped a legendary item. Despite the fact that a player wasn't in the area when it was cleared off mobs, the game still selected a random drop for him/her for the mere fact of being in the same game as the player clearing the area. This way, not only that each player gets huge amount of experience from act-associated missions, a Horadric Cache, which hold an act-specific legendary item, he/she also has a chance for a legendary item drop.
Goblin Farming
During your exploration, you will surely stumble upon small creatures called Goblins, lugging a bag of loot. After attacking a goblin, he will, after a brief moment, start running in a random direction - the further away from you, the better. If you won't kill him quickly enough, he will open a portal and escape, taking his precious bag of loot with him, leaving you empty handed. Goblin Farming is extremely profitable, as they have a high chance of dropping a legendary item, not to mention huge amounts of hold, mats and gems they drop upon death. There are two kinds of Goblins in the game:
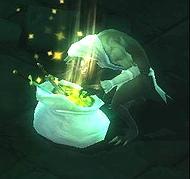 | Goblin - he will appear randomly in even the most bizarre places, inside of crypts, dungeons, or even in an open area. During your exploration you should check each and every corner, as there's a chance that a Goblin is lurking there. Additionally, you can find those little creatures inside Nephalem Rifts - if you stumble upon one during your trip there, there's still a chance to find another (or more of them) inside. |
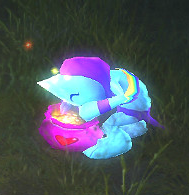 | Rainbow Goblin - this type of Goblin is considerably more rare, but upon death he will ALWAYS open a portal leading to Whimsydale. Aside from getting an epilepsy attack from being inside this colorful location, you can stumble upon several elite packs, with a decent chance for a drop. |
On very rare occasions (>5% chance), after killing a normal Goblin, there's a chance for him to open a portal leading to The Vault (it will appear after a short delay near the corpse of a recently killed Goblin, in the company of the sounds of falling coins).
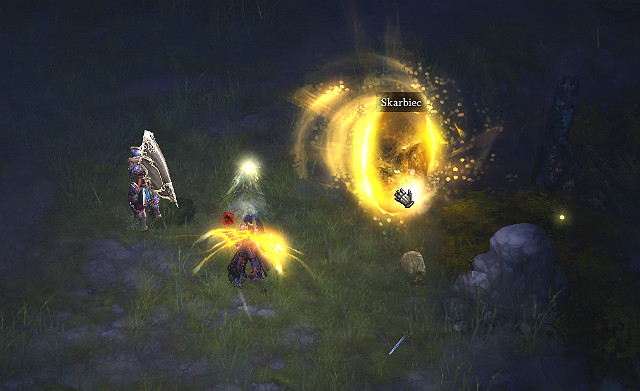
The portal can ONLY be opened while playing the Adventure Mode. You won't be able to open it during the campaign and/or inside of Nephalem Rifts. Increasing the difficulty level does not impact the chance to open a portal as well. This location gives you an opportunity to collect insane amounts of gold, gems, mats and legendary items - you will find more info in the "The Vault" section of this guide.
Where to farm Goblins?
As long as the selection of location for Goblin farming goes, the Northern Higherlands are the best choice! The location is relatively small, you can scan around it fast and it also offers a great deal of chests, shrines and elite mob packs to kill.
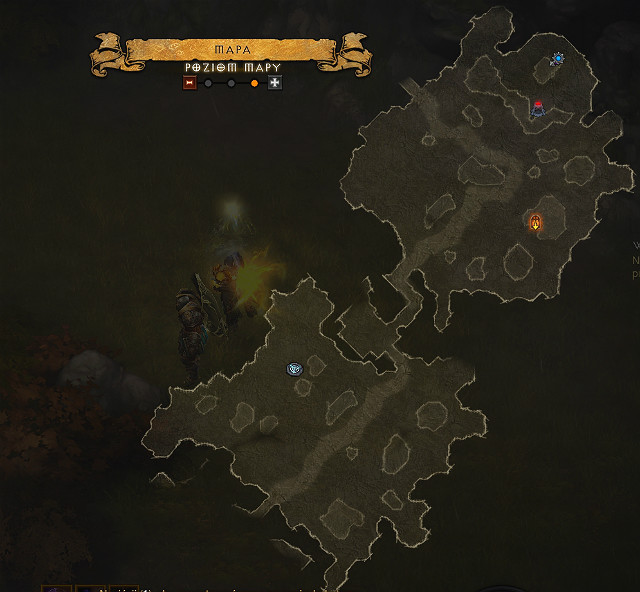
As can be seen on the above screenshot, the location is divided into two smaller parts. You will always start on the lower part. While scanning the area, you should always move according to a specific order to ensure that you won't be leaving an part of the map unchecked. You should first scan around the edges of the map, circle around it and then move to the inside. Goblins tend to hind on the outskirts of the map, and very rarely can they be found out in the open, in the middle of the map. After you've scanned the area, leave the game and repeat the process. There's a goblin in 1/3 of created games, but there's a chance of encountering him a few times in a row as well.
Outfit properly before you start farming
If you made up your mind about the farming location, it's worth to equip adequate items. Finding them may take up some time (you can also buy them from Kadala by using your Blood Shards), but they can fasten the whole process by a great deal. What is needed for an effective farm? Items which increase your chances for a drop, increase the mobility of your character, as well as the abilities allowing you to run across the map more freely. The following items should be at EVERY character disposal:
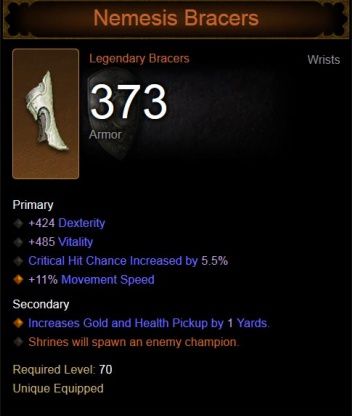 | Nemesis Bracers - bracers which should always be "at hand" (in your inventory, or equipped on your character). Thanks to them, you will be able to summon additional elite champions by using shrines. Not only that you will be getting a buff, you can also drop an interesting item! Remember that they work with shrines only, so activating a life-restoring fountain, or an experience pool won't yield any effect at all. Another important factor is the arrival of the enemy pack - they will appear as soon as you activate the shrine, so be on your guard. |
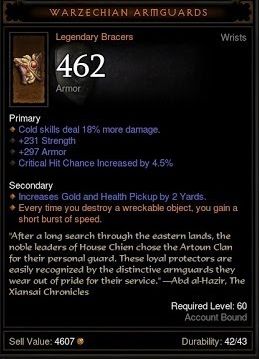 | Warzechian Armguards - those bracers will increase the mobility of your character. Thanks to them, whenever you destroy a wreckable object, you will gain a short movement speed boost. Destroying barrels, chests, tree chunks, etc will now be even more profitable! |
Afterwards, it's a good idea to seek the services of the Blacksmith and create Cain's set. If you are lucky, you will draw out some interesting attributes, and thanks to the set you will gain an additional experience, as well as a chance to find magic items.
Abilities should be chose accordingly to your class, for instance a Wizard can use the Teleport skill, while a Barbarian can use his Sprint skill. Each and every character class has a number of abilities increasing their mobility, allowing them to move around the map quicker and swifter.
Experience Farming
Experience farming can be divided into two categories. The first one is the acquisition of 70th level, while the other is Paragon Level farming, allowing you to further increase the attributes of your character(s).
Level 1-70 farming tips & tricks
- Merchants offer a great deal of various items, but, unfortunately, most of them are of no real use, especially if you don't have abundant amounts of gold at your disposal. It's generally a better idea to save the money and use the items you get from mob drops. However, you shouldn't forget about one fact - after you've reached level 6, you can buy rings with +damage attribute from merchants. Amulet version is available after you've reached level 10. Buying those items will significantly increase the offensive capabilities of your characters.
- If you happen to find a weapon with a socket, insert a RUBY of the best quality you can afford. This gem will significantly increase the weapon damage, increasing the DPS (damage per second) of your character.
- If you happen to find a helm with a socket, insert a RUBY of the best quality you can afford as well. This way you will give your character a huge experience gain boost.
- Try to salvage any unnecessary pieces of equipment. They will come in handy when you decide to use the services of the Blacksmith. Crafted items are way more powerful than those you can find from monster drops (especially on lower levels).
- If you no longer use a socketed item, don't use your gold to remove the previously socketed gem! You can simply salvage it at a Blacksmith, and a gem will be automatically returned to you.
- Your priority should be increasing the primary attribute of your character:
Barbarian - Strength
Wizard - Intelligence
Demon Hunter - Dexterity
Crusader - Strength
Monk - Dexterity
Witch Doctor - Intelligence
This way you will increase the damage output of your character. Another important factor is "Vitality", which will increase the health pool of your character, increasing the survivability in the process. Try to make sure that both of those attributes are on each piece of your equipment.
- Try to select the difficulty level accordingly. Your goal is to kill the mobs as quickly as possible, so you can't afford a situation in which you have to fight a single, white mob for 5 minutes.
Paragon Levels
If you want to maximize your experience points per hour value, you should choose the proper location. The following places are only a recommendations, as each and every player can (and should) find his own best place to level up.
Act I
Quest 6 (The Broken Blade), speak with Alaric part. The game should be created on a normal difficulty, so that you can swiftly activate a checkpoint, from which you will then start your farm. Look for the Crypt of the Ancients in the Festering Woods and as soon as you enter it, you should activate a checkpoint.
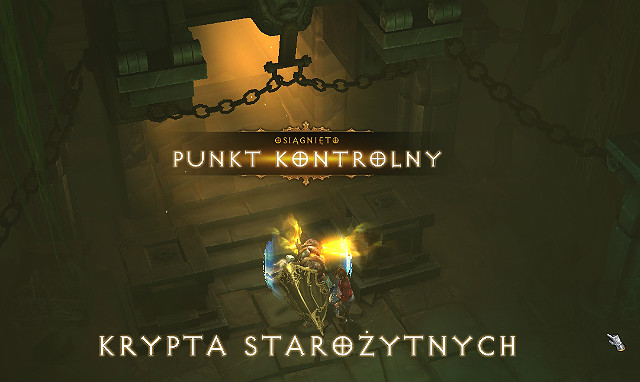
You can now leave the game, increase the difficulty level according to your preferences and continue the game. Use the portal located in the town to swiftly get to the Crypt of the Ancients. It's a rather small location, filled with large amount of mobs, at least 1 elite mob pack and a shrine.
Old Ruins - you can either select a further quest, or do this short run in the Adventure Mode. Teleport to the Old Ruins on the proper difficulty level, which should be selected according to your capabilities.
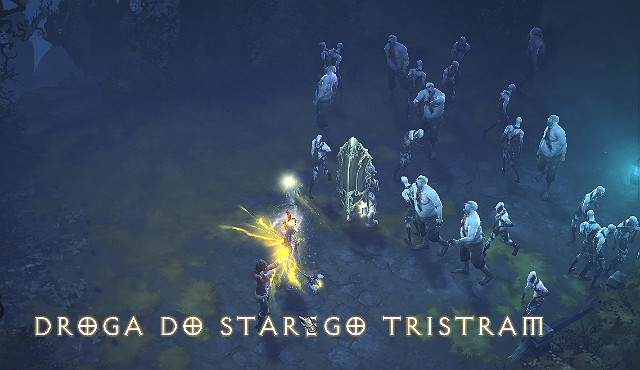
Go to the right until you reach Old Tristram Road. There you should kill a swarm of zombies, get back to the town and repeat the process. Zombies give a decent amount of experience points and are really easy to kill.
Nephalem Rifts
You can also join a game in which other players complete Nephalem Rifts on higher difficulty levels. During your playthrough with other players, you will gain an experience boost. Joint completion of Nephalem Rifts is a quick process, and you can gain huge amounts of experience this way, not to mention a chance for an interesting loot.
Bounties
It's worth to do those short Bounties, in which you don't have to look around for mobs and/or locations around the whole map. The best ones are those which are about killing some of the bosses, like Azmodan, Khul or Mahda, because they are located extremely close to the Waypoint and you don't have to look around the map. Completing a Bounty on Torment difficulty will reward you with a lot of experience points, and some of those bounties are associated with simple events. Doing event-associated Bounties is very profitable, as it gives you the experience for the bounty, the event itself, as well as all the mobs you kill there.
You are not permitted to copy any image, text or info from this page. This site is not associated with and/or endorsed by the developers and the publishers. All logos and images are copyrighted by their respective owners.
Copyright © 2000 - 2026 Webedia Polska SA for gamepressure.com, unofficial game guides, walkthroughs, secrets, game tips, maps & strategies for top games.
