Death Stranding: Controls
On this page of our guide to Death Stranding you will find a full description of all controls. We have prepared separate sets of controls - on foot character controls and vehicle controls. In addition, we have included information on the available controls settings.
- Death Stranding Controls - Walking on foot
- Death Stranding Controls - Vehicles
- Advanced Control Settings
Death Stranding Controls - Walking on foot
 | Movement. |
 | Sprint / Stop. |
 | Look around. |
 | Change the position of the camera - it can be set behind the left or right arm of the hero. |
 | Compass mode - you have to hold the button. |
 | Left hand action - the hero can hold an object in his left hand, grab a backpack with his left hand, aim with a weapon or prepare to throw an item. |
 | Change posture - you can choose between standing or crouching. |
 | Interaction - you often have to hold down the button. |
 | Load Cargo - load an object on the back. |
 | Jump / Climb - you can hold down the button to automatically climb further objects. |
 | Right hand action - hero can hold an item in his right hand, grab a backpack with his right hand, fire a weapon or throw an object. |
| Trying to catch a balance - this is useful when there is a risk of tipping over, for example, as a result of a tilting cargo that you carry or when passing through streams of river. |
 | Single press of the button - Terrain scanner. Hold down the button - Hold your breath (this is helpful when you want to avoid being detected by enemies). |
 | Equipment selection - you need to select the item you are interested in from the drop-down menu. |
 | Item selection - you must select the item you are interested in from the drop-down menu. |
 | Tool/weapon selection - you must select the item you are interested in from the drop-down menu. |
 | Object selection - you must select the object you are interested in from the drop-down menu. |
 | Call / Comment. |
 | Pause / Handcuffs. In the pause menu you will find, among others, a map, inventory, quest log with contract list, and system options. |
Death Stranding Controls - Vehicles
 | Control & drive a vehicle |
 | Afterburner / Speed boost - allows you to move around faster, but uses the battery much faster. |
 | Look around. |
 | Compass mode - you have to hold the button. |
 | Brake / Reverse. |
 | Use or Enter vehicle / Exit or descent from the vehicle. |
 | Brake. |
 | Vehicle jump - not always available and may look different depending on the type of used vehicle. |
 | Accelerate |
 | Area scanner. |
 | Call / Comment. |
 | Pause / Handcuffs. In the pause menu you will find, among others, a map, inventory, quest log with contract list, and system options. |
Advanced Control Settings

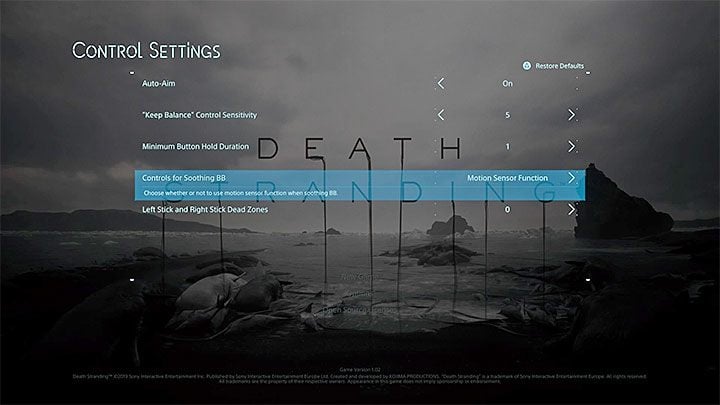
Additional control settings can be found in the Control Settings and Camera Settings menu. The most important of them are the following:
- Auto-Aim - You can use the aiming assistant. It is enabled by default.
- "Keep Balance" Control Sensitivity - You can set how sensitive the game should treat holding down L2 and R2 buttons as an action to regain balance. It is best not to decrease the default value, otherwise the game may trigger other actions related to these buttons more often and as a result you may fall to the ground and damage the transported cargo.
- Minimum Button Hold Duration - this is the amount of time required to register a given action as holding the button instead of pressing it. The default value of 1 is sufficient to distinguish between presses and holds.
- Controls for Soothing BB - you can define how you want to calm BB. By default, the game suggests using motion sensors of your gaming controller (you have to move them alternately up and down), but if for some reason you don't want to use them you can choose to alternatively use R2 to perform this action.
- Left Stick and Right Stick Dead Zones - you can change the parameters of the so-called dead zones for each analog knob. Choose a higher value if you have problems with too high sensitivity or a malfunctioning controller, which for example "pulls" left or right.
- Camera Speed - you can change the sensitivity level of the camera movement separately for the X and Y axes. Additionally, there are separate settings for TPP and FPP views.
- Camera Movement - you can reverse the camera controls separately for the X and Y axes. Additionally, there are separate settings for TPP and FPP views.
- Aim Acceleration / Deceleration - You can set hardware acceleration levels for aiming. The default values of 1 seem to be fine.
You are not permitted to copy any image, text or info from this page. This site is not associated with and/or endorsed by the developers and the publishers. All logos and images are copyrighted by their respective owners.
Copyright © 2000 - 2025 Webedia Polska SA for gamepressure.com, unofficial game guides, walkthroughs, secrets, game tips, maps & strategies for top games.


