Cult of the Lamb: All Bosses
Each crusade ends with a fight against a stronger opponent. On this page of the Cult of the Lamb game guide you will find a list of all bosses, along with tips on how to defeat them. In addition, we have described skirmishes with Bishops and The One Who Waits himself.
On this page of the guide, you can find a list of all bosses that you'll encounter during your adventure with Cult of the Lamb. We also supply practical tips how to fight Bishops effectively.
- Amdusias
- Valefar
- Barbatos
- Leshy (Bishop)
- Gusion
- Eligos
- Zepar
- Heket (Bishop)
- Saleos
- Haven
- Baalzebub
- Kallamar (Bishop)
- Focalor
- Vephar
- Hauras
- Shamura (Bishop)
- Baal (Final Boss Servant)
- Aym (Final Boss Servant)
- The One Who Waits (Final Boss)
Amdusias
Amdusias is the first boss met in Darkwood region. He is not a particularly demanding opponent and has a small number of health points. During the fight, remember to avoid his charge attacks which are signaled by his silhouette lighting up . It's best to focus on reducing Amdusias's health as quickly as possible, while ignoring the minor enemies.
Valefar
Stay mobile at all times during this encounter, as Valefar's multi-directional projectiles can make the battle harder . Also, watch out for the moment when the enemy is signalling his death from above. Another attack involves firing deadly projectiles which are signaled by an exclamation mark appearing over his head. Once you get the cue, quickly move away to the edge of the arena to avoid damage.
Barbatos
Barbatos is the third boss in Darkwood region. This enemy likes to burrow underground, digging tunnels and leaving a trail of spikes that you must avoid.Keep attacking him with Curses, as ranged attacks work best here . When you run out of Fervour, carefully approach the enemy to deal him with a few melee blows, and then move away to a safe distance.
Leshy (Bishop)
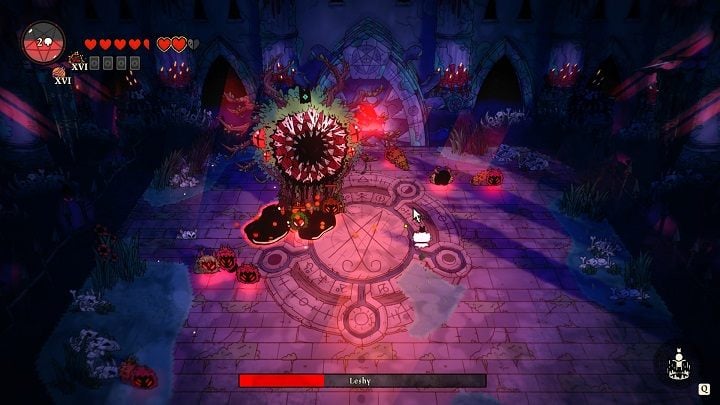
Leshy is the ruler of Darkwood and the first Bishop you will face. Here are some tips on how to beat him :
- Leshy uses many moves identical to the previous bosses in Darkwood, so pay attention to what the enemy is doing at all times.
- They can fire multiple projectiles, but they are easily avoidable. As soon as you notice that Leshy is getting ready to launch a volley, move away to a safe distance to make dodging easier.
- When the enemy's health drops to half, Leshy will start using a new move of jumping up and dropping onto the ground with force. The wounds inflicted this way are serious, so as soon as you see that the opponent is getting ready for this attack, stay away.
- Leshy also often attacks in melee when you get close to him, so always retreat to a safe distance after a few hits.
Gusion
Gusion appears in Anura. The enemy lays eggs that hatch into frogs - if there are too many of them, you may get swarmed by minor opponents. However, it is best to focus on Gusion completely and defeat him as quickly as possible while attacking additional opponenets with AoE curses.
Eligos
The second boss in the Anura area fires insect projectiles that home toward your character. You can destroy incoming projectiles with any attack . The second type of projectile is indestructible, requiring you to be constantly on the move and approach the boss from time to time to deal damage.
Zepar
The fight with Zepar is quite similar to the one with Gusion. The movement patterns of the two bosses are similar, but Zepar has some explosive projectiles up his sleeve that deal AoE damage . However, they can be easily avoided, because, as the bomb lands, the game displays the blast radius.
Heket (Bishop)

Heket is the final enemy in the Anura region. When fighting him, there are a few things that you need to remember:
- Heket often uses AoE attacks, so constant dodging is mandatory in this encounter.
- Every now and then the enemy releases exploding insects. Be sure to avoid them (without attempting to destroy the projectiles)
- When you reduce your opponent's health to 1/3, they will disappear from the board and large toads will appear in his place. You have to eliminate them in order for Bishop to reappear on the arena . There are smaller opponents among them, but you can take care of them easily by using Curses.
Saleos
Saleos is the first boss you'll meet in Anchordeep. Watch out for the spikes he shoots out of the body. This opponent is quite fast and sometimes you may have problems keeping up with him - the way to go is to stay on the move, deal damage and dodge.
Haven
Haven has a troublesome attack in form of fire rings that can only be avoided by performing a dodge at the perfect moment. He often summons minor enemies - kill them as soon as they appear, refocus and attack the boss.
Baalzebub
Baalzebub employs similar tactics as Harborym. As soon as he finishes a series of ranged attacks, quickly jump to him and land a few blows . Blast and Spatter Curses work well here.
Kallamar (Bishop)
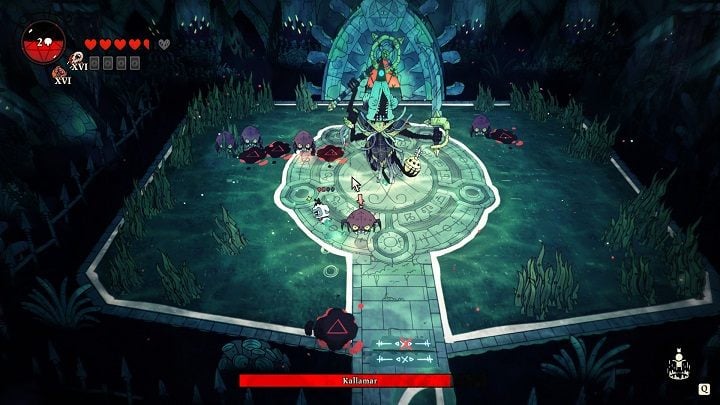
Kallamar is the third Bishop you will face. The fight is quite difficult, so it is worth remembering about a few aspects :
- Kallamar can teleport to anywhere in the arena , so a lot of running will be necessary.
- The enemy often summons lesser opponents - it is a good idea to eliminate them as they appear, because if there are too many of them you may receive unnecessary damage.
- Another attack involves the boss firing a barrage of projectiles, making it easy for you to get lost because of the large number of elements on the screen. To get through this tough spot, apply dodges at all times. As soon as Kallamar fires a large missile, the opponent is idle for a moment, and this is the perfect opportunity to land a few attacks.
- After reducing the enemy's health to half , he will start teleporting more often. He will often appear close to you, so when such an opportunity arises, perform a few attacks and relocate to a safe distance.
Focalor
The first boss in Silk Cradle is Focalor. It's best to use as many Curse attacks as possible and stick with hit-and-run tactics. You need to sense a right moment to strike. Watch out for the charge attack and AoE blasts.
Vephar
Vephar fires projectiles that poison your character, so try to avoid them at all costs. After you land a few melee attacks, immediately retreat, because the boss's body will start to grow spikes . As soon as they disappear, repeat the attack and escape pattern.
Hauras
Hauras is fond of firing projectiles of various range, frequency and speed, so staying on the move is a must. If you stay close to him for too long, you can take severe damage from melee attacks . Make the most of your Curses, then use a series of short blows.
Shamura (Bishop)

Shamura is one of the toughest opponents in the game, so there are a few tips to remember:
- Shamura uses a variety of attacks - from projectiles to melee and jump attacks. Staying on the move is mandatory as it is sometimes difficult to predict where the attack will come from.
- A good method of dealing damage is to dodge when the boss fires an exploding projectile at you, approach the enemy and land a few hits.
- The less health Shamura has , the more frequently he uses various attacks.
- During the fight, use instant activation curses . Thanks to this, you will be able to deal damage quickly.
Baal (Final Boss Servant)
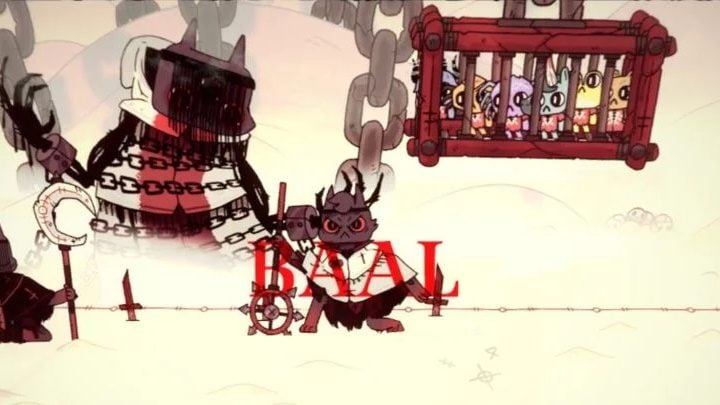
The duel with Baal is not particularly demanding, as the enemy has a limited number of moves. First of all, you need to watch out for his melee combo and spikes that spread to four sides in straight lines, or one that willl home towards your character. All you need to do is dodge at the right moment and return with a few combinations to defeat Baal.
Aym (Final Boss Servant)
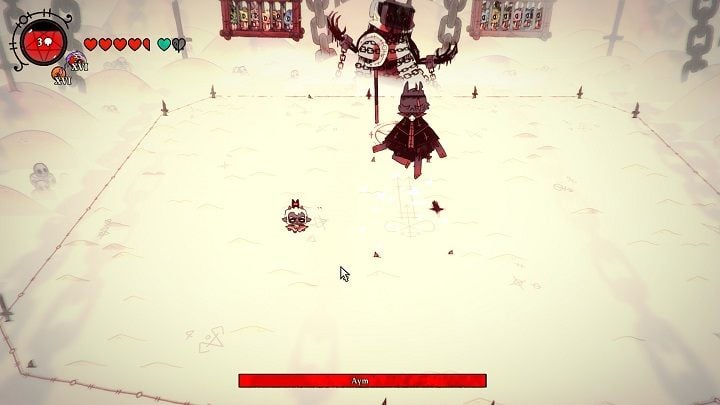
Aym's moveset doesn't differ much from the one of Baal's. This time, spike attacks take the form of three shots in straight lines, and the tracking variant is a bit faster. From time to time, Aym will fire a series of missiles, but avoiding them is easy. A combination of melee attacks and Curses will quickly lead you to victory .
The One Who Waits (Final Boss)

The fight against The One Who Waits is divided into two completely different phases, in which the boss takes different forms and uses different attacks.
Phase 1:
- You can recognize some attacks, as they were used by Baal and Aym . These are spikes fired in your direction - avoiding them is easy.
- Another, much more dangerous attack, is a series of five waves of fireball rings . As soon as you notice that the boss has released the first wave, retreat as far as possible to avoid the danger more easily when the balls disperse a bit. After the last wave, the enemy will teleport and this is a good opportunity to deal a few attacks.
- The One Who Waits also summons four lines of fireballs that swirl around him. When faced with this attack, you must retreat, as poorly coordinated dodges can result in receiving damage from a few attacks at once.
- When an opponent loses half of his health, he will become idle for a while . This is a great opportunity to shower him with a barrage of attacks - use all you have, including Curses, to defeat him.

Phase 2:
- The One Who Waits now takes the form of three eyes that share a life bar. Focus your strikes on the eye that is not currently firing fireballs at you .
- Every now and then one of the eyes will burrow underground , while the other will start firing fireball volleys at you. Dodge, land a few hits, and then back away.
- After destroying one of the eyes, a lot of vertical and horizontal fireball lines fireballs will appear on the arena. You will avoid them by moving between them and using dodges .
- After destroying the second eye, the boss will repeat the attack pattern . You must avoid the fiery lines again for the third eye to appear on the board.
- The third eye attacks faster and more fiercely , but has no new moves. Use the remaining Curse charges and melee attacks, and after a few hits, The One Who Waits will be definitively defeated.
You are not permitted to copy any image, text or info from this page. This site is not associated with and/or endorsed by the developers and the publishers. All logos and images are copyrighted by their respective owners.
Copyright © 2000 - 2026 Webedia Polska SA for gamepressure.com, unofficial game guides, walkthroughs, secrets, game tips, maps & strategies for top games.
