Black Mirror: Riddle the desk in library
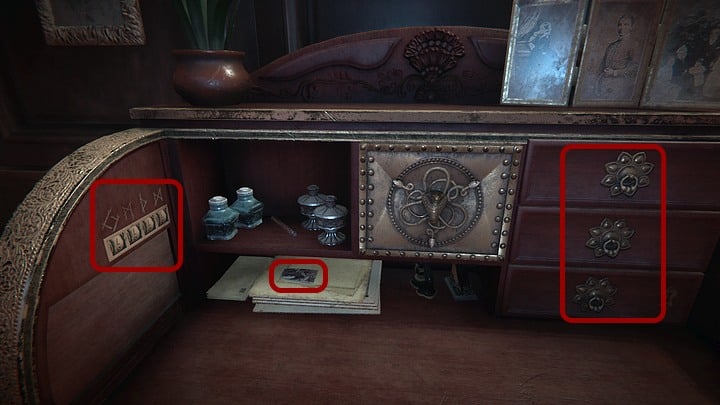
Take a look at the contents of the desk (use the WSAD buttons to move the screen and activate additional points). Visit the pile of letters on your left to pick up additional photograph pieces and search the small drawers on your right. The uppermost one will yield a note with a mysterious code and a letter from David's father, the middle one contains a letter from Dr. Leah Farber (her son's doctor) to Lady Gordon, while the bottom one will turn out to be locked.

Now look at the left side of the desk. You can see some kind of a combination lock - each of the four characters refers to a number seen below. These symbols are runes, going from the left to the right: jera (J), mannaz (M), thurisaz (TH) i dagaz (D).
The letter you've received from John will serve as a source of following equations: J + TH = IV and IX = M + J, while the note from the drawer adds another set: TH + J + TH = V and D - M = II
Now it's time for some simple calculi, for example:
- TH + J + TH = 5, gives us J + 2TH = 5 and -J - 2TH = -5. further along the way (after multiplying each element by -1)
Continue by creating a set of equations:
- -J - 2TH = -5
- J + TH = 4
Multiply both equations to receive -1TH = -1 which gives us TH = 1.
- If TH = 1, J = 3, as J + TH = 4 (J + 1 = 4)
- If J = 3, M = 6, as M + J = 9 (M + 3 = 9)
- If M = 6, D = 8, as D - M = 2 (D - 6 = 2)
Time to input the numbers (3, 6, 1, 8) and unlock the compartment found below which contains a key. The key can be used to unlock the bottom drawer - it won't open just yet, but the action will serve as the first step in your quest to access the ornated compartment found in the central part of the desk.

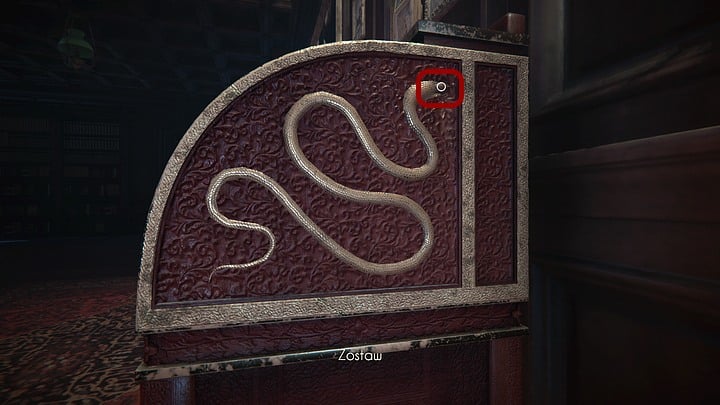
Take a look at the right side of the desk - you'll encounter a carved likeness of a snake. Click on the interactive point found on its head.

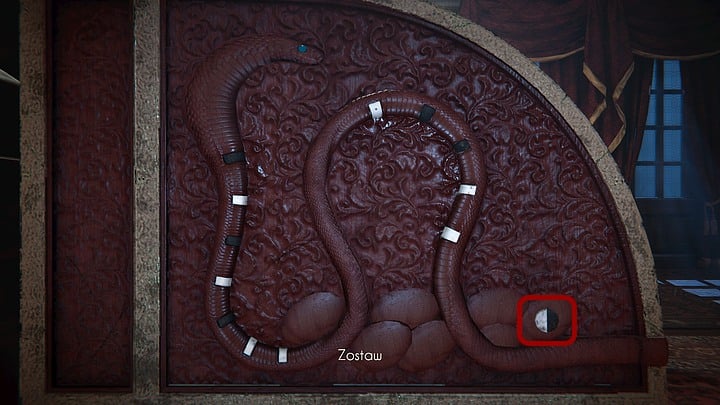
Move to the left side of the desk to encounter a second snake with an intricate set of white and black marks on its body. Your task is to follow the pattern and choose either the white or the black side of a single button found in the rightmost part of the carving. The order (including the final part of the body found inside the desk) is as follows:
- black, white, black, white, black, white, white, white, black, black, white, white, black, black, white, black. (you can stop pressing buttons and check the bars - if David makes a comment during this process, it means that you did something wrong and you have to start all over again).
The unlocked safe contains a key to the master study and a new letter from David's father. Moreover, take a look at the newly found key to learn that you can rotate the bits found in the bottom part of the key.
You are not permitted to copy any image, text or info from this page. This site is not associated with and/or endorsed by the developers and the publishers. All logos and images are copyrighted by their respective owners.
Copyright © 2000 - 2025 Webedia Polska SA for gamepressure.com, unofficial game guides, walkthroughs, secrets, game tips, maps & strategies for top games.
