Black Mirror: Find Andrew
Having found yourself in the great hall under the castle, you'll quickly learn that the floor only appears to be solid, and you need to tread very carefully. As Leah stops David, slowly move to the left (I wouldn't listen to her suggestion to take a step back, because the game's controls act up at that section and the character will take a step forward instead if you do as she tells you). When David loses balance, try to keep the glowing point inside the circle until its outline is filled with white. If you fail to do it, the character will die. The situation will repeat every time you stray from the correct path.
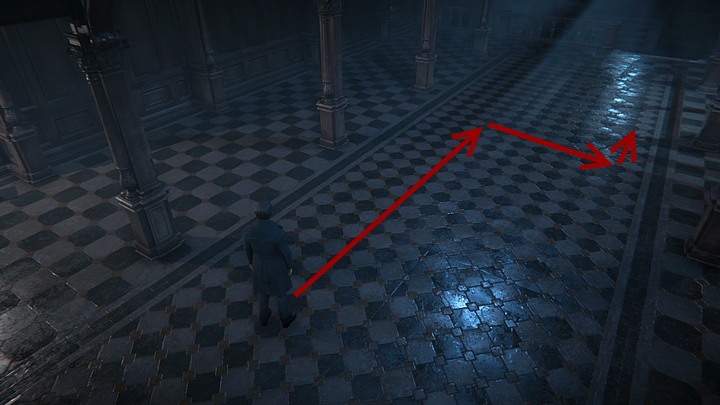
Go straight ahead, keeping to the left side along the columns. Once you slowly reach the point where the light shines on the right side of the floor, make a 90 degrees turn to the right (without going past the columns), then another 90 degrees turn, this time to the left, and slowly move ahead.
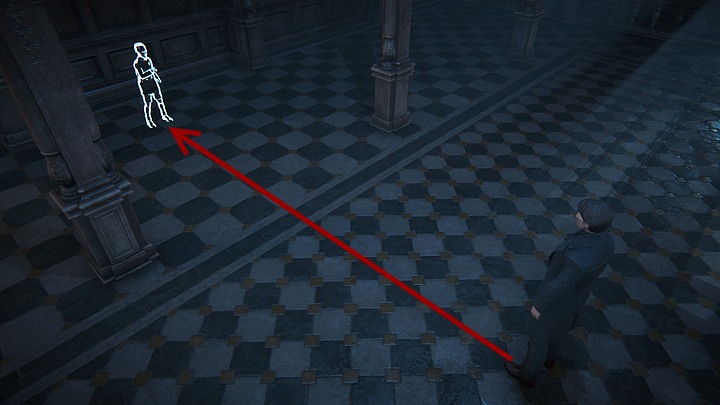
At that point, a ghost of Johnny will appear and beckon David. Imagine a straight line leading from David's position to John and follow it, very slowly, as you may still die, moving towards the boy (to the left).
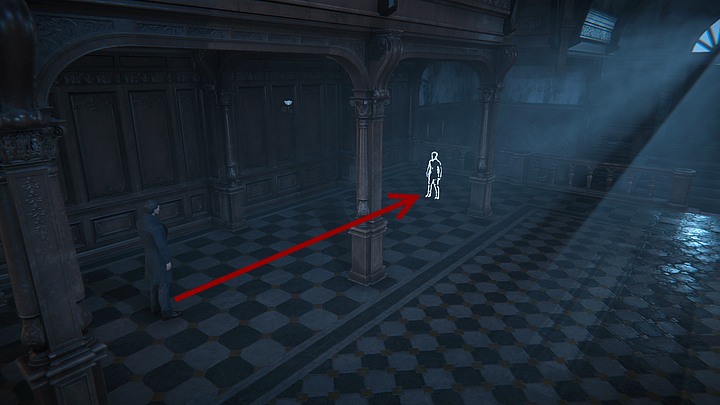
Then, the boy will appear somewhat further (once again between the columns), so go to him, slowly, trying to keep to a straight line (use the squares on the floor to picture it).
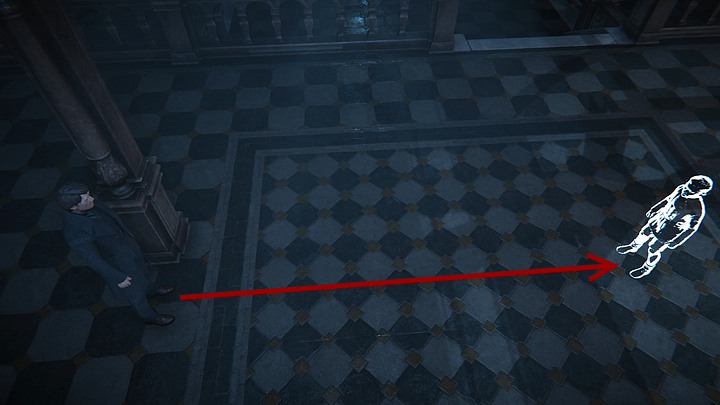
Finally, Johnny will appear on the right, once again prompting you to approach him, so take another straight line to his position.
Eventually, you'll find yourself in a place where there's a large stone gate carved in rock. You may try pushing it open, but it will take a bit more than that. Head for one of the passages visible beneath the spiral stairs. I'd suggest starting with the one on the left.
You'll find yourself in a corridor, in which one of the walls becomes the floor. Take a look at the round, cloth-covered table on the "wall" to the left. Notice that its reflection in the mirror (visible in front of you) shows a figurine standing on it. Exit the corridor and reenter the corridor to the left. Now the ceiling will become the floor, and the table will be positioned above and to the right.
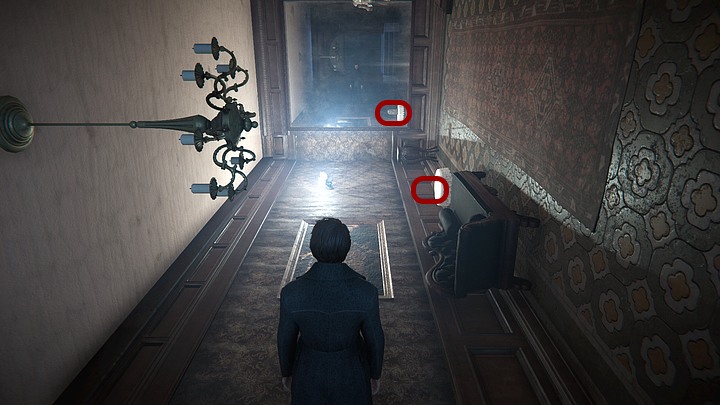
Leave the corridor and reenter it for a second time. This time, the wall with the table (on the right) will become the floor. Approach it and collect the figurine, which may not be there in reality, but David's reflection in the mirror will be able to grab it. Once the character approaches the mirror, click quickly the left mouse button until the outline of the circle is filled with white to take the figurine from the character's reflection.
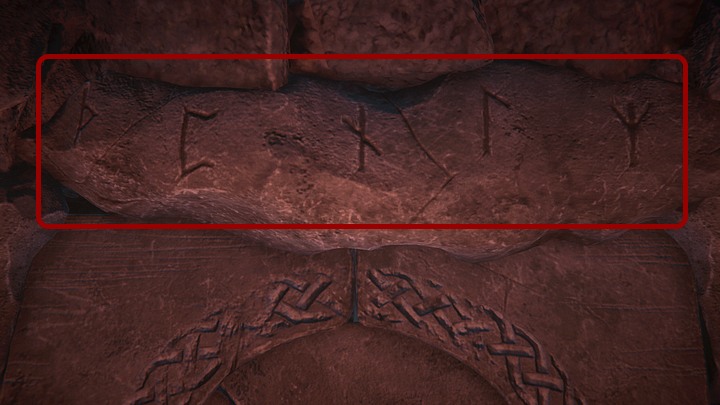
David will automatically bring the figurine to the stone gate and put it on the stand to the left. Notice the runes carved above the gate - the same runes can be found on the tablet that you have in your inventory (only without the first and the last rune).
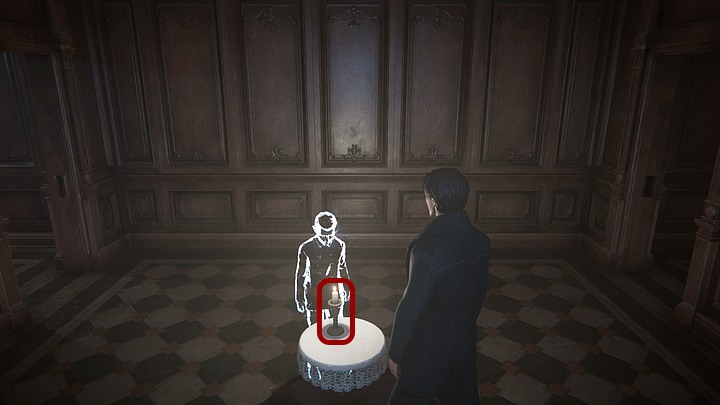
Now, head for the passage to the right. You'll find yourself in a room with several doors - your task is to reach the room in which Johnny waits for David. The puzzle is randomly generated, so you'll simply have to search for the right door yourself, but it shouldn't take you long to reach a room with a small, round, cloth-covered table and a candle. And it's the candleholder with a burning candle that you need - after David picks it up, he'll start seeing runes on the walls.
The order of the runes is the same as above the stone gate and on the tablet (except for the first and the last one). Not that it has any big meaning in this case, because on most door there will be only a single rune, and your job is to simply go past it.

Only after you enter the room with the runes laguz (scythe) and algiz (tree) you will need to follow the correct order depicted on the tablet or the stone gate, which means: first go through the door with the scythe rune, then through the door on the right, with the tree rune.
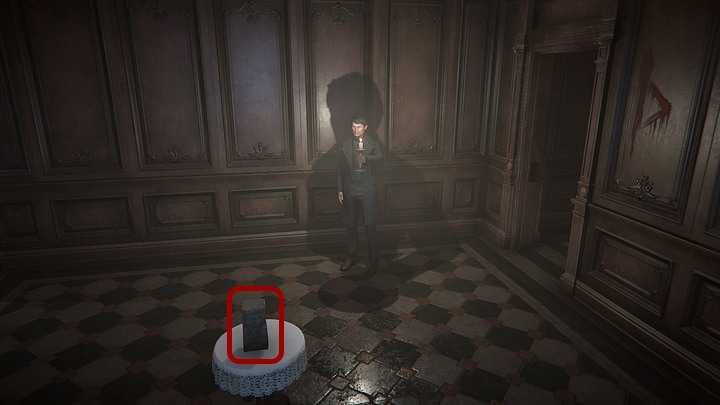
Now, you'll be back to the room with the table, on which you'll find another figurine. Take it.
David will take it, and place it on the stand right of the stone gate. He will be able to pass. Once you are past the gate, talk to Andrew. During the conversation and after it, you'll experience a whole series of clicking events that will once again require you to fill the outline of a circle.
You are not permitted to copy any image, text or info from this page. This site is not associated with and/or endorsed by the developers and the publishers. All logos and images are copyrighted by their respective owners.
Copyright © 2000 - 2025 Webedia Polska SA for gamepressure.com, unofficial game guides, walkthroughs, secrets, game tips, maps & strategies for top games.
