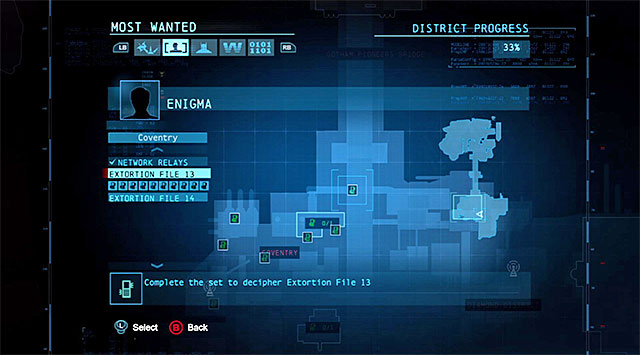
Collectible to be found while exploring the main map.
13;2 – File 13; datapack 2. Deal with the thugs and then find a lockbox with a datapack inside it. Use batarangs to hit three interactive buttons found to the right and then grab the collectible using a batclaw.
13;3 – File 13; datapack 3. Start off by reaching a roof of a building located to the south of the collectible. Choose a remote controlled batarang and aim it at a ventilation shaft found on the roof of the northern building. Throw the batarang, decrease its speed and make sure it doesn't hit anything. Once the batarang has left the shaft hit the green button. You may now take the datapack from the newly opened lockbox.
13;6 – File 13; datapack 6. Find a fenced-off area and use the glue grenade twice to seal nearby pipes. You may now approach the collectible.
Collectibles to be found while exploring buildings (the number inside brackets informs how many items are hidden in this particular location).
Lacey Towers (1) – Collectibles which can be found in this location: File 13; datapack 9.
My Alibi Nightclub (2) – Collectibles which can be found in this location: File 13; datapack 10 // File 14; datapack 10.
Collectible to be found while exploring the main map.
14;2 – File 14; datapack 2. Reach the factory roof and stand on the pressure plate that is far away from the lockbox. Look up and use remote claw to connect two large chimneys with a rope. Reach the rope using grapple and then glide towards the second pressure plate. Once again you must return to the rope using grapple. Finish off by gliding towards the last third pressure plate. Land on this plate and then use batclaw to grab the collectible from an opened lockbox.
14;3 – File 14; datapack 3. Find a lockbox in a canopied area. Use the Cryptographic Sequencer on a nearby control panel and guess the correct password (TRUTHWILLOUT). You may take the collectible.
14;4 – File 14; datapack 4. Start off to the north of the collectible. Occupy a high point and start gliding. You must be heading towards a weak wall found next to a window in order to break through. Once you've done that you must pick up the datapack.
14;6 – File 14; datapack 6. Find a lockbox and use the Cryptographic Sequencer on a nearby control panel. Guess the correct password (PUZZLEMENT) and use your batclaw to grab the collectible.
14;7 – File 14; datapack 7. Find a lockbox on a building wall. Use batarangs to hit three interactive buttons found under the lockbox and then target the last fourth button located above the lockbox. You may now grab the collectible using a batclaw.
14;8 – File 14; datapack 8. Find a lockbox on a roof. There's a generator to the right of the lockbox and you must charge it using your Shock Gloves. Doing this will open the lockbox, allowing you to pick up the secret.
3;1 – File 3; datapack 1. Find a lockbox and use the Cryptographic Sequencer on a nearby control panel. Guess the correct password (CHRONICLES) and take the collectible.
3;2 – File 3; datapack 2. Find a small courtyard containing a cage and two pipes with some hot steam coming out of them. Locate a generator to the left of the cage and charge it using Shock Gloves. That's not all, because you must also use your batclaw to open a large hatch located above the cage. Doing this will prevent the steam from being released from the lower pipes, allowing you to enter the cage and get to the secret.
3;3 – File 3; datapack 3. Find a generator and four pressure pads. Start off by using your Shock Gloves to power the generator and observe a combination which is going to be presented on the board located above the lockbox. You must now begin stepping on the pressure plates in the exact same pattern - 1, 2, 1, 3, 4, 3 (more info on the page describing file no3 puzzles). Assuming you've done everything correctly you'll open the lockbox.
3;4 – File 3; datapack 4. Start off on a roof of a high building to the south-west of the collectible. Begin your flight, however you can't simply glide. Instead you must use the dive & ascend abilities to maintain a stable flight altitude and to make sure that Batman will reach an upper balcony of the comms tower. That's where you'll find the datapack.
3;5 – File 3; datapack 5. The collectible is on the top balcony of the Soder Cola building and sadly reaching it is extremely difficult. Start off on the lower part of the balcony. Look north and use the grapple launcher on one of the gargoyles, catapulting Batman as a result of that. Quickly make a 180 degree turn and begin diving and ascending to maintain proper altitude. This is the only way to safely reach the balcony with the collectible.
3;6 – File 3; datapack 6. Start off on a bridge located to the north-west of the lockbox with the collectible (it's stuck to the wall). Choose a remote controlled batarang and throw it east, however after some time turn it south and then west so that it'll hit the first interactive button. You now have 6 seconds to finish the puzzle. Turn south and throw a standard batarang at a new button. Finish this puzzle by throwing three batarangs at new buttons located above the lockbox. You may now use the batclaw to collect the datapack.
Collectibles to be found while exploring buildings (the number inside brackets informs how many items are hidden in this particular location).
Hat Shop (1) – Collectibles which can be found in this location: File 3; datapack 9.
Gotham Merchants Bank (2) – Collectibles which can be found in this location: File 3; datapack 10 // File 4; datapack 10.
Collectible to be found while exploring the main map.
4;1 – File 4; datapack 1. Find a generator and three pressure pads. Start off by using your Shock Gloves to power the generator. Your next objective is to make the green lamps from the middle row (the same one as the lockbox) to glow. You can achieve this by stepping on the pressure plates in the following order (starting from the left) - 1, 2, 3, 1, 3 (more info on the page describing file no3 puzzles). Assuming you've done everything correctly you'll open the lockbox.
4;2 – File 4; datapack 2. Deal with the thugs and then step on a pressure plate. Choose a remote controlled batarang and throw it at a nearby fence. You must navigate the batarang so that it flies through a small hole and hits a green button. Head in the same direction, perform a slide and pick up the datapack.
4;3 – File 4; datapack 3. Find a pressure plate and three buttons located behind a fence. Get to the buttons and place explosive gel on each one. You may now stand on the pressure pad and detonate all three charges at the same time. All that's left to do is to take the collectible from the newly opened lockbox (use the batclaw).
4;4 – File 4; datapack 4. Reach the collectible from the east. Approach to the pressure pads and use your Remote Claw to create a rope passageway. Use the rope to reach the other side and take the datapack.
4;8 – File 4; datapack 8. Explore a balcony found near the lockbox containing the item you're looking for. You'll uncover a computer terminal and you must hack it by using the Cryptographic Sequencer and uncovering the correct password (SHELLGAME). Return to the lockbox (it's attached to the wall) and use your batclaw to grab the datapack.
1;2 – File 1; datapack 2. Land on a roof located next to the comms tower, finding a lockbox, a generator and three pressure pads here. Start off by using your Shock Gloves to power the generator. Quickly turn left and run over all three pressure plates before they turn off again. You may turn around and use the batclaw to grab the collectible from the newly opened lockbox.
1;3 – File 1; datapack 3. Start off by standing on a pressure plate located on a roof above the secret. Face the building located on the opposite side of the road and start gliding towards it. Make sure to hold the button responsible for attacks during the flight and manuever Batman towards a new button found on the wall of the building you're heading to. Assuming you've done everything correctly Batman should touch the wall for a moment. QUICKLY release the glide button and then press it again, allowing the main character to rebound. Fly towards the last button and bounce off it again. Land and take the datapack.
1;5 – File 1; datapack 5. Find a lockbox stuck to the church tower and a pressure pads on one of the lower platforms. Land on the pressure plate and then use grapple to quickly transport Batman to the main part of the church roof. You must now use batclaw to grab the collectible before the lockbox closes again.
1;8 – File 1; datapack 8. Find five green buttons and a lockbox containing the collectible. Take your time to familiarize yourself with the order in which the buttons are being activated. Use your batarang to hit the first button from the right when it becomes active and collect your reward.
Collectibles to be found while exploring buildings (the number inside brackets informs how many items are hidden in this particular location).
Abandoned Courthouse (1) – Collectibles which can be found in this location: File 1; datapack 9.
Church (1) – Collectibles which can be found in this location: File 1; datapack 10.
Collectible to be found while exploring the main map.
2;4 – File 2; datapack 4. You might encounter some problems locating the secret. Land on a small balcony and you'll notice two objects attached to the building's wall - a lockbox and a computer terminal. Hack the terminal using the Cryptographic Sequencer (the password is QUANDARY). You may now take the datapack.
2;5 – File 2; datapack 5. Land on a roof with a lockbox and a generator. Start off by using your Shock Gloves to temporarily turn on the generator. Turn right and quickly choose a remote controlled batarang from your inventory. Throw the batarang at the electricity and then steer it so that it hits a fusebox located next to the collectible. You may now take the datapack.
2;6 – File 2; datapack 6. Start off to the west of the collectible, on the roof of the Ace Chemicals building. Start gliding towards a weak wall in order to break through it. Once you've done that you must pick up the datapack.
2;7 – File 2; datapack 7. Find an area with a generator and five pressure pads. Start off by using Shock Gloves to power the generator. You must now copy the pattern symbolized by green lights. This means you must step on plates (starting from the left) 1, 3 and 4. Finish this puzzle by using your batclaw to grab the datapack.
2;8 – File 2; datapack 8. Approach the collectible from the north and use a glue grenade to seal a nearby pipe. Perform a slide and hack into a security terminal located next to the lockbox by finding the correct password (TRICKERY). You may pick up the datapack.
2;9 – File 2; datapack 9. Ignore the map bearings, because the collectible is in the sewers (more info on the page describing file 2 puzzles). You must reach a large vertical shaft in the sewers. Use a remote controlled batarang here so that it flies through a hole in the fence and then hits a green button. That's not all, because you must create a rope passageway using a Remote Claw and then use it after reaching it with a grapple. You may now pick up the collectible.
Collectibles to be found while exploring buildings (the number inside brackets informs how many items are hidden in this particular location).
Bane's Field HQ (1) – Collectibles which can be found in this location: File 2; datapack 10.
Collectible to be found while exploring the main map.
8;1 – File 8; datapack 1. The collectible is inside a cage on a building's roof and in order to get to it you must use three glue grenades to seal nearby pipes (hot steam).
8;2 – File 8; datapack 2. The datapack is stored inside a lockbox attached to a large chimney. In order to gain access to this collectible you must use a Cryptographic Sequencer and hack a nearby control panel. The correct passwords are: COMPLICATE, ENTAGLE, PERPLEXITY.
8;3 – File 8; datapack 3. Start off on top of a large chimney located to the east of the collectible. Glide towards the secret and try to land on a small platform which isn't accessible in any other way. The only thing left to do here is to destroy a wall using explosive gel.
8;6 – File 8; datapack 6. Once you've reached a lockbox use your explosive gel on an inactive left button. You must now locate a pressure plate and stand on it so that you'll activate the button. Detonate the gel, however don't leave the pressure pad just yet. Choose a remote controlled batarang from your inventory and throw it at the right button. Steer the batarang so that it avoids the fence and once you've hit the button collect the datapack.
Collectibles to be found while exploring buildings (the number inside brackets informs how many items are hidden in this particular location).
Steel Mill (11) – Collectibles which can be found in this location: File 8; datapacks 7,8,9,10 // File 9; datapacks 7,8,9,10 // File 10; datapacks 8,9,10.
Collectible to be found while exploring the main map.
9;1 – File 9; datapack 1. The collectible is on the top balcony of the comms tower and reaching it may seem like an impossible task. It is possible to get there, however it's very difficult. Locate a large chimney to the north-east of the comms tower and use the grapple launcher on it in order to catapult Batman. Quickly make a 180 degree turn and begin diving and ascending to maintain proper altitude. This is the only way to safely reach the balcony with the datapack.
9;2 – File 9; datapack 2. Find a small alley with four inactive pressure pads. There's also a generator nearby and you must temporarily activate it using your Shock Gloves. Start running towards the pressure plates and step on each plate before the generator shuts down again. Finish this puzzle by performing a slide which will allow you to get to the datapack.
9;4 – File 9; datapack 4. Find a lockbox and use the Cryptographic Sequencer on a nearby control panel. Guess the correct password (UNTRUE).
9;6 – File 9; datapack 6. Reach a small metal balcony and deal with an enemy sniper. You may now use your Shock Gloves to power the generator. Follow this action by using the batclaw to grab the datapack.
10;2 – File 10; datapack 2. Find a hole in the north wall of the building and head inside. Start using standard batarangs to hit the green buttons and remember that you must hit all three buttons before the time limit expires. You may now take the datapack from the newly opened lockbox.
10;3 – File 10; datapack 3. Start off by eliminating the snipers occupying the northern balconies. You may now stand on a pressure plate located to the north of the collectible. Start throwing standard batarangs at nearby buttons (one above the left balcony, one above the right balcony, one above the entrance to the building) and make sure that you've hit them all within 15 seconds. Finish this puzzle by grabbing the datapack using the batclaw.
10;5 – File 10; datapack 5. Find a lockbox stuck to the crane and a pressure pad on a ship to the south-east. Land on the pressure plate and then use grapple to quickly transport Batman to the platform attached to the crane. You must now use batclaw to grab the collectible before the lockbox closes again.
10;6 – File 10; datapack 6. Start off to the east of the collectible and use grapple to transport Batman to a higher balcony. You may now approach the generator and turn it on by using Shock Gloves. Doing this will unlock access to the datapack.
10;7 – File 10; datapack 7. Start off by landing on a small bridge located to the south-east of the collectible, Head west and enter a large building. Turn north here and use glue grenades to seal all the pipes. Proceed further north and you'll reach the area where the datapack was hidden.
Collectibles to be found while exploring buildings (the number inside brackets informs how many items are hidden in this particular location).
GCPD (14) – Collectibles which can be found in this location: File 19; datapacks 4,5,6,7,8,9,10 // File 20; datapacks 3,4,5,6,7,8,9.
Collectible to be found while exploring the main map.
18;1 – File 18; datapack 1. Find a lockbox on the GCPD's roof and use the Cryptographic Sequencer on a nearby control panel. Guess the correct password (FINALANALYSIS) and pick up the collectible.
18;3 – File 18; datapack 3. Find a pressure plate on the building's roof. Stand on the pad and then use your remote batarang twice. First hit the left green button and then the right green button (the batarang must fly through an opening located at the top of the cage). Finish this puzzle by using batclaw to grab the secret.
18;5 – File 18; datapack 5. Find a lockbox, climb on top of a balustrade and face towards the electricity. Choose a remote controlled batarang from your inventory and throw it at the electricity so that it gets charged. Make a 180 degree turn and steer the charged batarang so that it hits a fusebox located above the secret. You may now take the datapack from a newly opened lockbox.
18;7 – File 18; datapack 7. Stand on a pressure plate and quickly throw five batarangs at the green buttons located under a nearby bridge. You must achieve this before the time limit expires so don't even consider aiming manually. Once you've passed the challenge use a batclaw to grab the datapack.
18;8 – File 18; datapack 8. Find a lockbox on a balcony and use the Cryptographic Sequencer on a nearby control panel. Guess the correct passwords (PUZZLEBOX, SHAKEDOWN, COERCION) and pick up the collectible.
18;10 – File 18; datapack 10. Begin on a building's roof somewhere to the north-east of the collectible. Face a large green button seen in the distance and glide towards it. Make sure to hold the button responsible for attacks during the flight and manuever Batman towards a new button found on the wall of the building you're heading to. Assuming you've done everything correctly Batman should touch the wall for a moment. QUICKLY release the glide button and then press it again, allowing the main character to rebound. Land as soon as possible and use the batclaw to grab the datapack before the time limit expires.
19;1 – File 19; datapack 1. Step on a pressure plate and notice that this action resulted in unlocking a part of the cage. Start using glue grenades here in order to seal all three pipes. Once this is done leave the pressure plate and enter the cage, collecting the datapack.
20;1 – File 20; datapack 1. The datapack is hidden inside a ventilation shaft found on the building's roof. You can obtain this collectible without having to use Batman's gadgets.
20;2 – File 20; datapack 2. Find a small roof with a cage containing a sphere, a generator and two pressure pads. Start off by using Shock Gloves to turn on the generator. Step on the left pressure plate, then on the right and finally return to the left pad. You may now approach the cage (don't worry that nothing opened) in order to take the datapack from the sphere.
Collectibles to be found while exploring buildings (the number inside brackets informs how many items are hidden in this particular location).
Enigma's HQ (1) – Collectibles which can be found in this location: File 20; datapack 10.
Gotham City Royal Hotel (12) – Collectibles which can be found in this location: File 15; datapacks 7,8,9,10 // File 16; datapacks 7,8,9,10 // File 17; datapacks 7,8,9,10.
Collectible to be found while exploring the main map.
15;1 – File 15; datapack 1. The datapack is inside a cage located next to the comms tower. You can get inside the cage by performing a long glide towards it or by standing on it and then descending after approaching the ledge. The last action you must do is to use batclaw to grab the collectible.
15;2 – File 15; datapack 2. Go to the bottom of the large building with a comms tower on top of it. Inspect the south-western corner and you should notice a datapack attached to the ceiling. Use batclaw to get this collectible.
15;3 – File 15; datapack 3. You must reach the top balcony of the Soder Cola building. Find a lockbox here and start off by using your disruptor to sabotage three jamming devices located above the secret. That's not all, because you must also use a Cryptographic Sequencer. Hack into the security terminal and guess the correct password (ILLICITSECRET). You may now take the collectible from the newly opened lockbox.
15;4 – File 15; datapack 4. Inspect the area at the bottom of the Soder Cola building to find a lockbox. Use the Cryptographic Sequencer on a nearby control panel. Guess the correct passwords (MALFEASANCES, MISBEHAVIOR, BLACKBOOK) and pick up the collectible.
15;5 – File 15; datapack 5. Start off on the train tracks to the south of the collectible and use detective mode to locate a destructible wall. Use explosive gel on this wall, as well as on two others. Doing this will allow you to reach a secret room with a datapack lying on the ground.
16;1 – File 16; datapack 1. Start off on a ledge located next to the water, to the south-east of the collectible. Use your Remote Claw on an interactive attachment and fly towards the rope. Once you've grabbed the robe use it to enter a large cage and to pick up the datapack.
16;3 – File 16; datapack 3. Locate a pressure pad to the north of the secret. Stand on the plate and then throw a batarang at the green button found above the lockbox. You may now use your batclaw to grab the datapack.
16;5 – File 16; datapack 5. Find a cage at the bottom of a large building and use the batclaw to destroy a part of it. Enter a ventilation shaft and take the collectible.
16;6 – File 16; datapack 6. Find a lockbox and a pressure plate. Stand on the plate exactly when it turns green and a result you will be allowed to take the collectible.
17;1 – File 17; datapack 1. Start to the east of the collectible. Stand on top of a cage found on one of the upper ledges and face east (the opposite direction to the collectible). Choose a remote controlled batarang and throw it. Make a 180 degree turn with the batarang after a few seconds and steer it towards a hole in the cage located underneath Batman. That's not all, because the batarang has to fly through the entire cage to hit a green button. You may now take the datapack from the newly opened lockbox.
17;2 – File 17; datapack 2. Find a roof area with a pressure pad, six interactive buttons and a lockbox. Stand on the pressure plate and throw three batarangs at the left set of buttons. Leave the plate and quickly throw another three batarangs, this time at the right set of buttons. You may now end this puzzle by using a batclaw to grab the datapack.
17;3 – File 17; datapack 3. Start off on a roof above the secret. Face the building located on the opposite side of the road and start gliding towards it. Make sure to hold the button responsible for attacks during the flight and manuever Batman towards a button found on the wall of the building you're heading to. Assuming you've done everything correctly Batman should touch the wall for a moment. QUICKLY release the glide button and then press it again, allowing the main character to rebound. Fly towards the second button and bounce off it again. Finish this puzzle by going back to a bridge connecting the two buildings and using batclaw to grab the datapack from the lockbox.
17;4 – File 17; datapack 4. Land on a roof and start off by using a batclaw to pull a ventilation shaft grate. Stand on a nearby pressure plate and throw a remote controlled batarang at the electricity. Steer the batarang towards the ventilation shaft so that it hits a fuse box found inside the shaft. You may now use the batclaw again, this time to collect the datapack from the lockbox.
17;5 – File 17; datapack 5. Defeat the bandits occupying the roof and then locate a pressure pad and six buttons. Begin this puzzle by dispersing the explosive gel on the buttons located to the right (the ones in the fenced-off area). You may now stand on the pressure plate. QUICKLY detonate all three charges and then throw three standard batarangs at the buttons located to the left. Assuming you did all of this before the limit expired you will be allowed to grab the collectible using a batclaw.
17;6 – File 17; datapack 6. Find a parked truck and inspect the area to the right of the truck. Use a disruptor on a jamming device and then a Cryptographic Sequencer on a computer terminal (the correct password is SECRETKNOWLEDGE). You may now take the datapack from the lockbox.
5;1 – File 5; datapack 1. The datapack is inside a container which is attached to the crane. You can gain access to the container by performing a glide towards it or by standing on its roof and then carefully dropping down.
Collectibles to be found while exploring buildings (the number inside brackets informs how many items are hidden in this particular location).
The Final Offer (12) – Collectibles which can be found in this location: File 5; datapacks 7,8,9,10 // File 6; datapacks 7,8,9,10 // File 7; datapacks 7,8,9,10.
Collectible to be found while exploring the main map.
5;2 – File 5; datapack 2. Use detective vision to examine the lower part of the building's wall and you'll notice a weak wall. Destroy this wall using explosive gel and collect the datapack.
5;4 – File 5; datapack 4. Explore the building's roof in order to find a large cage. Start off by dispersing the explosive gel on the inactive right button. Move back a little and throw a batarang at the active left button. Enter a nearby ventilation shaft and reach the central cage. Detonate the explosive gel to unlock access to the second vent. Use it to reach the datapack.
5;5 – File 5; datapack 5. Find an alley with a lockbox and several pressure plates. Run over all the plates in a straight line (don't make any stops) and you'll gain access to the secret.
5;6 – File 5; datapack 6. Find a generator on the building's roof to the east of the lockbox. Turn on the generator using Shock Gloves and then quickly grab the datapack with your batclaw.
6;1 – File 6; datapack 1. Find an alley underneath the building and use your Cryptographic Sequencer on a nearby control terminal. Guess the correct password (CLEVERSCHEME) to gain access to the lockbox.
6;2 – File 6; datapack 2. Start on a roof to the east of the collectible and find an interactive spot in order to use the Remote Claw. Grab the rope and use the zipline to begin moving. Batman will automatically break through a weak wall and you'll be allowed to pick up the datapack.
6;6 – File 6; datapack 6. Find a ledge with a lockbox and a pressure pad. Stand on the plate and wait for Batman to face the southern container. Throw a remote controlled batarang at this container and once it's inside start avoiding the obstacles. Wait for the batarang to reach the end of the container, make a 180 degree turn and fly it towards a hole. The last part of the flight is about hitting the green button. Once that's done you will be able to take the datapack from the newly opened lockbox.
7;1 – File 7; datapack 1. The collectible is inside a cage which is not too accessible, because it has only one opening on its eastern side and you can get there using a standard grapple. Begin gliding from the roof of one of the taller buildings and try to fly inside the cage through a small hole. Once you've succeeded you may pick up the datapack.
7;2 – File 7; datapack 2. Use Shock Gloves on a generator found on the ship's deck and stand on the first pressure plate. You now have 40 seconds to solve the entire puzzle. Face the nearest mast and use grapple launcher to catapult Batman. Start gliding and turn around so that you can land on the second pressure pad located in the north-eastern part of the ship. Remain on the pad and use the grapple launcher for the second time. Perform a second glide and this time land on a plate found on the upper ledge. You may now use the batclaw to grab the datapack.
7;5 – File 7; datapack 5. Start off to the north-west of the collectible. Face a ventilation shaft and throw a remote controlled batarang inside it. Steer the batarang through the entire vent system so that is ultimately hits a green button. You may now jump over the fence and take the datapack from the newly opened lockbox.
11;1 – File 11; datapack 1. The collectible is on the bridge's small balcony. Throw a remote controlled batarang at a green button located to the west of the lockbox, unlocking access to the datapack.
11;2 – File 11; datapack 2. The lockbox is attached to the wall next to a small balcony. Land under the secret and start off by choosing a remote controlled batarang from your inventory. Look up and throw the batarang at the balcony mentioned before. Steer the batarang so that it hits a single button found above the lockbox. You now have 5 seconds to hit three new buttons located in front of Batman and you can use standard batarang. Once you've succeeded go back to the balcony and take the datapack.
11;3 – File 11; datapack 3. Get to the small balconies located under the bridge and start on the balcony located to the south-east of the collectible. Touch the pressure plate to start the timer (25 second). Glide towards the northern balcony, use grapple to reach it and stand on its pressure plate. Finish this puzzle by gliding towards the south-western balcony. Interact with the last pressure plate to open the lockbox containing the datapack.
11;4 – File 11; datapack 4. The collectible you're looking for is under the bridge. Land on one of the metal supports and use a batclaw to grab it from a distance.
11;5 – File 11; datapack 5. Reach a boat with two pressure pads and a lockbox. Stand on the upper pressure plate and face the metal structure located close to the second pressure pad. Use the grapple launcher to catapult Batman. Begin gliding and turn towards the boat in order to safely land on the second pressure plate. The key to solving this puzzle is to avoid touching other objects in the meantime. If you've done everything correctly you will be allowed to take the datapack from the lockbox.
12;1 – File 12; datapack 2. The collectible is on the bridge's small balcony. Locate a generator to the east of the datapack and turn it on using Shock Gloves. You may now head west to take the secret from the lockbox.
12;2 – File 12; datapack 2. Explore the area at the bottom of the bridge in order to locate a lockbox. Use your disruptor on the jamming device and then a Cryptographic Sequencer on a control panel (the correct password is ZEROTRUST). You may now take the datapack from the newly opened lockbox.
12;3 – File 12; datapack 3. Find a ockbox and use the Cryptographic Sequencer on a nearby control panel. Guess the correct passwords (CHEATING, TRUTHCOMESOUT, INFORMATION) and take the collectible.
12;4 – File 12; datapack 4. Find a pressure plate on the bridge's central balcony and stand on it. Observe the combination displayed on the ground, because it shows the correct order in which the green buttons located to your both sides must be activated - south-west, north-west, north-east and south-east. Many of the buttons are behind obstacles so use remote controlled batarangs instead of the standard ones. It's also important to remain at all time on the pressure pad. Once you've solved the puzzle look up and grab the datapack using your batclaw.
12;5 – File 12; datapack 5. Start off on a high observation post far to the north of the collectible. Glide south and try to land inside a destroyed side corridor. Once you've done that head south on foot and use explosive gel to destroy a weak wall. You may now pick up the datapack.
Collectibles to be found while exploring buildings (the number inside brackets informs how many items are hidden in this particular location).
Bridge (10) – Collectibles which can be found in this location: File 11; datapacks 6,7,8,9,10 // File 12; datapacks 6,7,8,9,10.