Batman Arkham Origins: Black Mask Most Wanted
Way to unlock the mission: You get the opportunity to start this side mission towards the end of your stay in the Sionis's mill, in the [Industrial District], right after you deal with Copperhead.
Beginning of the mission


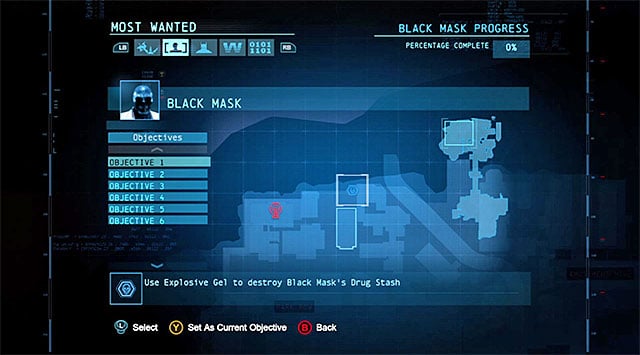
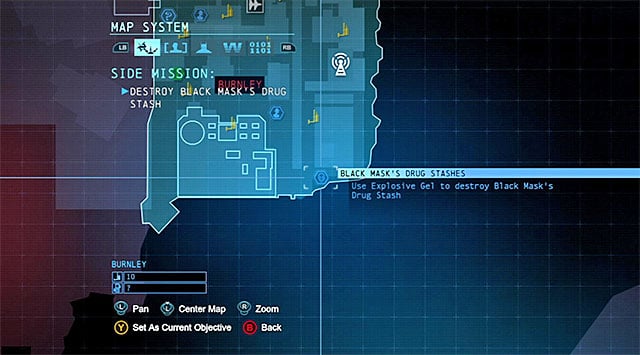
Along your way to the mill's exit (the beginning of the Acquire Electrocutioner's electromagnetic signature mission Batman will have to use the explosive gel to destroy the Black mask's drug stash in the Loading Bay (screenshot 1). Blow up the abovementioned object and exit. In the meantime you will learn that there are six more stashes of this kind. You can reach the stashes in any way you want and, to determine their locations, you can always use the side missions menu, because it includes the locations of all the stashes (screenshot 2).
Destroy the first stash


The first one of the stashes is in the Northern part of the Park Row district. Since there are bandits gathered around the stash, it pays off to attack them by surprise and use the advantage of height. I recommend that you consider using the concussion detonator and land onto one of the enemies to make things easier for yourself at the outset. Further into the fight, you need to watch out for the enemy with knife, who is actually the only one that is a threat here.

After you have won the fight, take a look around for the control panel and hack into it, using the Cryptographic Sequencer (the screenshot). You can now spread the explosive gel on the stash and detonate it.
Destroy the second stash

The second stash is in the central part of the Sheldon Park district.


The best way to approach the mission's marker is by approaching the Eastern gate, locating the bridge shown in screenshot 1 and entering the building. Walk inside, deal with the two bandits. Turn left (you need to be facing Southwards) and you should notice the corridor shown in screenshot 2, which leads to the stash. Spread the explosive gel and destroy the stash.
Destroy the third stash

The third stash is in the central part of the Gotham Pioneers Bridge.

I recommend that you approach the mission's marker from the South, by landing onto the cargo hoisted up on the crane (The screenshot) to the left of the main body of the bridge. You should notice a plank under the bridge, which is occupied by several enemies equipped with guns. Use the hook go get there and deal, in the first place, with the armed bandits. After you win the fights, use the explosive gel to destroy the stash.
Destroy the fourth stash


The fourth stash is in the South-Western part of the Coventry district, where before you go for it, you should first pay a visit to the Gotham Royal, where you obtain the shock gloves, which belonged to the Electrocutioner. Focus on locating the small ledge where there should be two bandits. Glide there and deal with the enemies.

Use the shock gloves on the local generator, which will lift the grate and provide you with access to a small tunnel. Go inside, select the explosive gel from the inventory and use it to destroy the stash.
Destroy the fifth stash

The fifth stash is in the South-Eastern corner of the Burnley district, i.e. to the East of the police precinct.

Your target is on the balcony shown in the screenshot, located at the edge. The best way to get there is to approach it from the East, thanks to which you will not alarm the enemies. Otherwise, be prepared to eliminate a small group of bandits. Regardless of which you chose, spread the explosive gel and blow up the stash.
Destroy the sixth stash

The sixth stash is in the Southern part of the Park Row district.

After you approach the marker, locate the alley guarded by several enemies who are weakly equipped, and take them by surprise. You can now approach the stash in the narrow alley, spread the explosive gel and detonate.
Destroy the last stash in the church


The church is in the Eastern part of the Park Row district. It is worth knowing here that the region of the main entrance to this building is being occupied by quite a numerous group of bandits. You can try and sneak into the church, or deal with those enemies. If you have chosen the latter, you need to keep in mind that it is going to be quite a long fight. Still, the good news is that none of them is going to use any better gear. Regardless of whether you have sneaked past the goons, or defeated all of the enemies, enter the Church.

Inside the church, there are six enemies, who are armed with melee weapons so, it is highly advisable that you remain in hiding at all times, especially that it may be difficult to escape, given the church's limited area. In the church, you will, fortunately, find some gargoyles that will help you eliminate the enemies (gliding inverted takedowns, hanging the enemies up using the grapple).

Apart from the gargoyles, you can also make use of the venting shafts. If you want to reach them safely, you should take the side passage located to the right of the starting point. Apart from that, in the church there is a wall with a weakened fragment. After you have secured the area, approach the stash and use the Cryptographic Sequencer on the control panel and determine the correct password (the screenshot). You can now spread and detonate the explosive gel.
Defeat Black Mask and his goons

The fight with the Black Mask and his goons is easier than it may at first seem. This is because the leader is a regular opponent without any separate health bar or special abilities. After you start fighting, focus on eliminating the two martial artists, because they are the major threat here.

Further in the fight, wait for the moment at which the shock gloves become available, because this gear will ensure Batman with quick and easy victory. The only thing remaining for you to do is listen to the final conversation with the Black Mask. [Character Profile Updated: Black Mask]
[New Character Trophy: Roman Sionis]
[New concept art: Steel Mill - Copperhead]
- Batman: Arkham Origins Game Guide
- Batman Arkham Origins: Game Guide
- Batman Arkham Origins: Most Wanted
- Batman Arkham Origins: Enigma Most Wanted
- Batman Arkham Origins: Anarky Most Wanted
- Batman Arkham Origins: Penguin Most Wanted
- Batman Arkham Origins: The Mad Hatter Most Wanted
- Batman Arkham Origins: Deadshot Most Wanted
- Batman Arkham Origins: Black Mask Most Wanted
- Batman Arkham Origins: Shiva Most Wanted
- Batman Arkham Origins: Bird Most Wanted
- Batman Arkham Origins: Escaped Blackgate prisoners Most Wanted
- Batman Arkham Origins: Crimes in Progress Most Wanted
- Batman Arkham Origins: Most Wanted
- Batman Arkham Origins: Game Guide
You are not permitted to copy any image, text or info from this page. This site is not associated with and/or endorsed by the developers and the publishers. All logos and images are copyrighted by their respective owners.
Copyright © 2000 - 2026 Webedia Polska SA for gamepressure.com, unofficial game guides, walkthroughs, secrets, game tips, maps & strategies for top games.
