Interface | Basic information
The HUD of The Flame in the Flood isn't very complex, but getting to know it well will prove helpful, as being able to understand what the game is telling you can make the gameplay a lot smoother. Below you will find the description of all the elements of the interface.
Interface - the basics

1. These elements stand for the most basic information, which we discuss in detail later on.
2. The number above the backpack indicates how many free slots remain in Scout's inventory. Remember, however, that you can usually carry 9 pieces of a given resource that will occupy only one slot.
3. Keys 1 to 3 (or pressing the left trigger) allow you to use the quick menu. [1] opens a menu of medical supplies, [2] opens a menu of food and [3] - other instruments.
4. Those indicators show how far have you traveled, how many days have you survived, what time of the day it is, and how well Scout's clothes protect her from the cold.
Basic survival indicators
These are the basic indicators of Scout's status:
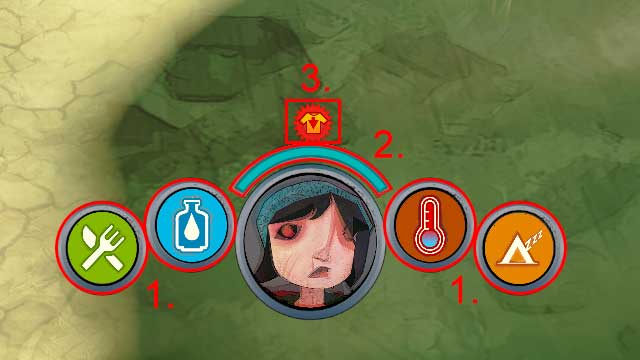
1. These are the indicators of hunger, thirst, body temperature, and fatigue. The lower they are, the worse is Scout's condition. If any of those runs out completely, Scout will be close to death.
Also, you should bare in mind the realistic hierarchy of these indicators: Scout is most likely to get thirsty, then hungry. After that comes the fatigue, and finally (if you don't rest by a fire, and/or have poor clothing) the body temperature will drop.
2. This is Scout's stamina. It allows you to swing the stick, sprint, and row the raft. The stamina replenishes automatically.
3. Above the stamina bar is the injury indicator. Any damage that Scout has taken is shown here. Some - like a snakebite - can be fatal, others - as for example wet clothes - lower the statistics only temporarily.
Objectives
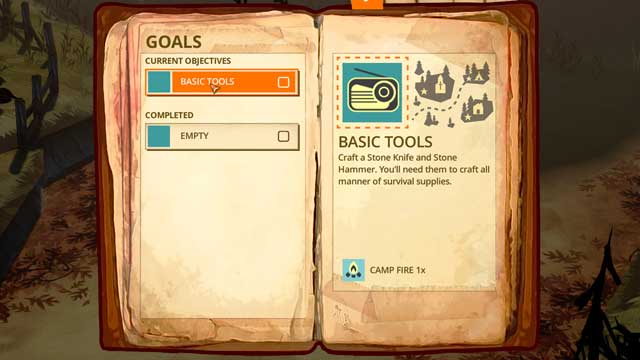
The Goals tab shows available quests - completing them gives you the reward shown at the bottom. Early in the game, these are mostly simple crafting tasks, but later on, you might even be hunting a legendary monster. More about that in "Quest awards" chapter.
Afflictions
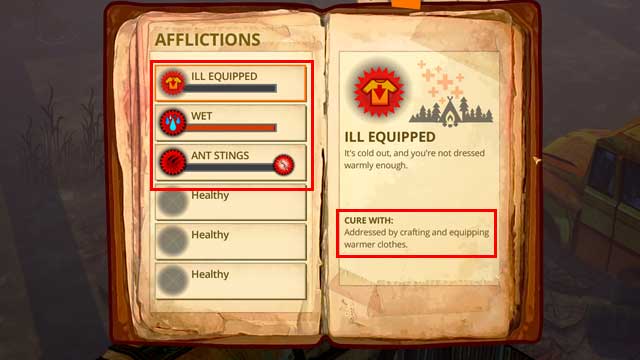
This tab feeds info about Scout's injuries and afflictions. It also says how to treat them in the "Cure with" section, but most of the times it's enough to consume a drug or a plant.
Crafting
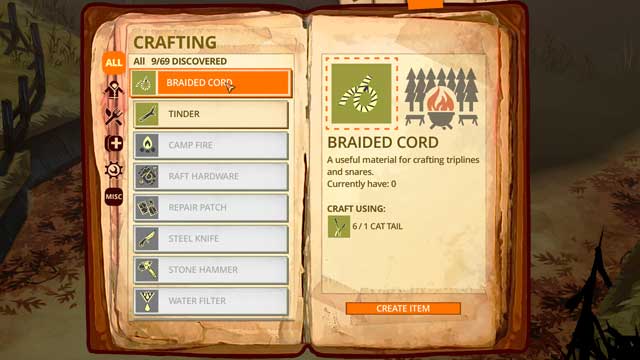
In the Crafting tab you can construct various items. Some of them you can craft on-the-spot, while others require special equipment. More about that in the "Crafting" chapter.
Equipment
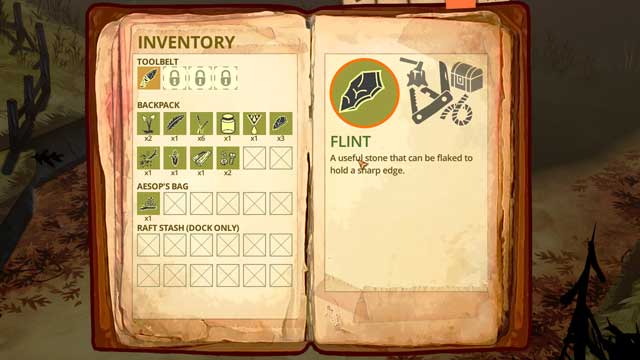
This is the inventory tab. Each item is briefly described; if you're not sure what's the purpose of an item, or want to check the expiry date, you'll find it here. Detail concerning the inventory can be found in... the "Inventory management" section.
Clothing
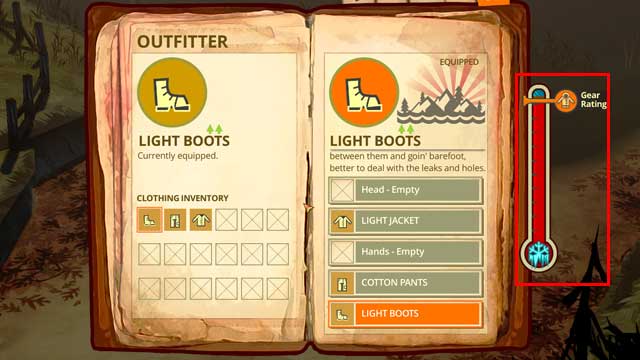
This tab shows the status of your outfit - its general condition as well as its warmth rating (marked in red). The worse the condition of your clothes, the greater the danger of hypothermia is. Not wearing a full outfit is an affliction.
You are not permitted to copy any image, text or info from this page. This site is not associated with and/or endorsed by the The Molasses Flood or The Molasses Flood. All logos and images are copyrighted by their respective owners.
Copyright © 2000 - 2025 Webedia Polska SA for gamepressure.com, unofficial game guides, walkthroughs, secrets, game tips, maps & strategies for top games.
