Chapter 21 | Chapters walkthrough for The Banner Saga 3
Last update:
This page contains a walkthrough of chapter 21 of the game The Banner Saga 3 - With a Mighty Grief That Was Ours and Theirs. This is one of the longest chapters in the game, it's also one of the most unique ones. For the most part, you will be traveling with Iver's caravan, which is heading to The White Tower. From time to time, you will go back to Arberrang to help out Rook's troops or to help Alette defend a town under siege. This game mechanic is described in detail further in the walkthrough.
- General information useful in chapter 21
- Going spelunking
- The Frozen Sea
- Godstone Dredge
- Arriving at The White Tower
- Confronting Bolverk
- Returning to Arberrang
General information useful in chapter 21
- You start the chapter by traveling with Iver's caravan. The story resumes from the point when chapter 19 had finished.
- At the bottom of the screen, there's a counter showing the number of days left, it ticks down until it reaches 0. The number of days equals what Rooka/Alette caravan managed to build up in chapter 20, which is the number of days which were left to the besieged Arberrang.
- After the counter drops all the way down to zero, the game isn't instantly over. Instead, you will travel back to Arberrang and get the chance to boost the day count by fighting. Iver's caravan needs this time to get to The White Tower.
- You will definitely return to Arberrang at least once. Additional trips back there can be necessary if you didn't get enough days stacked up in chapter 20 or you wasted too much time while traveling with Iver's caravan in chapter 21 (e.g. by sending your troops to rest or making a bad choice during one of the event sequences). The descriptions of potential encounters in Arberrang are described in depth in the part: Returning Arberrang at the bottom of the page.
- Every single trip to Arberrang results in at least one larger battle and making the best possible choices, which will help the town survive the siege a bit longer. After the encounters in Arberrang, the game displays information about the number of days you have gained and after that, you will return to leading Iver's caravan.
- The maximum number of returns to Arberrang is five. After the fifth battle, Iver's caravan must reach their destination within the time limit.
- "The countdown" will disappear after Iver's caravan gets near The White Tower. There, your heroes will confront Bolverkiem. Defeating him means the end of chapter 21.
Going spelunking
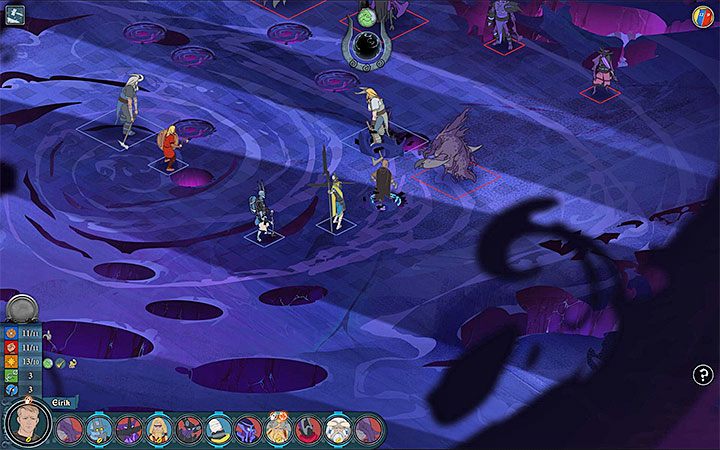
Soon after embarking on your way, a sequence connected with Dytch should trigger; his leg will become stuck in a hole. Your first fight will happen there, but before it starts you have to choose one of three options. Choosing option 1 (surrounding Dytch) or option 3 (drawing the attention of the monsters away) allows Dytch to take part in the encounter, although he will still be immobilized. However, this does not mean that he will be useless, as Dytch has the ability to replenish his allies' willpower.
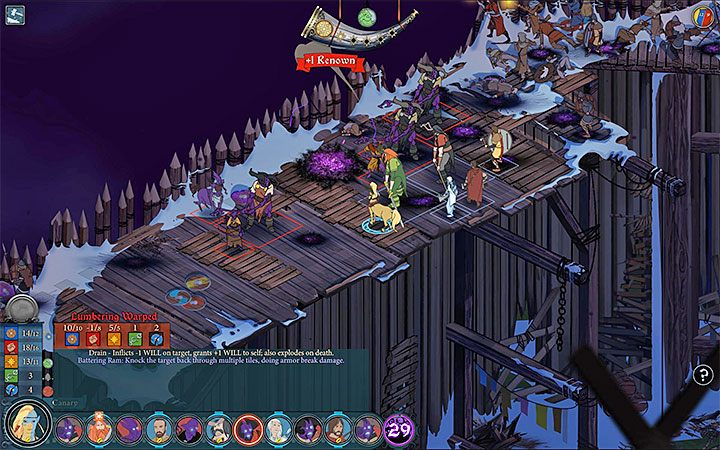
Regardless of what is going on with Dytch, the rest of your heroes also need to be careful during the encounter. There are more holes in the arena and stepping into them immobilizes a character, which results in a lost turn (the screenshot above illustrates this kind of instance). You should also know that holes can cause problems to your enemies, e.g. they can be stopped in place. Also, stopping two creatures in sinkholes (use skills that push enemies backwards) unlocks Trapped achievement. As the monsters are concerned, the most unique ones are the Warped Borur. They are able to move underground. They can also afflict your heroes with a negative status, Corrode, which decreases hit points of the afflicted hero at the beginning of their (heroes) turn. Fortunately, Borurs aren't very tough, so it's a good idea to slay them in the initial phase of the encounter.

After you move deeper into the cave a short animated sequence and a dialogue with Juno will trigger. It is quite straightforward.
One of the following events can be related to Folka's problems with moving around the cave. It's best to choose the first option available and persuade the caravan to continue marching. Options 2 and 3 will result in resting and "losing" about one day.
Soon a conversation with Dytch should trigger. You can talk to him about all the available subjects or finish the conversation immediately. Unfortunately, Dytch will once again get the caravan in danger and you will have to engage in another fight. Iver and Dytch have to the part in the encounter. The remaining 4 heroes can be chosen freely. In this encounter, enemies come at you in waves. Your party starts while being surrounded by warped from both sides. Although you can't prepare for the first part of the encounter, you can do this before the second phase. You have to deal with two enemy waves. If you eliminate all of them, you will receive Gosen's Necklace as a reward (a level 12 item; +2 strength; 40% dodge chance).
One of the following events should be encountering a creature with Tentacles. Alfrun will give a speech about it. After you are presented with choices, it is best to opt for the "sprint" variant (option 2). This option does not lead to any negative consequences, and what's more, the party won't waste any time.
The next event may concern the filed with tall grass. When given the choice, we suggest you opt for the aggressive march (option 3), this will save you precious time.
The Frozen Sea
The journey across the Frozen Sea should start with a small event concerning the breaking ice. It's best to choose option 2, which results in your party continuing their marching in single file. This way, no-one dies and no time is wasted.
Your journey will be soon interrupted by the arrival of a giant Serpent. You don't need to worry about fighting it. Instead, a dialogue scene with Juno will trigger.
After the duel scene is over, your party will have to continue their travel in complete darkness. Soon another event connected with what's happening should trigger. Don't choose the option to divide into two groups (option 1), as this can lead to one of your characters dying (in our case, it was Bak who died). Option 3 is also not recommended, as the caravan will get lost and lose time as a result. Option 2 (careful inspection of the surroundings) is the only good solution, however, it also means fighting with the warped. This is already the second battle in this chapter, in which monsters attack in waves. What's more, during the second wave, enemies will come at you from all sides. Hence, the best strategy is to place your party members close to one another, right in the center of the map. There's a maximum of three waves in this encounter. Surviving until the end is rewarded with a Brass Ocarina (a level 15 item; additional 3 segments of movement after an action; +2 movement; +3 breach; +2 Defense Points and Willpower On Rest; +3 threat generated).
After the battle is over, a cutscene about finding Juno will trigger. Iver, Eyvind, Sparr, and Valgard will be taking part in the conversation. It is not interactive and concerns getting to The White Tower. Surviving the journey across The Frozen Sea is rewarded by the achievement: Thin Ice.
Godstone Dredge

The next stop on your way to The White Tower is Godstone Dredge. It will trigger along with a conversation with Juno.
When at the Godstone, you have to target it with the cursor and click on it. A new event will trigger. This is one of the most important events during the journey. You can choose between two main options (option 1 does not have a different outcome):
- Pull the line at the bell (option 2). By doing this, you will receive an artifact, Dredge Clapper (a level 13 item; +2 threat generated; throwback on attack at strength 3; +3 Strength Talent Ranks; +3 breach; +3 strength attacks), however, this also results in a difficult fight against monsters.
- Leave the bell alone (option 3). By doing so, you will avoid confronting enemies, however, you also won't be getting the artifact. A camp will be set up immediately.
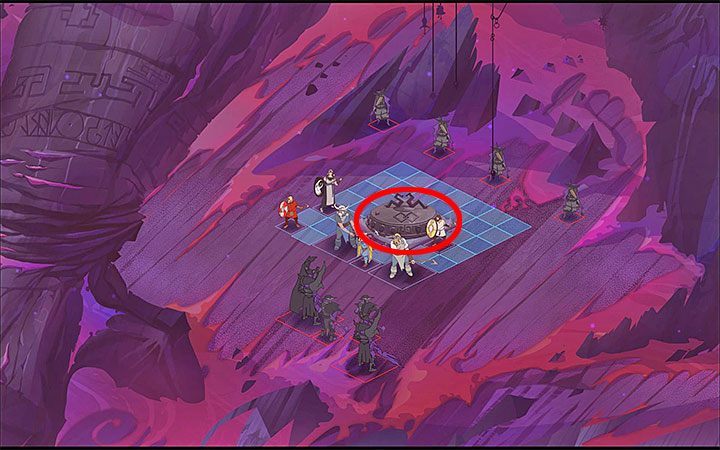
If you choose to fight (option 2), get ready for a serious battle. Whenever a monster hits the bell (screenshot above), it summons additional enemy units, which makes this encounter really tricky. It's recommended to place your units around the bell and also picking a few varls to take part in this encounter, as they can take up more squares on the map. Try to play defensively, which means keeping your party close to the bell and attacking monsters after they come closer.
A monster can hit the bell if it reaches a spot next to it and isn't stopped in time. Every hit spawns a few new warped, what's more, the summoned creatures may be stronger than the ones you had been dealing with up to that point. Additional units can't be summoned forever (you will be notified if the bell is damaged), however, it's very probable that your party will become significantly weakened until that happens (you can't make changes to your units as in the sections with enemy waves).
Regardless whether you hit the bell, you will end up in the camp. It's suggested that you talk to Oli and have a drink together. Now you can rest (NOT recommended!) and visit the hero tent. After all the errands continue marching on.
Arriving at The White Tower

On your way to the tower, caravan members may start drinking alcohol. It's best to demand they stop this nonsense, as it results in losing precious time.
At some point, a long conversation between Iver, Folka, and Eyvind will take place. There are no important decisions to make there; it's only describing choices, which become available in the game's finale. Similarly, another conversation with the witch Alfrun does not require making any important decisions.
On the way to the tower, your party may come across a suspicious plant. We opt for option 3 and risk eating the plant. This will result in the caravan moving faster, and as a result, saving time.
On your way to The White Tower, your party should encounter another group of warped. You have to fight them. Do not choose option 3 (avoiding enemies), as this will result in failure and thus is a waste of time. Fortunately, the encounter isn't all that difficult.
The caravan may also encounter a large group of Dredge Clappers, who committed mass suicide. Don't choose the option to search the surroundings. Nothing can be gained by this and you will only waste precious time.
Confronting Bolverk
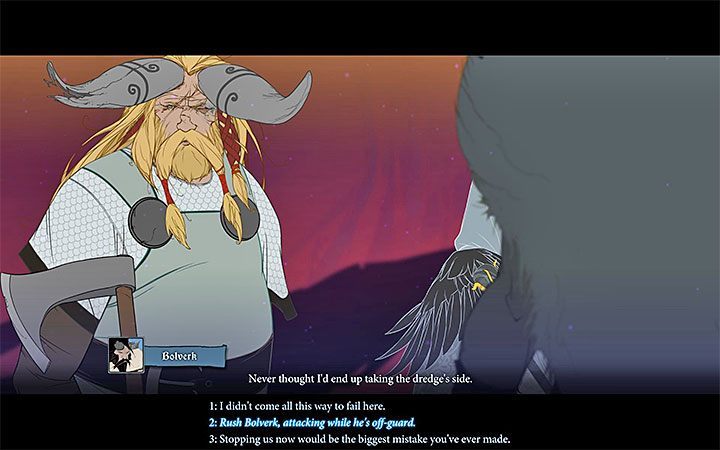

After you get closer to The White Tower the countdown stops, at the same time you encounter Bolverk. All the available dialog lines lead to the final confrontation with Bolverk and allied Dredges. However, your choices regarding the dialog lines are very important here:
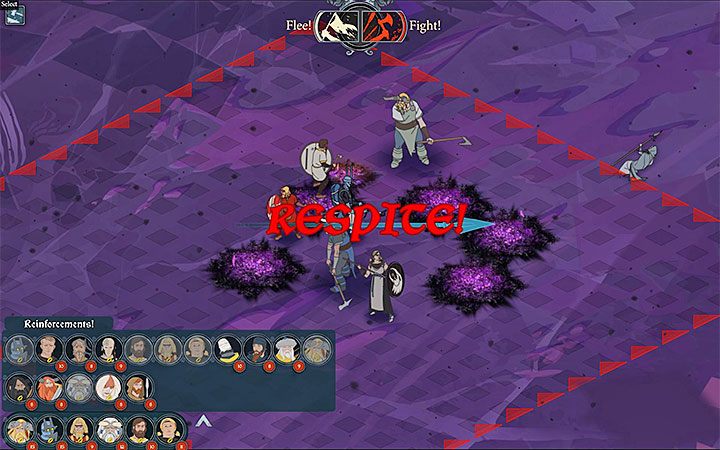
- The second option (Rush Bolverk, attacking while he's off-guard) - Iver pushes Bolverk and starts the battle close to him (the picture 2). Also, this option allows you to attack Bolverk immediately (with your entire party).
- The first or the third option - Bolverk won't participate in the battle right away. You have to defeat two waves of enemies before you face him. Bolverk will appear with the third wave. This isn't a good situation because it is highly probable that members of Iver's caravan will be tired after the fights with the previous two waves.

Bolverk is, of course, the biggest threat in this battle. He is heavily armored and has lots of hit points, however, his special abilities are the most troublesome: Frenzy allows him to attack two targets and push them away, Cull the Weak gives him a bonus turn if he manages to knock down one of your heroes. You can deal with his second skill by sending your strongest warriors toward Bolverk as they have a smaller Chance of losing all of their hit points.
Another unique part of this encounter concerns the Warped Valk Crystals. They can hinder your movements, especially if you are commanding varls. The crystals can be easily destroyed, but they also have an additional use. You can shatter them and cause a "frag grenade" effect; the shards will fly accordingly to the attack angle. It's a good idea to use them to weaken nearby enemies. Attack the crystals when there's an enemy standing behind them, so the fragments can cause damage - this attack is presented in the screenshot above.
Try to eliminate Bolverk first if you chose to attack him when he is off-guarded (the second dialog option). Once he is dead, you will be able to deal with the rest of the Dredges. If you chose a different option then you should send out weaker heroes to face the first two waves. You should also play more defensively to avoid loses or wounds. Leave your most powerful heroes for the third wave - when Bolverk joins the fight.
After killing Bolverk you will get Pacified achievement. Just after you have won the battle, you will advance to chapter 22 of the game.
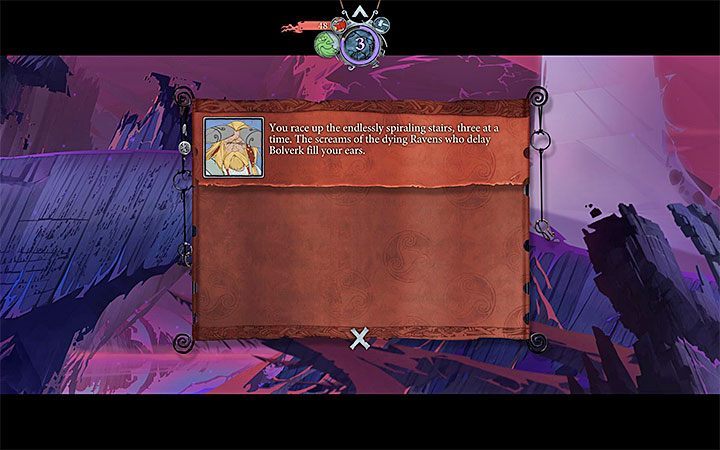
Important note - Losing the fight with Bolverk doesn't mean game over for you. You can still proceed to the chapter 22. The big difference, however, is that all characters except Iver, Juno and Eyvind will die. This affects one of the available endings (more details can be found in the walkthrough of the chapter 22).
Returning to Arberrang
- The First Return to Arberrang
- Second Trip to Arberrang
- Revisiting Arberrang for the Third Time
- The fourth return to Arberrang
- The fifth return to Arberrang
The First Return to Arberrang
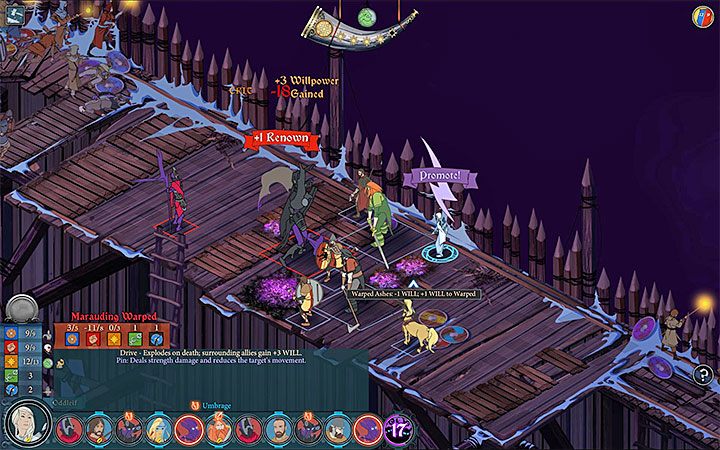
During this visit (and possibly later ones), you can go to the market and the heroes quarters (promoting them to higher ranks, assigning artifacts etc.). In order to push the action forward go to the location where a funeral ceremony is taking place. You will be presented with a list of possible actions. All of the choices improve morale, however, if you decide to host a feast in honor of the dead (option 3), you will get the most fame, 40 points. After that, you can talk to Aleo.
After you get back to the city view mode, two interactive locations will appear. Visiting the Outskirts is optional. You have to make a decision concerning depleting food supplies. Secondly, visit the Menders at the walls. This will trigger a meeting with Zefr and a new cutscene. Later, you have to take part in a battle on the city walls. In this encounter, you have to protect the menders located at the bottom of the screen as they will not take part in the fight. Because of the narrow battlefield, it's a good idea to take the varls to battle, as they will block enemy movement more effectively. This is an encounter with waves of monsters coming from the direction of the walls (north-east). Relocate your units to be prepared for the fight. Defeating 2 waves of enemies will be rewarded by Warrior's Beret (a level 14 item; free movement around squares occupied by allies; attack are never parried; +50% Critical Strike; +2 threat generated; +2 All Talent Ranks).
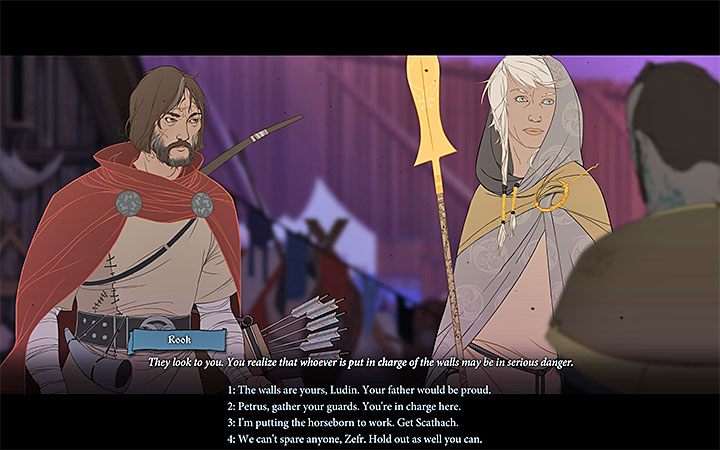
After a victorious battle, a dialogue scene between Zefr and others will appear. You will have to decide who is going to be the person protecting the Menders. Potential candidates include Ludin, Petrus, and Scathach - the chosen character will leave the caravan and you won't be able to use them in subsequent battles in Arberrang. Alternatively, you can refuse to assign anyone to help Zefr, however, it is not recommended, because you can lose Petrus during your next return. We chose Ludin, who dealt with the problem (you will learn about the consequences of this decision only if for some reason you return to Arberrang).
In the end, the game shows a summary, which will inform you about the number of days that Iver's caravan has received to get to The White Tower. The game will take into account the choice made during the funeral concerning the food supplies and defending the walls (if you manage to last until the end of the battle, you will get 72 hours).
Second Trip to Arberrang
First, you will learn about what had happened in the town from the moment of your last visit Captain Petrus can die if you don't send anyone to help defend the Menders on the walls during the first siege battle. You can go to the market and hero quarters as before. Additionally, the game should offer a possibility to have an optional conversation with Hogun. Do not ignore it, although it does not give you any choices to make.
Before you engage in battle, you can visit two optional paces. In the "Commons", you can decide on how to lessen a violent conflict between two centaurs. Do not choose the last option, as it will result in Kanarka killing Derdriu. The second optional location is "Houses". There, you can decide how to deal with a fire. Do not choose the option to engage varls in the action, as it will result in Griss' death.
After finishing all the optional objectives in the town, click the walls to go there and listen to the report about defensive action (the result should be better if, during your first return to the town, you sent someone to help protect the Menders). You have to take part in another battle on the walls. It's recommended to take your strongest characters in the first turns. The fight starts with your units located right next to the enemy, thus neither you nor the monsters need to move closer to attack. Just like during your first return, the monsters come at you in waves. If you manage to survive two waves, you will receive an artifact, Miniature Carving (a level 10 item).
In the end, the game will again show a summary containing information about the number of days that Iver's caravan has gained to reach The White Tower. The game will take into account choices made during the centaur quarrel, the fire, and also defending the walls (for lasting until the end of the battle, you should receive about 30 hours).
Revisiting Arberrang for the Third Time

As before you will be informed about events, which had happened while you were away. Then, click on the stairs. This will open up three possible events: meeting Ubin, Egil, and Zefr. Do not omit these conversations. Playing as Alette gives you a chance to unlock Young Love achievement - you have to kiss Egil on the cheek during the conversation. It's important to note that meeting with Zefr and exhausting all dialogue options will reward you with Mala Prayer Beads (a level 10 item; attacks are never parried; +25% Critical Strike; +2 defense points per turn; 2 strength points parried).
You have to click on the tower and decide whether the defenders can rest. Do not choose the third option (making everyone rest when it's their turn), as this may result in Hogun's death (from exhaustion).
To get the action going you have to clock on the basement of the main chamber. First, you have to make a decision concerning supplies. It's best to choose the first option (saving supplies and waiting for help). Option 2 (using barrels against the warped) can reduce morale, and the third option (making the drunks join the battle) can lead to Tryggvi's death.
All of the choices above lead to a new difficult fight against monsters, who are led by Warped Eyeless. Sundr (Eyeless) should be slain first, as he has the ability to reanimate fallen allies. Try to focus your attack on him from the beginning to prevent him from using his Shatter ability, which makes him invulnerable to damage for a short time. After defeating Eyeless (the reward is Double Blind) take care of the rest of the monsters. The toughest monster is the warped bear, so try attacking it with the strongest units you can.
In the end, the game will again show a summary containing information about the number of days that Iver's caravan has gained to reach The White Tower. For having the 3 optional conversations with party members, you will receive 72 hours. Additional bonus time will also be added for the decision made in the tower and for repealing the attack from Eyeless and the monsters from the basement (about 30 hours).
The fourth return to Arberrang

The survivors have retreated near the great hall. After that you have to participate in a battle that takes place on the stairs leading to that building. This fight shouldn't be difficult to you - eliminate stronger monsters first.
After that the game plays an important event (the picture above) - Gunnulf holds the wall near the destroyed entrance to the great hall:
- Tell Gunnulf to let go and get to safety (option 1) - Gunnulf survives but he is replaced with Ubin who dies.
- Dig through the rubble while Gunnulf holds up the wall (option 2) - You manage to save a few people. However, Gunnulf dies.
- Get more people to help Gunnulf with the wall while you look for survivors (option 3) - The worst option. The operation ends in a failure - Gunnulf and Egil are dead.
You can visit the foyer to have an optional conversation with Canary and Hakon - try to ease the conflict. Meet with Dallren in the central hall. You can recognize him from your previous adventure or you can let the man introduce himself. At the end of the conversation you can accept bread or refuse to take it.
Note - You can get an additional scene provided that Rugga is still alive. This is yet another moment where Rugga can die.
After that the game will display another summary that informs you how many days Iver's caravan has for reaching The White Tower. The game counts how many people you have managed to save (the part with Gunnulf), did you murder Rugga or let him live, did you manage to solve the conflict between Horseborn and Varl and did you accept the bread from Dallren.
The fifth return to Arberrang
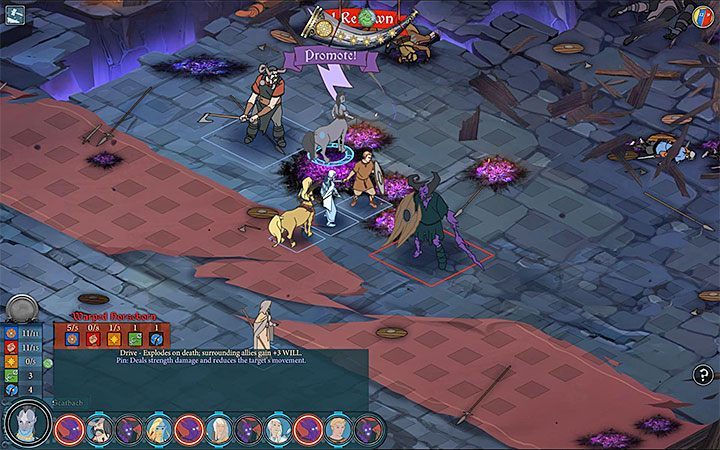
The last return to the town opens with a conversation between Rook/Alette, Yrsa, Hakon and Zefr. Yrsa suggests blowing up the great hall's rooftop (provided that she is still alive).
After that you must participate in a new large-scale battle. Your party starts in the middle of the map while the monsters start on the edges. Depending on which heroes you chose, you can defend yourself in the center of the map or decide to move towards one of the hostile groups. Once the battle is over, you can decide whether you want to retreat to the basement or keep fighting - the second choice gives Iver's caravan extra time. You can think about this option if Rook's/Alette's caravan is still able to fight.
The summary for the fifth return is brief. The game only counts time spent on defending yourself from the Warped. You can get 1 additional day or more.
You are not permitted to copy any image, text or info from this page. This site is not associated with and/or endorsed by the Versus Evil or Stoic. All logos and images are copyrighted by their respective owners.
Copyright © 2000 - 2025 Webedia Polska SA for gamepressure.com, unofficial game guides, walkthroughs, secrets, game tips, maps & strategies for top games.
