The Banner Saga 3: Chapter 18
Last update:
The chapter contains a walkthrough of chapter 18 of The Banner Saga 3 - Alas, the Sea is Still Deep and Wide. In this chapter, you will again assume control over the caravan led by Rook or Alette. The chapter continues the thread of the Arberrang siege and includes a duel with a boss - Ruin.
The Siege
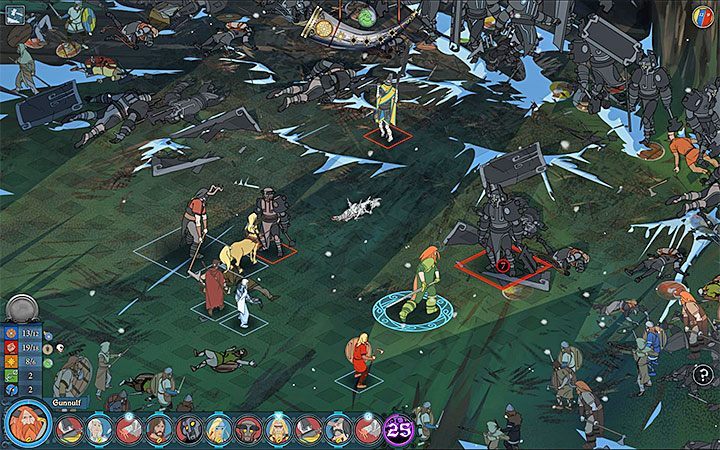
The chapter begins with a meeting with Rugga, who's held hostage. The dialogue options for this particular conversation don't matter too much, but there's a unique option that allows you to beat Rugga. Regardless of your choices, the meeting will be interrupted when a fragment of the wall is destroyed by a huge anchor. This will signify the beginning of a fight.
The first battle is similar to one of the previous encounters: the dredges will attack in waves. You can repel the first wave and escape or try and last till the very end. During the initial stage of the fight, you should be particularly mindful of the powerful annihilator - destroying his armor first is a good idea. Unusually, you also fight with creepers, who can hide and ambush you. The monsters are not very problematic, but they can stop you for a while during exploration. Also remember about the number informing you about reinforcements arriving. Try to eliminate all dredges before that happens.
If you want to play the entire battle, you will have to deal with three waves of dredges. The thing is made a bit easier by the fact that the enemies only arrive from one direction - the crack in the wall. On the other hand, every subsequent wave will see you facing more powerful enemies - try to attack them with a couple of your characters. Should you survive till the end, you will be rewarded with a Meadspring Bottle (12 level; +1 will and defense per turn; +1 defense break; defense against death, as long as strength is not equal to 1; -2 attack strength).
After the fight, the protagonist should be stopped by Tryggvi. Don't quit this conversation too soon. Allow Tryggvi to ask his questions and have a drink together. For managing to bear through the entire conversation, you will be rewarded with Tryggvi's Necklace (8 level; +20% critical hit; +3 to all talents rating).
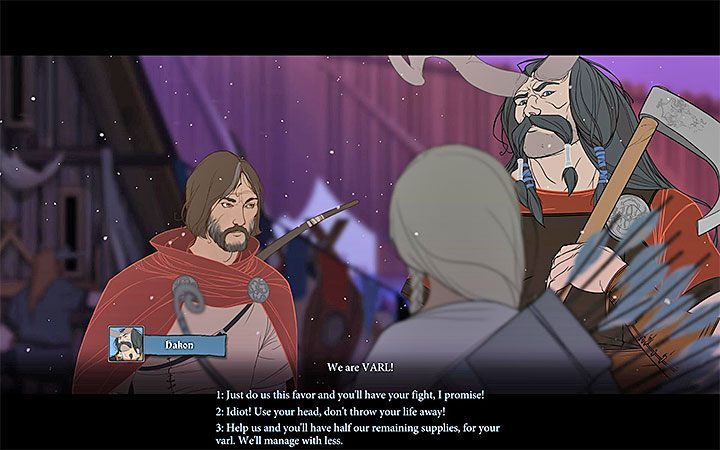
The next encounter will include Oddleif, Hakon, and Fasolt and it will result in a substantial group of Varls joining the caravan. The latter part of the meeting is the most important (the picture). You can:
- Ask the Varls to help you fight (first option) - Fasolt will leave. This is a bad choice - Varl are always useful on a battlefield.
- Insult the Varls (second choice) - Fasolt and Hakon will leave. This is a bad choice - Varl are always useful on a battlefield.
- Convince Varls to help you by giving them half your supplies (the third option) - this is arguably the best choice as it guarantees help of the Varls. (they won't leave your caravan - you can use them in the upcoming battles).
Patrolling the walls
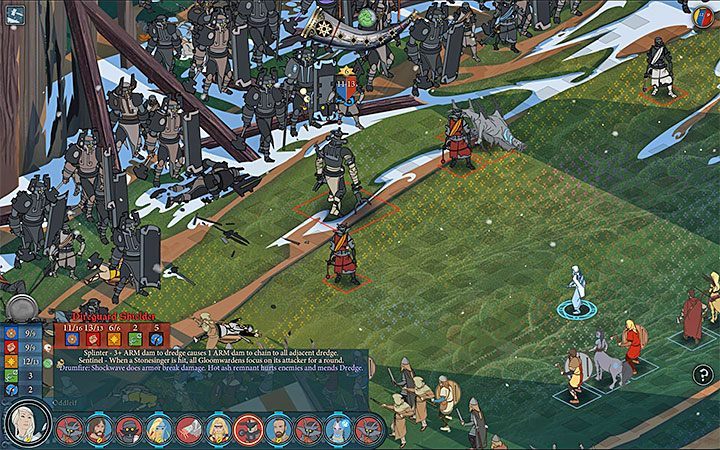
Click on the gate to start patrolling the walls. The first battle with the dredges should commence soon. The biggest threat is the biggest monster with a shield (Direguard Shielder). This unit can use abilities like, e.g. Drumfire which causes a shock wave. Don't place your heroes in a straight line on tiles that were damaged by a shock wave because they can lose single Strength points. You also have to keep your eye on the dredges with slingshots, since they can fling explosives.
After you win, you can resume the patrol and should soon encounter characters attempting to mend the walls. You can help them (you will lose some time), designate clanmates to do the works (the caravan will lose 20 people) or ignore them and keep on patrolling.
After reaching the harbor, you will learn of the deserters trying to escape from the city on boats. You can let them do that, despite being sure they won't survive; disperse the crowd (some people will stay in town, but you will lose some time); or convince Petrus to stop the ships and dismantle them to extract some wood that will help rebuild the walls (many people will stay in the town and you will get more materials but will lose the most time).
You will soon meet Nid. The first two dialogue options result in her leaving. The third choice (calling her a coward) will let you keep her around.
In the next scene, you meet defenseless people. You can leave your own warriors with them (subtract them from the caravan), attack the dredges (the caravan will be joined by 54 clanmates), or call the encountered people to hide behind the shields (the caravan will be joined by 13 clanmates and morale will be increased).
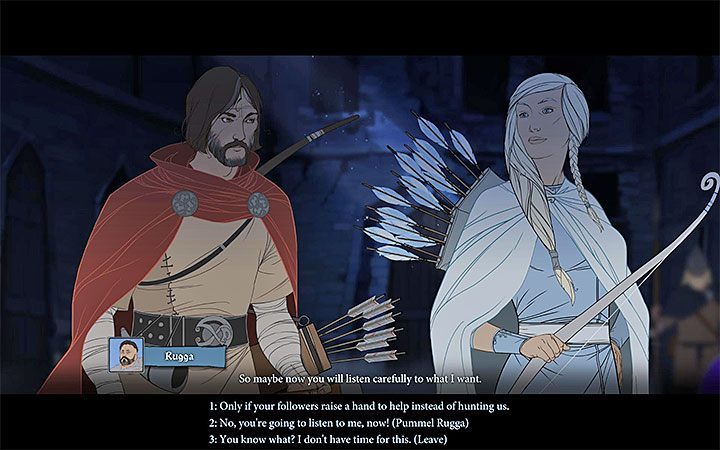
If you've spent too much time helping other people on the patrol, the Rugga's people will catch up with the heroes and kill Egil. You can start fighting them or let Petrus deal with them. If you start fighting, you will have to defeat a small and quite weak group of bandits. However, in this battle it is worth to avoid injuries in order not to have weakened your heroes before the much more difficult battle.
On your return to the grand hall, you will hear the bells ringing, signifying the death of the king. You have to meet Rugga. This is an important meeting, because it has several completely different endings. The decision is made at the end of the conversation (picture above).
- Agree to join forces with the Rugga's people. Oddleif will not like this decision too much.
- Attack the Rugga. This option offers additional choice. You can only beat Rugga instead of killing him. (you also have to confirm your choice when Rugga loses consciousness - Oddleif will protest against killing him).
- Ignore Rugga's proposition and leave.
After your meeting with Rugga you can also talk to Ludin and Yrsa as an option. During this conversation, it is a good idea to use all the dialog options. No decisions are made here, although the meeting is rewarded with an improvement in the morale of the caravan.
Boss battle - Ruin
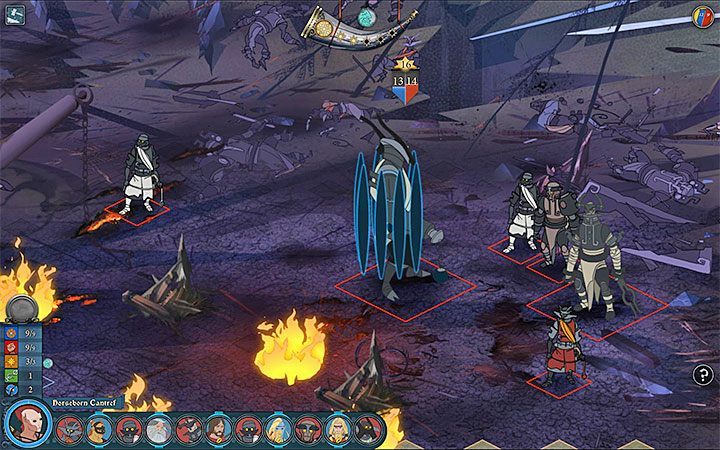
You have to join a duel against Ruin and other tormentors. Before you set off on the battlefield, you can optionally visit the heroes' tent to promote/equip the team members, and also take a look at the marketplace.
This is the most difficult battle in the game. Here are some important pieces of information about it:
- Fasolt's, Hakon's and other Varl's help is necessary if you want to break through and reach Ruin. Otherwise, you will have to fight an additional battle with a group of Dredges. They shouldn't be a threat to you but try to avoid any wounds. Important note - enemies will attack you in waves. The best solution is to flee after you defeat the first wave. By doing that you will be able to face Ruin.
- In the main battle you have to defeat Ruin and a group of tormentors. Getting rid of the boss (Ruin) will not lead to an automatic end to the fight. In order to win the battle, you must ultimately defeat all the monsters, and it is advisable to focus first on the Ruin, as its attacks can deal the greatest damage.
- Obstacles on the battlefield are an additional handicap. Avoid going through the fire holes, because every contact with fire means the loss of 1 point of health. Rubbles can be avoided or destroyed (a good idea if you command some varls).
- Shortly after the beginning of the battle, you should be joined by the allies varl Ubin and two centaurs. Ubin is going to be a valuable companion. Centaurs are rather "cannon fodder" and will be able to help only in distracting enemies from their main targets.
The Ruin has a number of unique skills, each of which is troublesome:
- The boss starts the battle with incomplete health points and armor, but is able to regenerate himself. This is possible thanks to the ability of the Immovable Object, which surrounds the boss with a protective field (check it in the screenshot above). You may try to destroy the barrier to stop the regeneration process, or it will disappear after the Ruin has returned to full health. You probably won't be able to stop the first regeneration of this kind. You should try to overcome Ruin before he is surrounded by a protective barrier again, as this will allow him to regain his lost health points and armor.
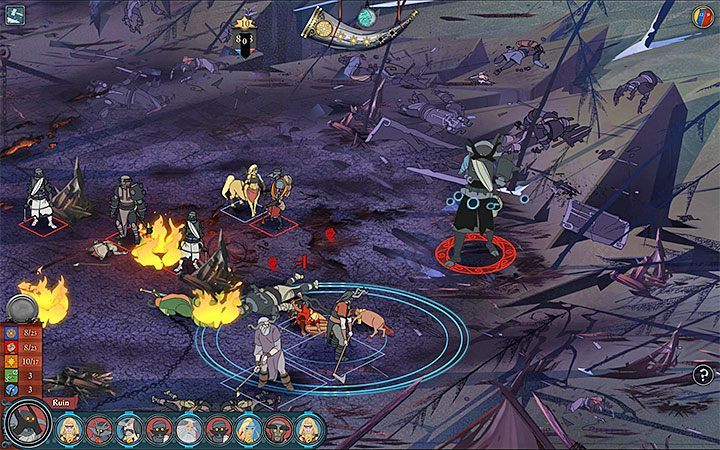
- The boss is able to lead out strong ranged attacks. The Ruin also has a passive ability, which allows him to push other units away from each other after its turn begins.
- Another strong skill of Ruin is the Irresistible Force. An example of using this capability is shown in the picture above. This skill has two phases. In the first phase, the gravitational stone attracts to itself all the attacked units. In the second phase, the stone explodes and this occurs during the Ruin's turn. You should try to remove as many heroes as possible from the stone in the rounds prior to the explosion (i.e. go outside the circles visible on the ground).
Only after the Ruin has been killed should you take care of the other monsters on the battlefield for good. For defeating the boss, you will receive the Ruined achievement. At the very end of the day, you will have a conversation with Oddleif and Ubin, among others. After that you will advance to the next chapter of the game.
You are not permitted to copy any image, text or info from this page. This site is not associated with and/or endorsed by the developers and the publishers. All logos and images are copyrighted by their respective owners.
Copyright © 2000 - 2026 Webedia Polska SA for gamepressure.com, unofficial game guides, walkthroughs, secrets, game tips, maps & strategies for top games.
