Find the activation key | Chapter five | Walkthrough

Go back inside the park. Right after the gate, turn right and go all the way up the stairs, as shown above.

Pick up the crumpled up note that's lying on the ground next to the car, and then approach the car on the track - it's the one that's just arrived.
Setting up the route for the rollercoaster car

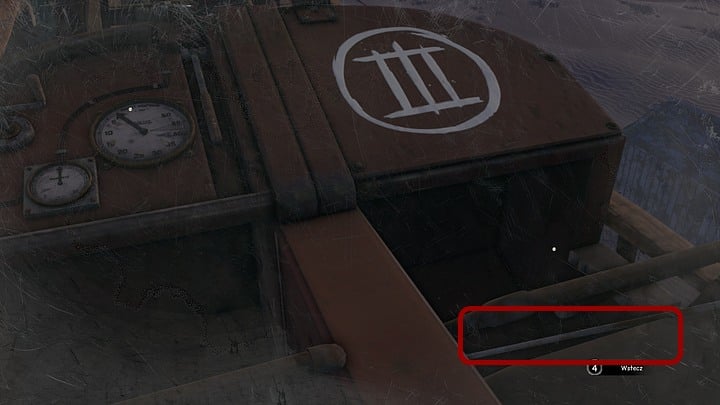
First off, zoom in on the right front seat - there's another shank there that you obviously have to take with you in another zoom. Then zoom in on the dashboard and closely examine the gauges there.

Use your mouse on the knob on the left to turn it counter-clockwise to move the needle on the larger gauge to its maximum position - number 50. Number III is painted on this car, and that's where it takes you - to the place described as III on the map in the workshop. According to the hint from the same map (15 + 25), place the shanks you've found (the first from underneath the bench inside the park and the next that was in this car) in numbers 15 and 25 on the bigger gauge. Lower the lever on the right with your mouse.
The car will slowly accelerate. When it stops for the first time, remove the 25 shank. After a moment, the car will stop again - look left and press the active point on the bottom of the screen. Kate will exit the car.
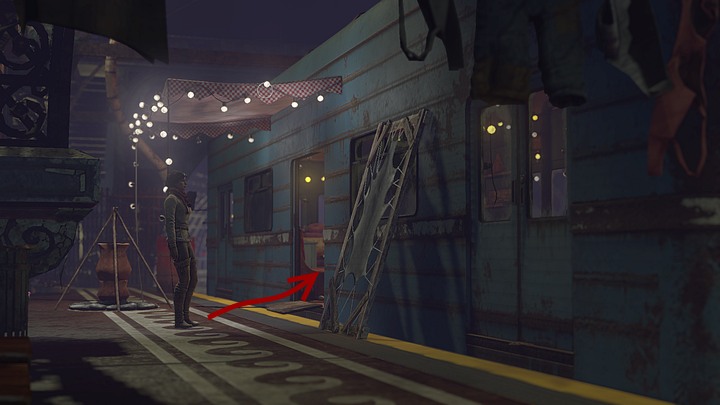
On the right, there will be an entrance with a ladder in the floor - get down there and you'll make it to a metro station. Take the stairs near the bottom of the screen, and then go left (up the screen).

Keep walking until you reach the passage shown above. Enter and look around. Seems somebody's living here.

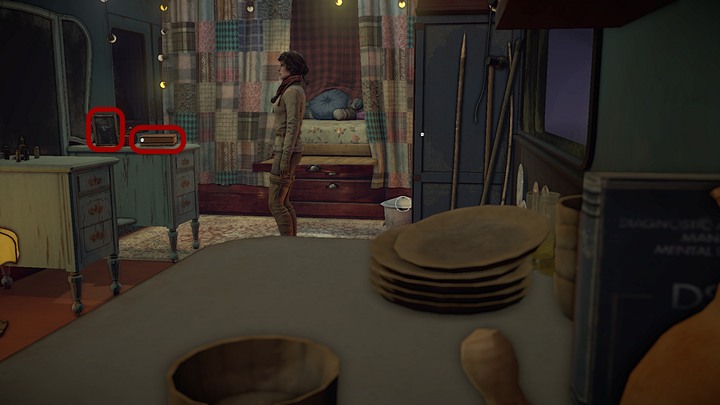
Zoom in on the picture of the man, which is standing on a cupboard next to the bed, and then take photo album from the same cupboard. Go through it carefully (inventory, documents). In the other part of this "house" there is a radio - you can turn it on and listen to a fragment of a melodramatic play.
Get outside - Kate will now personally meet the owner of the flat we've just visited. Talk to this corpulent woman - the conversation will reveal that she has the activation key we need. If you'd like to get it without unnecessary problems (and get the I Am Legend achievement) choose those dialogue options that will appease her (3, 1, 2) - it's especially important to mention the album picture (achievement: Martingale, unless you got it earlier - during your first conversation with captain Obo or mayor Buliakin).). If, however, the conversation should go south, you will need an additional argument to convince Katerina.
In order to do that, go back to the place where you've entered the metro station, but instead of taking the ladder, go right. In the next room, got towards the bottom of the screen and take the stairs.

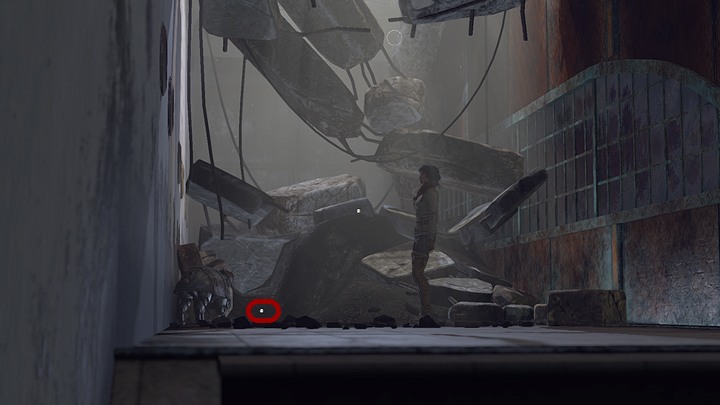
You will arrive at a pile of rubble, around which the Katerina's mech dog is poking. In the zoom, take the dog tags lying on the right from the dog. The tags belong to Katerina's late husband.
Go back to Katerina (she's sitting at the table in her "flat") and give the dog tags to her - this is enough for her to give you the activation key.
You are not permitted to copy any image, text or info from this page. This site is not associated with and/or endorsed by the Microids/Anuman Interactive or Microids/Anuman Interactive. All logos and images are copyrighted by their respective owners.
Copyright © 2000 - 2025 Webedia Polska SA for gamepressure.com, unofficial game guides, walkthroughs, secrets, game tips, maps & strategies for top games.
