X18 - Quests | The Dark Valley
This is a very unusual place. X18 laboratory is a small underground map, very similiar to Agroprom Sewers level. Sadly, you won't be able to use any minimaps, however there is only one path leading to your final destination, so it's going to be very hard to get lost. I will also do my best to explain which places you need to visit. You won't spend too much time here, however you must be very careful. You will encounter a few very dangerous mutants. Thankfully, there are also some interesting objects to be found, including better armors and precious artifacts. The map has been divided into three zones. You will have to acquire a combination for the lock in order to reach the next zone. Remember to save your game from time to time, especially if you're playing on one of the higher difficulty levels.

QUESTS:
1. Find the documents in X18
Received from: this quest begins automatically once you've completed Find the documents in the underground lab task
Starting point: X18 laboratory - right after you start exploring this map
What needs to be done:
a) find the documents
b) deliver the documents to Barkeep
Complete quest walkthrough:
There's nothing interesting near the start area, so you may as well use the stairs to reach the lower level of the underground complex (#1). Don't be scared, because crates and other smaller objects will be flying your way (#2). This is connected to the boss character of this location. You shouldn't receive any major damage from this, so you may as well ignore these attacks. Otherwise you would have to keep moving and not in a straight line.
 |  |
You will come across a steel door, however you may ignore it for the time being. Instead, focus all of your attention on exploring the surrounding rooms. You must have a machine gun ready, because the area is not safe. Be on a look out for artifacts. There are a lot of these objects here (#1), however you would have sell most of them. One of the artifacts is inside a radioactive zone (#2), but thankfully you won't have to pick it up, especially if you don't have any medicines at your disposal.
 |  |
There's a small corridor to your right. You must be EXTREMELY careful there. This area is being guarded by TWO mutants (#1). I'd strongly recommend that you take them out from a larger distance. Try aiming at their heads. Allowing them to make a jump is very often equal to a quick death, however you could also try dodging their attack (#2). You won't have to explore this tunnel from here. The most important thing is that the mutants are dead.
 |  |
I'd strongly recommend that you check all of the surrounding rooms. Once of them is going to be filled with a lot of cabinets (#1). MAKE SURE that you've opened all cabinets. You will find a lot of grenades and med-kits. There's also a gun with a grenade launcher. Dismount it, so you'll be able to use it with your weapon. You will also come across a Monolith Suit (#2). Don't be fooled by a lower price. This is a much better armor, so exchange it for your Stalker Suit.
 |  |
Now you will have to locate a small corridor which leads to the unexplored area of the map (#1). That's where the mutants have appeared, however this time we're moving from a different direction. Keep going straight. You will have to turn right at some point. You will come across a room filled with fire traps (#2). I would recommend exploring it, because you will find a few precious artifacts here. Also, check the body for additional supplies.
 |  |
You may proceed to the next section. You should be able to locate a room with a dead scientist (#1). Check his body. Once you've acquired the combination for the door, return to the main room (it's been described in the second quest of this location). Once you've opened the door, use the stairs to get down to the lower floor (#2). I would recommend that you save your game here.
 |  |
Don't worry about other objects which will be flying towards your character. Focus all of your attention on avoiding dangerous anomalies, especially since some of them will be moving. You should be able to locate a room with a lot of interesting artifacts (#1). After that, use the nearby stairs to go down to a lower level (#2). Save your game once again, because there's another mutant nearby and you're going to have to kill this creature.
 |  |
The mutant should be standing at the other end of this large room. You could try and kill it with your machine gun. If you decide to choose this approach method, you will have to aim at the head of the creature (#1). There's a simple way to kill it, though. Be on a look out for a locket launcher. You will find it on your left. Pick up the rocket launcher and use it to get rid of the monster. Once this is done, check the body of a scientist in order to acquire the code. You may also check the rest of the room. You should be able to find a few interesting things here (#2).
 |  |
Once you've opened the second door (check quest 3 description) you will find yourself inside the final room of this complex. That's where the boss creature is hiding. Before we'll proceed with the fight, you will have to pick up the documents, because that's why you're here. Use the stairs (#1). You will find the documents on your right (#2). SAVE the game!
 |  |
It's going to be a very easy fight, however you must remember about a few important things. The boss is a small and partially invisible creature. Once you hit it, you should notice a blood appearing on nearby walls and floors. This creature can be found near the stairs and that's where you should kill it (#1). Ignore the main room, because you would have to deal with a lot of flame traps. Once you've killed this creature, an interesting cut-scene will appear on the screen (#2).
 |  |
Now you will have to exit the lab. Sadly, this means that you will be required to choose the exact same passageways to reach the lab complex. Additionally, enemy soldiers will arrive here. Remember that you aren't rushed by anything, so take your time. You should be able to find a large stash nearby (#1). There are some medicines here. The first soldier is guarding a staircase (#2) and there's more of them in that area.
 |  |
Most of the enemy soldiers (#1) will leave Obokan rifles behind, however you shouldn't pick up these weapons, mostly because your current gun is more effective. You will have to reach the exit from the lab (#2). This will allow you to return to The Dark Valley sector.
 |  |
2. Find the codelocked door
Received from: quest begins automatically once you've reached the first steel door
Starting point: first locked door
What needs to be done:
a) find the code that's needed to open the door
b) type in the code in order to open the door
Complete quest walkthrough:
Like I've said before, you will come across a steel door and that's where this quest will begin (#1). You shouldn't have any problems finding the door. It's in the biggest room of this part of the complex. Once you've found the dead scientist, you will have to check his body in order to receive a note with the code (#2).
 |  |
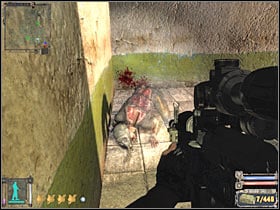
Make sure that you have checked the body. You won't find any items here, but you will receive a code - 1243 (#1). Now you may go back to the main room of the complex. There's a small panel on your left (#2). Type in the code in order to open the door. SAVE your game here.
 |  |
3. Open the door to the control center
Received from: quest begins automatically once you've reached the second steel door
Starting point: second locked door
What needs to be done:
a) find the code that's needed to open the door
b) type in the code in order to open the door
Complete quest walkthrough:
You will have to do the same thing here. Once you've reached a locked door, you will probably notice that some kind of a creatures is trying to open it (#1). Thankfully, you won't have to worry about it. Locate the scientist (#2) and check his body in order to receive a note with the code 9524. If you want to know how to reach him, read the description of the first quest. The scientist will also have a decent machine gun on him - IL 86. I would recommend picking up this weapon and saving it for later, mostly because you won't find any ammunition for it.
 |  |
You are not permitted to copy any image, text or info from this page. This site is not associated with and/or endorsed by the THQ or GSC Game World. All logos and images are copyrighted by their respective owners.
Copyright © 2000 - 2025 Webedia Polska SA for gamepressure.com, unofficial game guides, walkthroughs, secrets, game tips, maps & strategies for top games.
