Legend of Grimrock: Levels 11-13 The Tomb, The Prison, The Cemetery
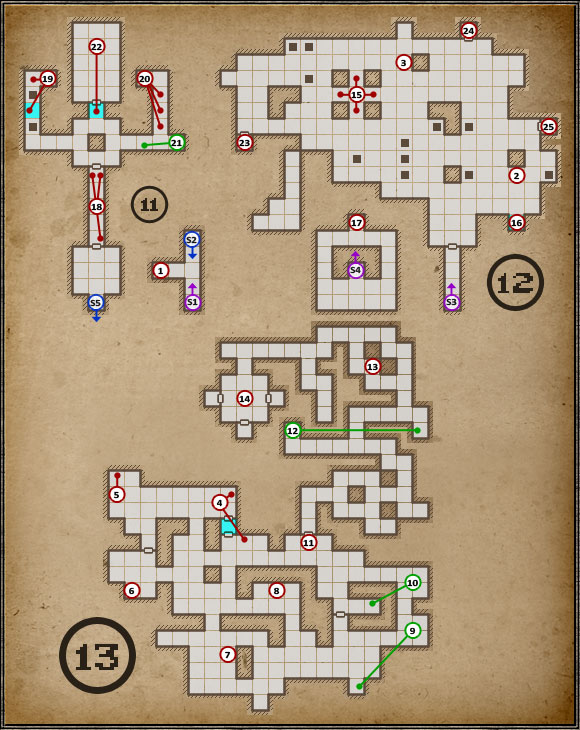
I've assembled the three last level of Grimrock into one. I did it because in fact, these three levels altogether create one dungeon of average size. The player (intentionally, by accident or out of necessity) keeps jumping between the levels with trap doors and portals, as such is the construction of the end-game. By connecting the descriptions, we will avoid chaos caused by jumping between given pages of the guide and unnecessary references.
 | This part of level 11 is merely a passage between level 10 and 12. Inside the alcove between the stairs you will only find a scroll informing that this level is locked. You can return to this point to catch a breath between the fight on the lower level, though only for a certain amount of time. |
 | The beginning of level 12 brings Goromorgs patrolling the whole area. The phantoms keep respawning here, so you can use this fact to train your characters - it's the last chance to do it more or less easily. 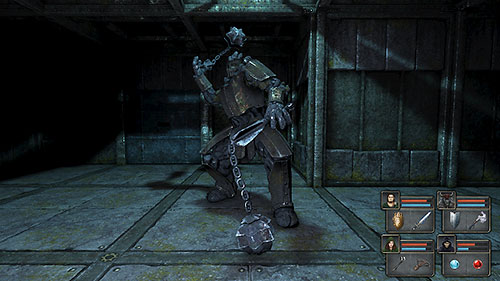 As you approach the pillars at point (15) you will be attacked by a new type of enemy, i.e. four Wardens. These constructions are the toughest beasts thus far, so lure them out one at a time. Their fighting style is very similar to the Ogres, so your tactic should be identical. Pretty much every time you fight them, a Goromorg will also be somewhere nearby, so try to get away from him until you defeat the golem - fighting them both can end very badly. |
 | At this spot there's a trap door which will take you to the desired point on level 13. Of course you can use any other trap for this (and it might come in handy later on numerous times), but to keep a certain order I choose this one. |
 | By using the trap door at point (3) you will end up right here. Level 13 is full of Shrakk Torrs, Tentacles, Giant Spiders and also some Giant Crabs by the end. You will also find food and herbs which you're probably running out of, so take a look inside each alcove and check each piece of rubble. For starters, press but button on the wall beside to open access to a portal which leads back to level 12. The second button used for the same purpose can be found beside the portal, on the other side. |
 | Here you will find the first part which you need to turn on the broken machine at point (15).  Steel Gear Right beside, on the northern wall there's also a button which you need to press to open the door at (11). |
 | On the shelf in this room there's another item needed for the machine.  Ore Nearby there's a Sack with some Torches inside. By going further east, you will also find the Ring Gauntlets right beside the door. |
 | On the next shelf, there's the third required component.  Infusor |
 | The last part is inside the wide corridor.  Bladed Gear |
 | Inside the south-east alcove there's a button on the wall. It opens the first of the secret room on this level. You will find some food there, as well as Fire Bombs. |
 | In the dead end behind the grate there's another button which opens a secret room. Inside you will find a Wooden Box with alchemy ingredients. |
 | You have opened this area at point (5), so it should be waiting for you wide open. Inside the corridors here you will come across Spiders and at the end Crabs as well. |
 | To open the room here, you first need to find the button on the wall of the nook on the other side of the corridors. The second to last Treasure in the game can be found there: the Globe of Tetharion. |
 | Crabs will start appearing in this area. One of them will drop a Gold Key, so keep your eyes opened. |
 | Finally, a Crystal of Life. You might need to use it a couple of time during the upcoming final battle. Remember that you can return here from level 12 at any moment by using one of the trap doors. 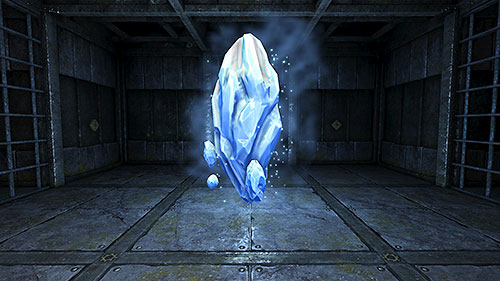 That's not all! As you can see, the last Treasury can be found here as well. If you've killed all the Crabs, you are sure to have the Gold Key which you need to open one of the three grates. Here's what awaits you behind given gates:
After using the treasury and Crystal, head to the portal at point (4) and return to level 12. |
 | Time to repair the machine between the four pillars. In order to do that, you just need to put the proper components (the ones you've found on level 13) into their places. Take a good look where you put each part, as it will be very important during the next fight. Make sure to save your game before repairing the machine and leave nothing behind on the previous levels, as you will be cut off from them. If you've missed some secrets or collectibles on level 1-11, this is the last chance to get them. The below screenshots show exactly which item fits which slot: 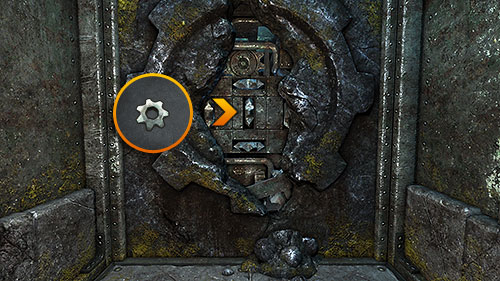 East: Bladed Gear 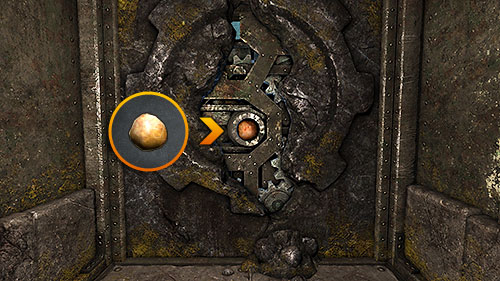 North: Ore 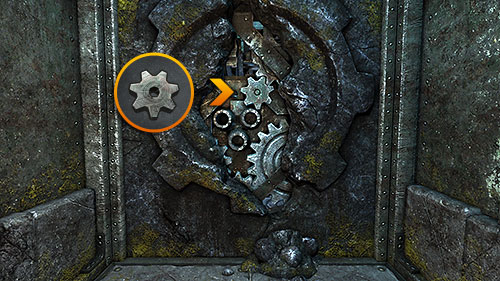 West: Gear 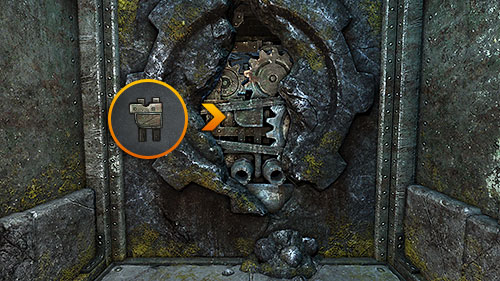 South: Infusor After placing all the items in the proper sockets, the machine known as Undying will come to life and out of gratitude will want to squash your whole team. Additionally, the whole 12th level will be flooded by monsters which you've come across on the above levels. To the south of the pillars, at point (15), Ice Lizard Steaks and Prison Keys needed to open the rooms at (24), (25) and (26) will start appearing. It's completely optional, though highly suggested. At this point you won't be able to hurt the demonic "cube". Run to the newly opened portal at point (16). |
 | The portal will take you to a previously inaccessible part of level 11, where you will find a weapon which will let you take the cube apart again. |
 | You will land here after going through the above portal. It's a peaceful place there nothing threats you. You can leave the battlefield at any moment by using the portal and regenerate your strengths here before the next attempt. Head to the stairs (S4). |
 | 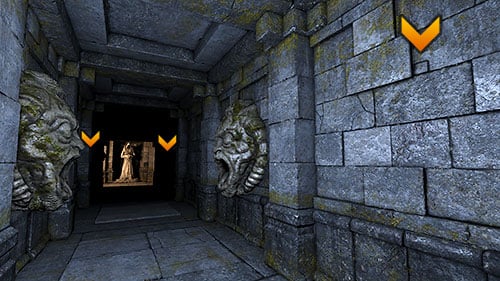 Here you will come across a suspicious corridor with a pressure plate in the middle. Press it and the corridor will lock from both sides and filled with poison. In order to safely get though, you need to find three buttons on the walls of the corridor: one by the entrance and two by the exit. The poison cloud will make finding them more difficult, so I have a suggestion: before stepping on the pressure plate, place the mouse at the spot where the first button is. Afterwards step onto the plate sideways (without moving the mouse), quickly return to the button and press it, head to the end of the corridor (still without moving the mouse) and press the two other buttons. Each one of them is precisely in the same spot on the screen. |
 | After crossing the wretched corridor, take a rest in the room with a pillar in the middle. On the other side there's a locked door, for which to open you will need two Ornate Keys found at (20) and (21). |
 | Inside the corridor leading to the first key you will come across two opened trap doors. In order to open the first one, you first need to throw an item onto the pressure plate on the other side of both trap doors. The thing is made harder by the portal which keeps activating and deactivating. You need to throw/shoot at the platform when the portal is deactivated, or else the item will be moved back. After closing the first trap door, get onto it and examine the western door beside the portal to find a hidden button there. Feel the moment at which the portal turns off, quickly approach the button and press it before the portal returns to the starting position. Both trap doors will be closed after you do it, so you should easily reach the key. If you fall into an open trap door while doing so, as below there's only a single mosquito and a portal leading back up. |
 | The second key is protected by demon heads with three pressure plates beneath them. You can access the key without any problem, the trap activates after you take it. The way back will be far more dangerous, as stepping onto each pressure plate causes the head above it to launch a projectile. To avoid getting hit, use any item you want to activate the plates before you step onto them. |
 | 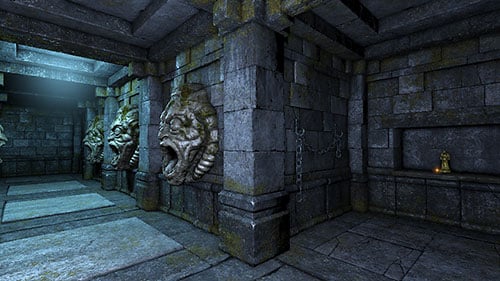 Before leaving this corridor, examine the southern wall to find a stone with a carved runic symbol. Press it and in return you will receive the last Treasure of Grimrock: the Goromorg Miniature. |
 | Use the keys to open the gate at (19) and enter the Tomb on the other side. Apart from two Scrolls the room seems empty, but only seemingly. 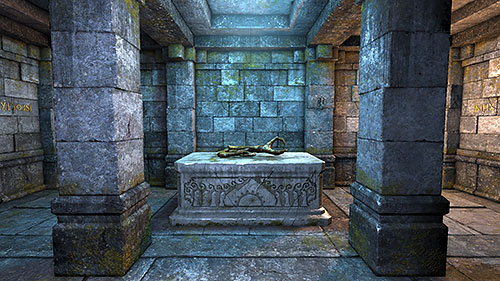 Take the torch from the wall and turn off the light you use and the Weapon of Power, the only weapon capable of dismantling the cube on level 12 will appear on the pedestal. Pick it up and a portal which can take your team back onto the battlefield will appear behind you. Fighting The Undying One should now be just formality. Equip your party with ranged weapons, at best enhanced with lightning (bombs, wands etc.). Mages should use Lightning, as the boss is most vulnerable to this kind of magic. In the first phase of the battle, the cube will truly be undying. You will need to take out the items which you have placed yourself just recently. Use the Weapon of Power to stun The Undying One for a short while and take out the items in order by clicking on a given component and throwing it away. The screens at point (15) should make recognizing the parts easier. Other monsters will attack you as well, though the keep respawning so you shouldn't even bother with attacking them. The only exception is when a monster blocks your route. After you take out all four parts, the cube will start glimmering with orange light and from now on it won't be immortal anymore. Destroying it shouldn't take you too much time - a couple bombs, spells, projectiles from the Weapon of Power should get the job done. Just remember to stay away from it and don't let the monsters push you to a corner. Remember that in case a member of your party dies, you can jump down onto level 13 by using any trap door you like and use the Crystal of Life. Also nothing stands in the way of retreating from the battle to heal up by using the portal at point (16). 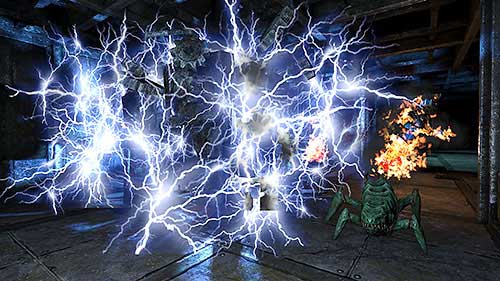 After the fight, Try Undying One will stop, throw some sparks and fall into pieces. You will just need to dodge the enemies for a bit longer until the ending cutscene starts and credits roll afterwards. Congratulations, you have finished the Legend of Grimrock. |
 | As I have mentioned fore, keys to the below items will appear in various places during the battle.
From my observations, it seems that they most often appear around the trap door south of point (15). They're rather hard to notice, as the metal they're made from is the same colour as the whole room. Additionally, they sometimes are hidden below Lizard Steaks, so keep your eyes open! The most important room here might in fact be number (24), as inside you can find the Lightning Rod, useful during the boss fight. |
 | Inside this room you can find a Sack with Healing Potions. |
 | The last room hides four Lightning Bombs, also useful in the final fight. |
 | Stairs to level 10. |
 | Stairs to level 12. |
 | Stairs to level 11 and 10. |
 | Stairs to The Tomb of Designers on level 11. |
 | Stairs to level 12. |
- Legend of Grimrock Game Guide & Walkthrough
- Legend of Grimrock: Walkthrough
- Legend of Grimrock: Legend
- Legend of Grimrock: Level 1 Into The Dark
- Legend of Grimrock: Level 2 Old Tunnels
- Legend of Grimrock: Level 3 Pillars of Light
- Legend of Grimrock: Level 4 Archives
- Legend of Grimrock: Level 5 Hallways
- Legend of Grimrock: Level 6 Trapped
- Legend of Grimrock: Level 7 Ancient Chambers
- Legend of Grimrock: Level 8 The Vault
- Legend of Grimrock: Level 9 Goromorg Temple I
- Legend of Grimrock: Level 10 Goromorg Temple II
- Legend of Grimrock: Levels 11-13 The Tomb, The Prison, The Cemetery
- Legend of Grimrock: Walkthrough
You are not permitted to copy any image, text or info from this page. This site is not associated with and/or endorsed by the developers and the publishers. All logos and images are copyrighted by their respective owners.
Copyright © 2000 - 2025 Webedia Polska SA for gamepressure.com, unofficial game guides, walkthroughs, secrets, game tips, maps & strategies for top games.
