Into the Breach: Combat guide
Last update:
This chapter will teach you how to use the terrain tiles and random events against your opponents. You'll learn effective ways of dealing with your opponents which doesn't necessarily mean killing. Most of the time, your task will be to draw the opponents away from the civilian structures rather than kill them.
Terrain Tiles and Random Events
The game is built around the effective use of terrain tiles and random events. Killing itself won't be enough to eliminate your opponents. The game informs you about the events, marking them in red (e.g. launching of a rocket that you need to defend) or yellow (e.g. air strike or an electrical discharge) Here is a list of all-terrain modifiers and events.
Terrain Modifiers
Name | Effect |
Forest -> Forest Fire | Engaging a forest tile can lead to a fire. Units who are standing on Forest Fire tile will receive 1 point of damage during each turn. |
Sand -> Smoke or Electric Smoke | Engaging the tile has raised a lot of smoke. A unit caught in the smoke cannot attack or repair itself. Electric Smoke - a default passive ability of Rusting Hulks that changes the smoke into Electric Smoke, dealing additional 1 point of damage to units caught in the smoke (doesn't work on mechs) |
A.C.I.D pool | A unit that enters an A.C.I.D pool or is hit with acid will receive x2 more damage. |
Water or A.C.I.D tile | Pushing an enemy unit into the water will result in the automatic death of the unit. Doesn't work on massive units, air or mechs. Mechs cannot attack in water, A.C.I.D or lava tiles. Units that manage to survive stepping into an A.C.I.D tile will receive x2 more damage. |
Mountain | Blocks movement and attack. A mountain tile needs two attacks to be destroyed. |
Ice | Engage an ice tile two times to change it into the water. |
Random Events
Air support | There is an air strike happening during each turn that causes an instant death to all units found in 5 tile radius. |
Lightning Strike | Some of the tiles receive a lightning strike effect that causes instant death to the unit found in its radius. |
Shield | Civilian buildings receive a shield at the beginning of the game. The shield absorbs any amount of damage, but does so only once. |
Old Earth Mine | Mines. Each unit that enters its radius is killed instantly. |
Tidal Wave | A portion of the game field is filled with water at the beginning of each enemy turn. |
Volcanic | A certain area is filled with lava at the beginning of the turn. Has the same parameters as water with the addition of a fire effect being placed on units who survive the encounter. |
Conveyor Belt | Units placed on the field with an arrow will be moved according to the direction of the arrow. |
Ice Storm | Fills a 3x3 area with ice that immobilizes all units. |
Boulder | At the beginning of the turn the map is visited by stones falling randomly from the sky, killing the enemy and allied units alike. |
Vek Units
This list contains the names of the enemy units along with statistics and special abilities. Take note of the Alpha versions of normal units - these are more powerful and can prove to be more challenging.
Name | Abilities and Statistics |
Leaper | Immobilizes a unit with a thread and engages it in the next turn for 3 points of damage. Can jump. Has 1 health point and 4 range points. |
Alpha Leaper | Deals 5 points of damage and has 3 health points. |
Hornet | Causes 1 point of damage to enemies in front of it. Has 2 health points and a range of 5 points. Air unit. |
Alpha Hornet | Deals 2 points of damage on two tiles in front of it. Has 5 health points. |
Soldier Psion | Regenerates 1 health point for all Vek units. Air unit. Has 2 health points |
Blood Psion | Regenerates 1 health point for all Vek units per turn. Air unit. Has 2 health points. |
Blast Psion | Places a bonus that deals 1 point of damage after the death of a Vek unit. Has 2 health points. |
Shell Psion | Gives a shield bonus to all Vek units that absorb 1 point of damage. Air unit. Has 2 health points. |
Scarab | Fires a projectile that avoids tiles in front of it, dealing 1 point of damage. Has 2 health points and a range of 3 points. |
Alpha Scarab | Fires a projectile that avoids tiles in front of it, dealing 3 points of damage. Has 4 health points and a range of 3 points. |
Beetle | Charges at a target dealing 1 damage point. Has 4 health points and 2 range. |
Alpha Beetle | Charges at a target dealing 3 damage points. Has 4 health points and 2 range. |
Spider Leader | Boss. Has 6 health points and 2 range. Cannot be killed by pushing it into water (Massive). Deploys 2-3 spider eggs. |
Spiderling | Has 1 health point and 3 range points. |
Beetle Leader | Boss. Has 6 health points and a range of 2 points. Cannot be killed by pushing it into water (Massive). Charges onto its target dealing 3 points of damage and leaving a trail of fire. |
Large Goo | Boss. Has 3 health points and a range of 3 points. Cannot be killed by pushing it into water (Massive). Causes 4 points of damage in its basic form. Killing it divides it into two smaller versions that also deal 4 points of damage. |
Firefly Leader | Boss. Has 6 health and a range of 3 points. Cannot be killed by pushing it into water (Massive). Fires projectiles from the front and behind dealing 4 damage points. |
Hornet Leader | Boss. Has 6 health and a range of 3 points. Cannot be killed by pushing it into water (Massive). Air unit. Attacks 3 tiles in front of it dealing 2 points of damage. |
Blobber | Has 3 health and a range of 2 points. Fires a bomb (Blob) that deals 1 point of damage in the next turn. |
Alpha Blobber | Has 3 health and a range of 2 points. Fires a bomb (Alpha Blob) that deals 3 points of damage in the next turn. |
Firefly | Has 3 health and a range of 3 points. Fires a projectile dealing 1 damage point. |
Alpha Firefly | Has 5 health and a range of 2 points. Fires a projectile dealing 3 damage points. |
Scorpion | Has 3 health and a range of 3 points. Incapacitates its target and deals 1 damage point in the next turn. |
Alpha Scorpion | Has 5 health and a range of 3 points. Incapacitates its target and deals 3 damage in the next turn. |
Crab | Has 3 health and a range of 3 points. Fires a projectile that avoids tiles in front of it, dealing 2 damage on two tiles. |
Alpha Crab | Has 5 health and a range of 3 points. Fires a projectile that avoids tiles in front of it, dealing 2 damage on two tiles. |
Burrower | Has 3 health and a range of 4 points. Deals 1 damage point in a single row. Cannot be moved. Hides below ground after receiving damage. |
Centipede | Has 3 health and a range of 2 points. Deals 1 damage point and places an A.C.I.D effect in a row of 3 tiles. |
Efficient Combat
You'll often find yourself in a situation where the opponent has the numerical advantage and will attack a few different targets in the different parts of the map. The key to success is mixing tactics in order to minimize losses coming from enemy attacks, sometimes at a cost of mech's health points.
The guide often comes back to pushing enemies. Each attack is marked by a few icons that correspond with the effect of the chosen move.
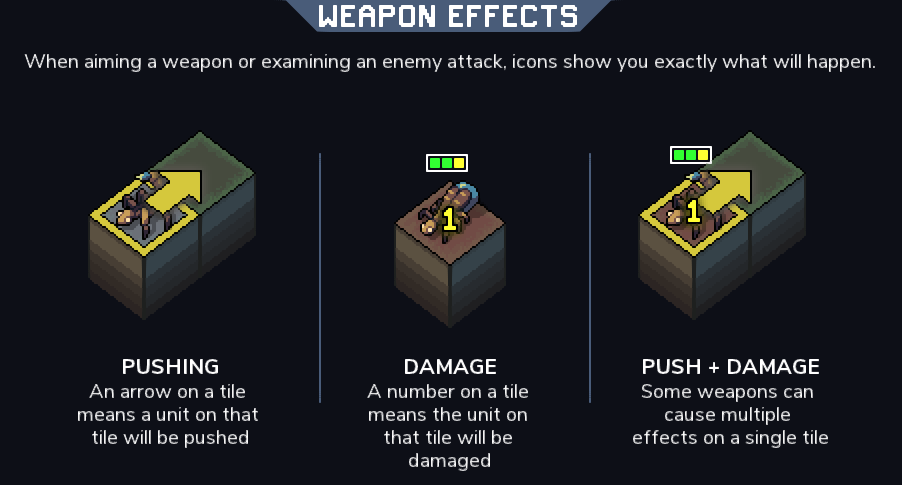
- The picture on the left depicts pushing, the middle one - damage dealing, the one on the right shows a mix of the two (pushing + dealing damage).
- The only viable strategy against numerological advantage is pushing opponents out of their range of attack.
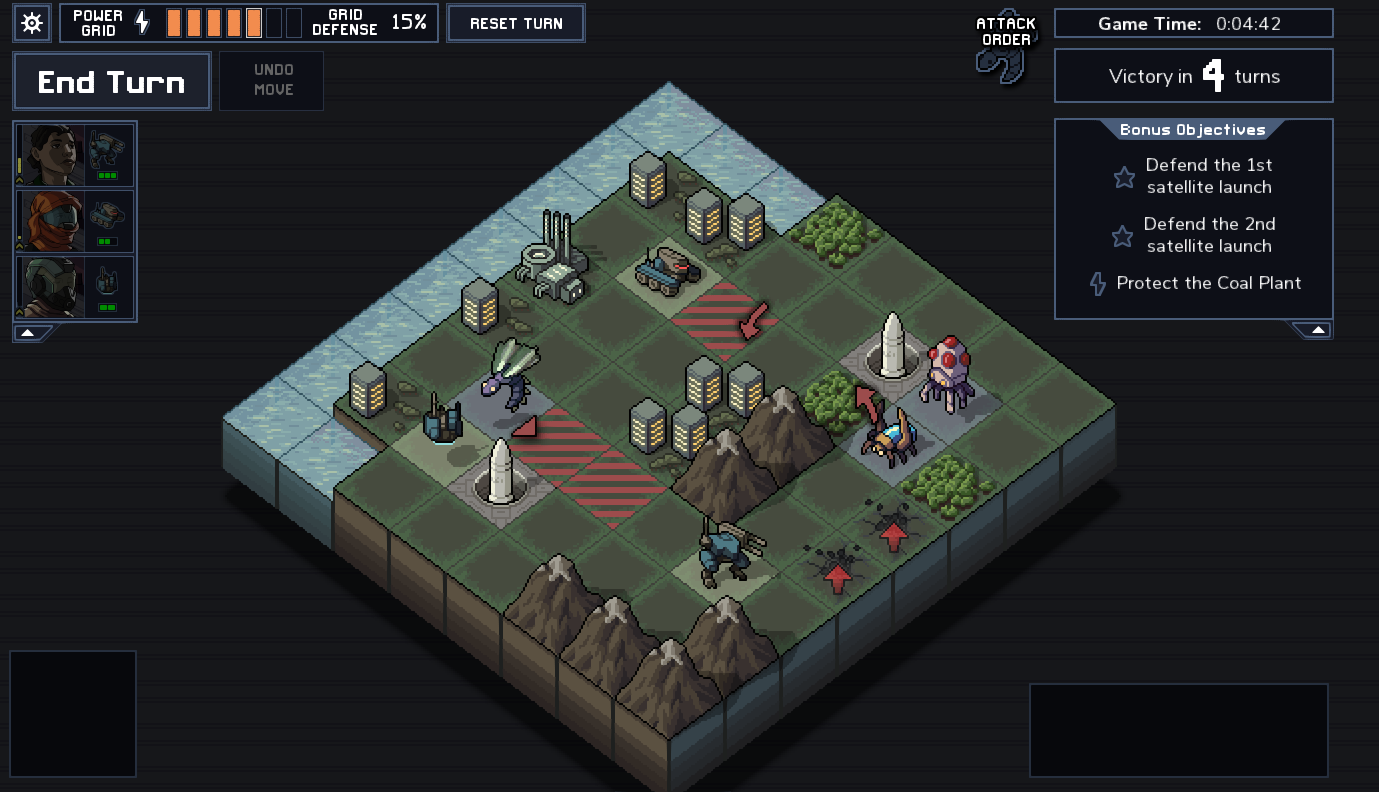
- Knowing that you cannot defeat an opponent, you can delay him for the time being. Unfortunately, this is only a temporary solution, as in the next turns you'll be forced to fight against more enemy units.
- A good way of stopping your opponents (aside from killing them using your mechs) is blocking their movement paths.
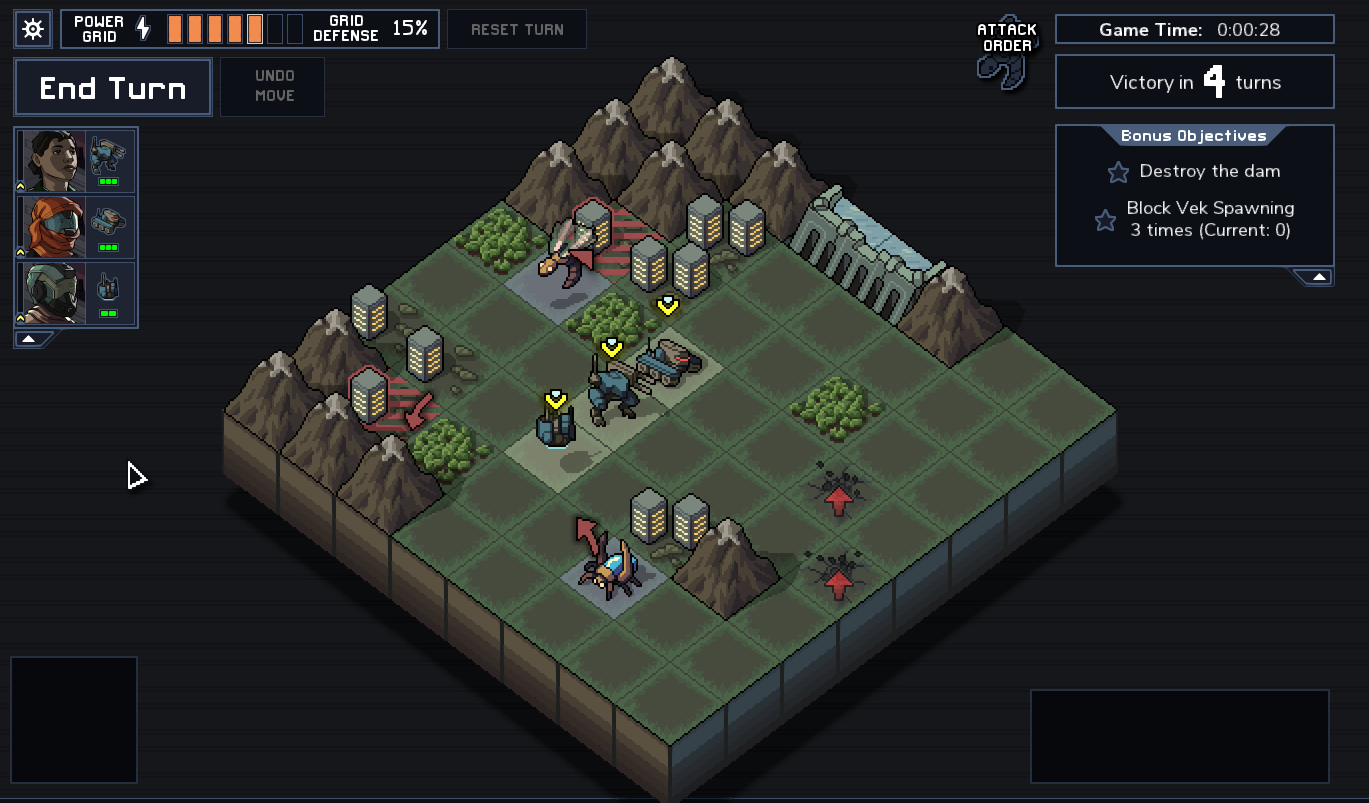
- The cracked earth with red arrows means that this is the next target of your opponent. You can step into these fields with your mechs, or even better - place your enemies there. Not only they will stop their allies from moving forward - the enemy units receive 1 point of damage.
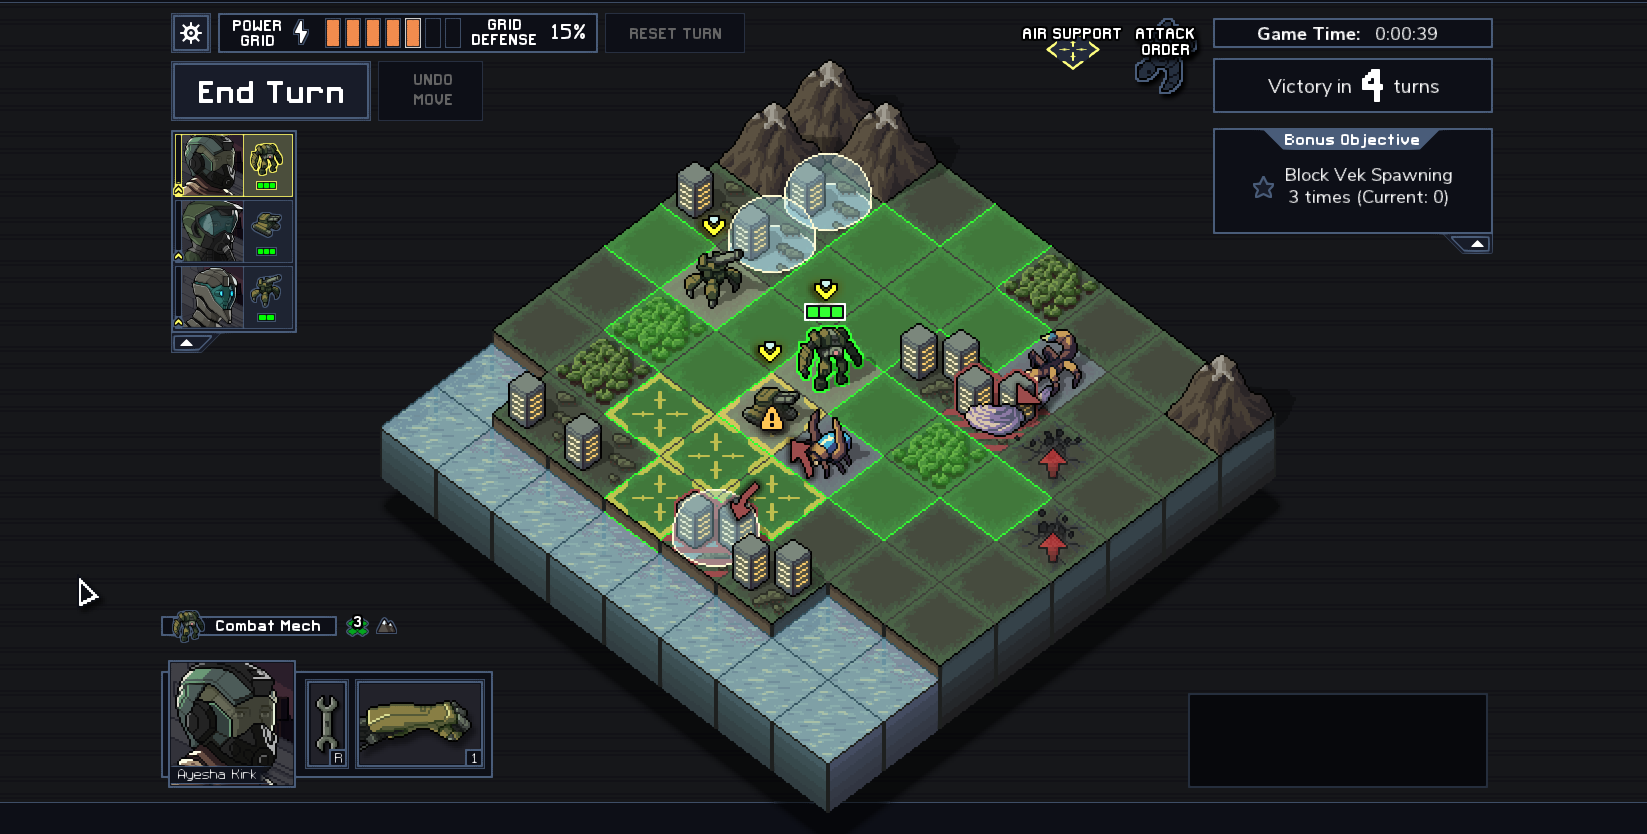
- The other cheap way of fighting your opponents is to use random events against our opponent. These events are signalized by yellow color (the yellow icons on 5 tiles are the same color as the Air Support seen in the upper right corner of the screen). Contact with most random event tiles results in instant death.
- The final tactic is pushing your enemies onto other enemies or mountains. These types of moves aren't very effective - the damage resulting from the collision isn't big, but sometimes such actions open up an opportunity for your next move.
- Sometimes, this tactic is downright mandatory, as the enemy can surround the mech, leaving you with a single option to push them at each other. This tactic can be utilized with mech-enemy and building-enemy combinations, but proceed only if your mechs or Power Grid will survive the move.
You are not permitted to copy any image, text or info from this page. This site is not associated with and/or endorsed by the Subset Games or Subset Games. All logos and images are copyrighted by their respective owners.
Copyright © 2000 - 2025 Webedia Polska SA for gamepressure.com, unofficial game guides, walkthroughs, secrets, game tips, maps & strategies for top games.
