Hearts of Iron 4: 10 simple steps for beginners
Last update:
Earlier chapters of this guide discuss all of the issues connected with controls and elements of the interface. Thanks to detailed analysis of the points raised there will help you navigate and familiarize yourself with the course of the game. Still, it goes without saying that the first contact with the game mat seem for a beginner overwhelming. The following chapter discusses ten key issues, which will help you understand the technicalities of the game. Of course, the game far exceeds what has been discussed here, but it will make it easier for you to play the game and will speed up your immersion into Hearts of Iron IV.
- 1. Select a national focus
- 2. Change your political system
- 3. Change the political system of another country
- 4. Build a military factory
- 5. Trade
- 6. Gear production
- 7. Gear management
- 8. Researching into technologies
- 9. Management of templates
- 10. How to deploy the army
1. Select a national focus
One of the key steps that you have to take, after you start the game, is to select the national focus for your nation. Thanks to focus, you will receive certain bonuses and you will speed up your research into specific areas.
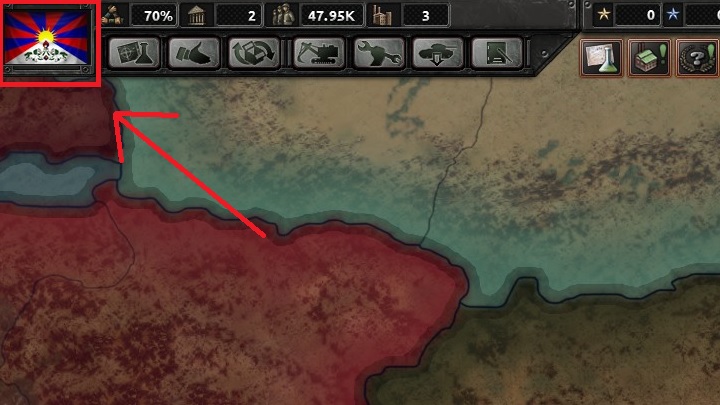
Bring up the political panel. You can do this either by clicking LMB on the flag of your country, in the upper-left corner of the screen, or by using the "Q" hotkey. After that, you will see an interactive panel for your nation.
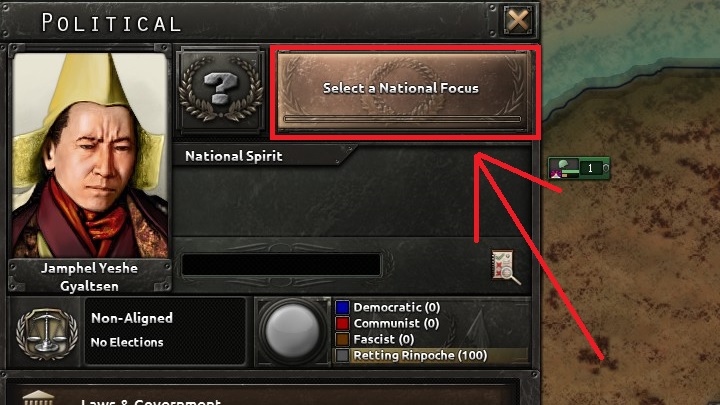
In the above screenshot, the national focus has not yet been specified. Press the LMB in the area marked in the above screenshot. After that, the tree of focuses available for your country should pop up.
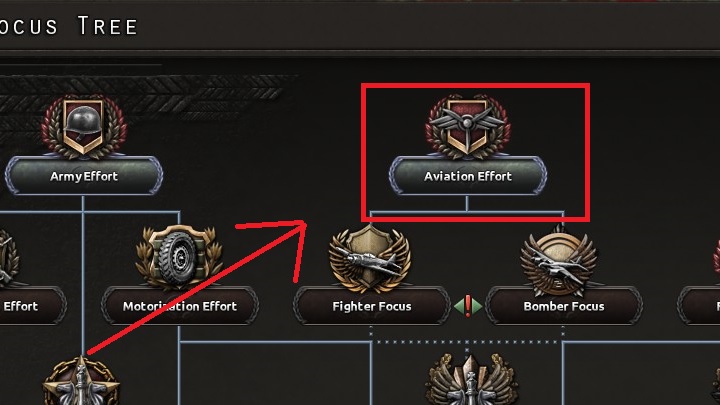
Of course, this is the very beginning of the game, which is why no focus has yet been completed. This means that at first, you can pick only one focus, out of the ones shown atop the entire tree. For the purpose of this guide, aviation effort has been selected. Click on the icon marked in the above screenshot. As a result of that, details on that focus should be displayed.
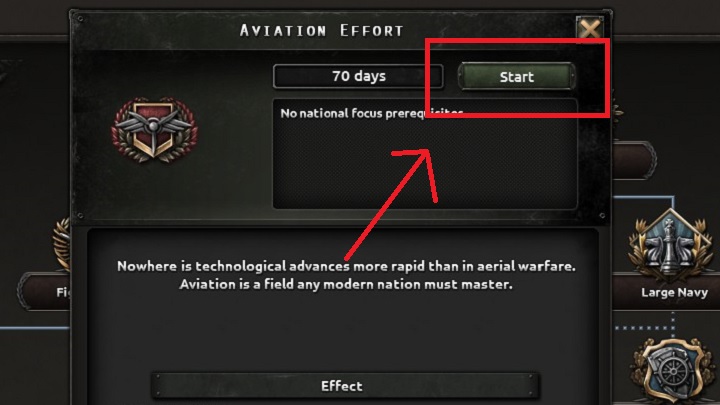
In this part of the panel, you learn about more detailed benefits that you receive from meeting the aim of the focus. To confirm your focus, click on the button marked in the above screenshot. This should close the tree of focuses and you should return to the world map.
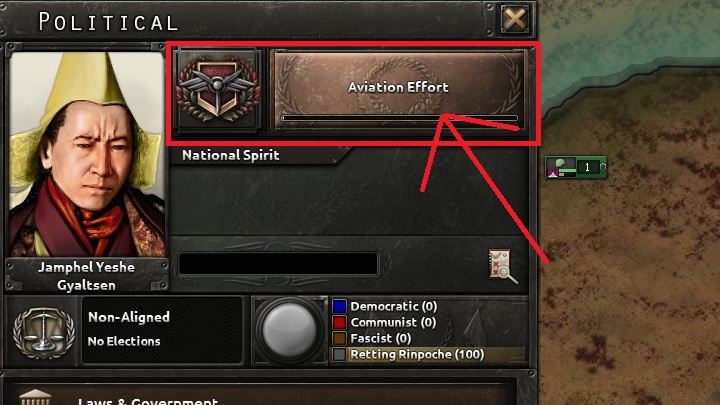
After you bring up the panel again, you notice that there is information provided on the button, concerning the focus that is currently being realized. You can also note the bar that shows your progression and how long until the focus is fully realized.
You can change the national focus at any moment, but you have to keep in mind that if you do this in the course of works on the current focus, this will cancel all of the progress made and you lose time.
2. Change your political system
Thanks to changing the political system in your country, you can receive additional bonuses from ideologies. Apart from that, a specific system determines certain diplomatic options, and it allows you to either enter closer relationships with one of the worldwide factions,, or establish your own alliance with countries of the same ideology. The process of changing the political system is time-consuming, but it is a good idea to adjust it to your own expectations.
Basing on the principle of external influence, you can do this in two ways.
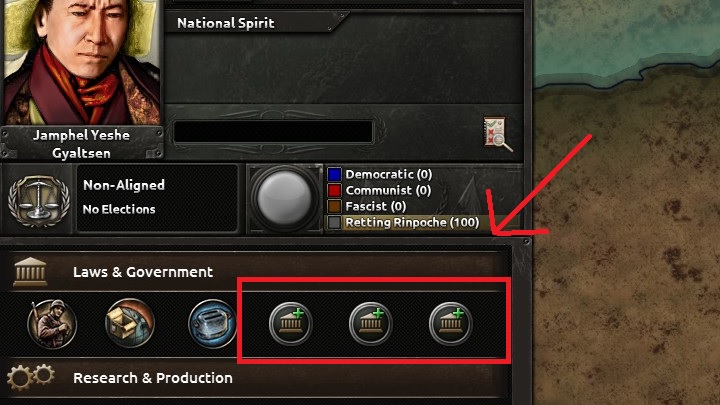
The first step is to bring up the political panel. The icons that have been marked in the above screenshot represent slots that you can use to appoint specific political advisors. Press the LMB on one of them and this should bring up another panel.
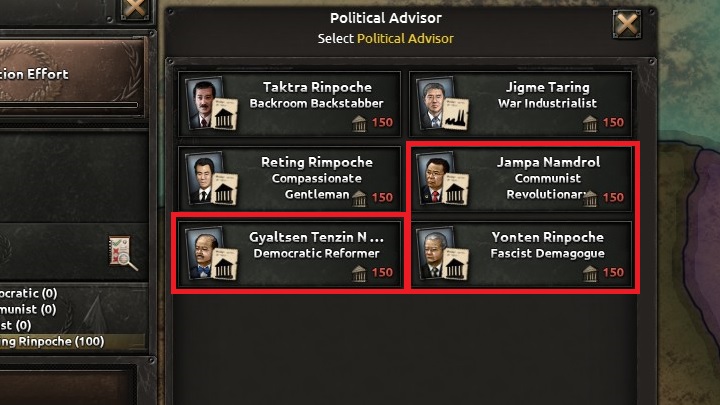
Among the available advisors, there always are some celebrities, whose actions will have a positive effect on the popularity of a given ideology. Remember that appointing an advisor will cost you 150 political power points, so you should save up the appropriate amount. What is important is that you should pick one of the available advisors, basing on the political system that you want to introduce.
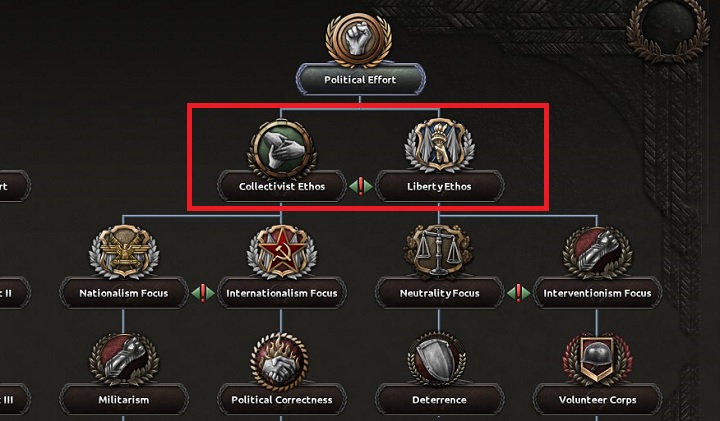
The next step towards changing the system is definition of specific national aims. It is thanks to them that will bring your nation closer to a specific system and will operate basing on its rules. The key choice in this matter is focused in the area marked in the above screenshot. The ideology tree is uniform and there is no room left for works on aims of several separate systems. The choices that you make will be irreversible after you meet your aims.
3. Change the political system of another country
Imagine that you play as one of the states of the Axis. Of course, you can also manage your own faction, but let's assume that you are playing as a fascist state. You are pressed for entering an alliance with Argentina, but it is a democracy and it does not even want to consider any alliance with you.
In such a situation, it is necessary to propagate your own ideology in another country which, in a long run, can change its ideology.
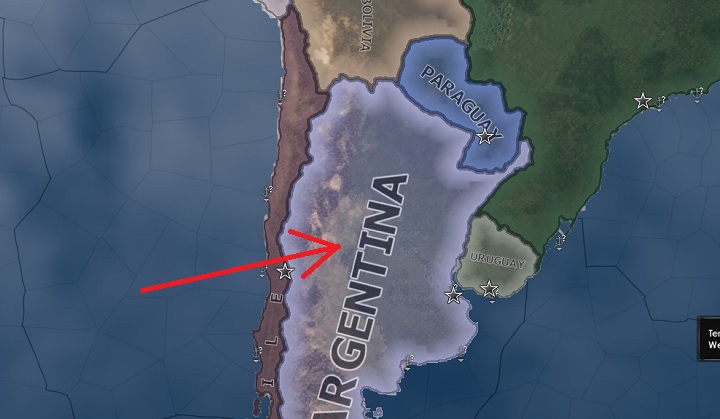
Press the RMB on Argentina. This should bring up the diplomacy panel, basic information on the country and available political actions.
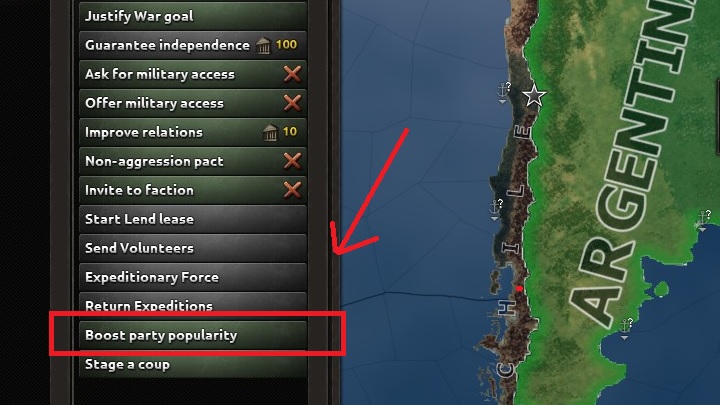
From among the available options, select Boost Part Popularity. As a result, another window will pop up, with information on costs and political power change in Argentina.
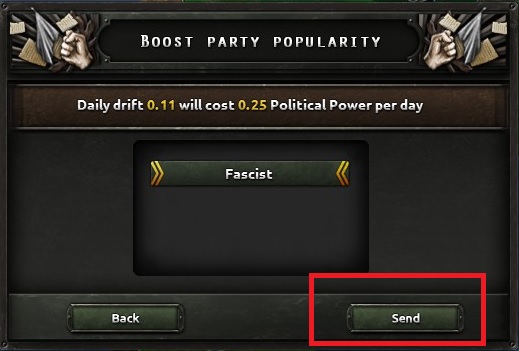
After you learn the conditions of this political action, you have to press the button marked in the above screenshot. At the same time, the action will be accepted and the cost of political power will be deducted, on a daily basis, from your passive income.
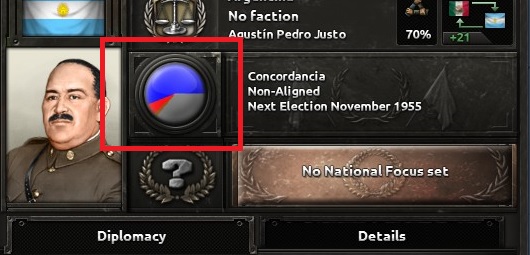
After several months, the pie chart will show that political power in the country has shifted. Growth in popularity of a party may cause a rebellion, or even a civil war, but usually, you have to wait until the next election. If, on the day of the election, popular support of a party exceeds 50%, the country changes its political system as a result. In the case of nations that do not organize elections, the popularity required is even higher (ab. 60-65%) at which point the nation automatically changes its political system.
4. Build a military factory
Expansion of infrastructure is one of the key tasks in the game. To perform the action, you gave to bring up the building panel. You can do this either via the interface, or by pressing "T" hotkey.
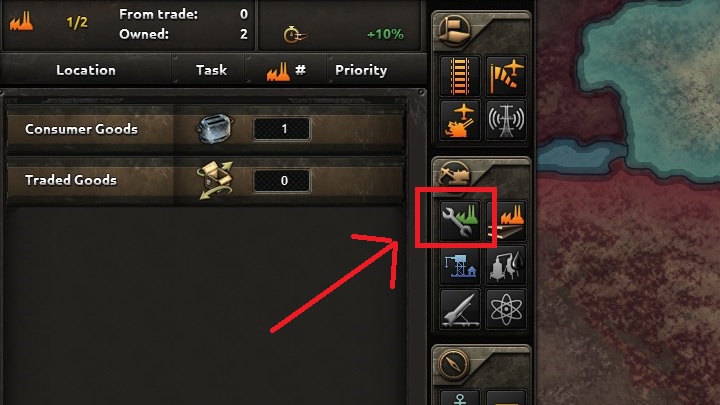
From the panel, select the icon of the military factory. This example has been provided for this specific building, but things are no different in the case of any other building. After you press the icon, you should note that the color of some of the provinces in your country changed.
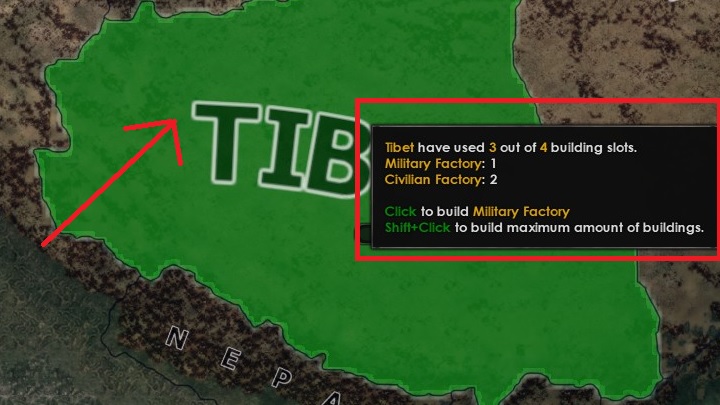
Color changes in those of the provinces, where it is possible to build the selected structure. After you roll your mouse over that territory, you will receive all of the necessary information. Now, click the LMB on one of the provinces in green. The above screenshot presents only one such province, because there is only one region in Tibet.
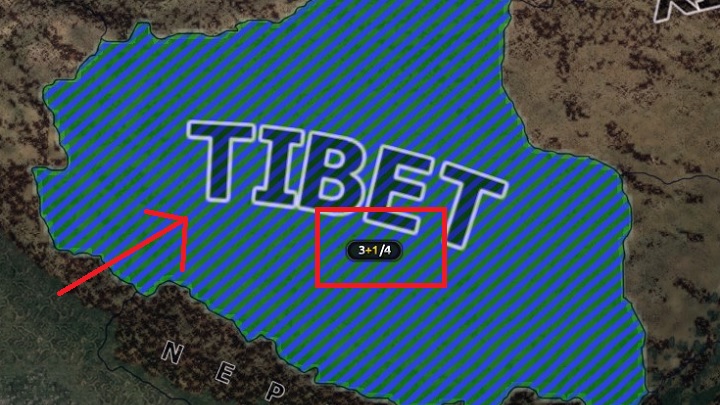
After you have selected the province, the blue area will turn striped in green and blue. This means that the building process is in progress. Additionally, you will be provided with information on how many structures are in that province, how many of them are under construction and what is the maximum available number of slots for this type of buildings.
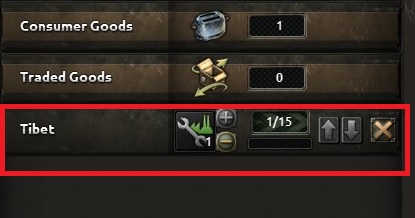
From the panel, you can learn that the building queue has been started and that there is the currently selected structure there. The 1/15 rate means how many civilian factory are currently producing resources necessary for building the factory. Using the arrows, you can change the order in which the buildings will be built, depending on what you need most at present.
5. Trade
At first sight, trade may seem confusing when it comes to its mechanics, because there is no specific currency that you can use for exchange of goods.
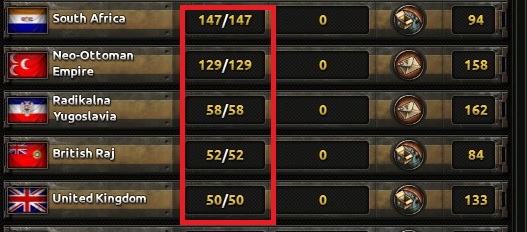
After you access the trading panel, using the interface or the "R" hotkey , a view similar to the above will appear. The element of the panel marked in the above screenshot specifies the number of a given resource that has been allotted to trade. Using this, you can easily determine if trading with one country only will satisfy your needs for the specific item. Click the LMB on the country from the list.
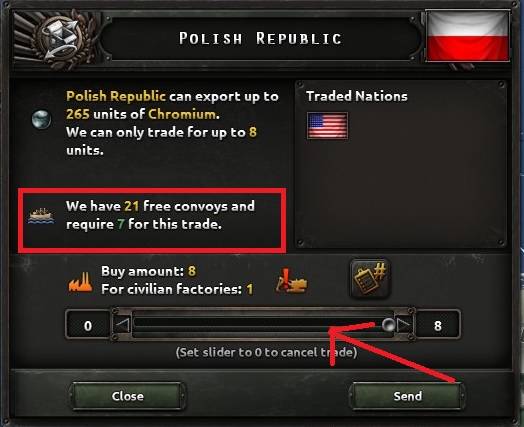
Another window will pop up, where you examine the course of trading transactions. In the area marked in the above screenshot, you can always view the number of available convoys and number of units that you will require to effect the transaction. In the case of trade, for each 8 units of a resource, you will have to give up one civilian factory that will process it. Using the slider that the arrow points to, you can change amount of the material that you want to accept. After you specify parameters, you only need to send your request and after a while, you will receive the shipment.
6. Gear production
During the game, you will often have to produce various types of gears that are required by divisions templates. For the purposes of this guide, an airplane assembly line has been created.
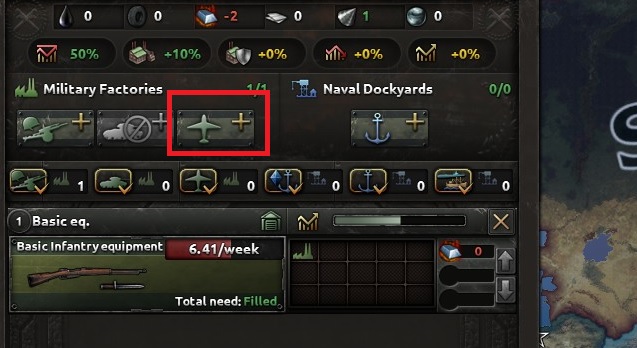
Bring up the production panel, via the interface, or with "Y" hotkey. To start the assembly line, you have to select the gear type that you want to produce. Click the LMB on the icon representing air force.
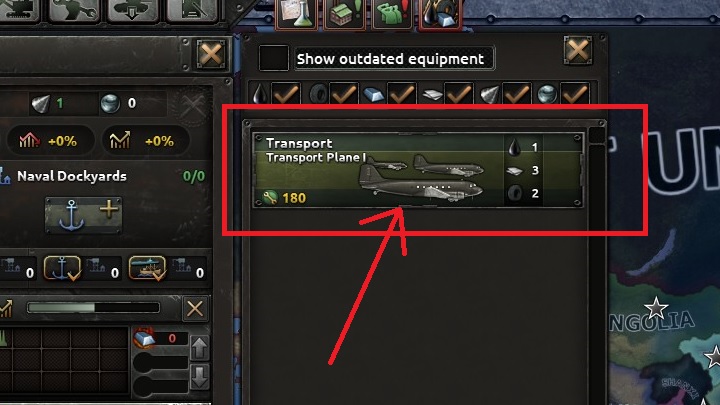
After you select the marked icon, another window will pop up. In that window, you can select one of the units that are available. At the beginning of the game, there will not be too many of them, and in this case, cargo plane has been selected.
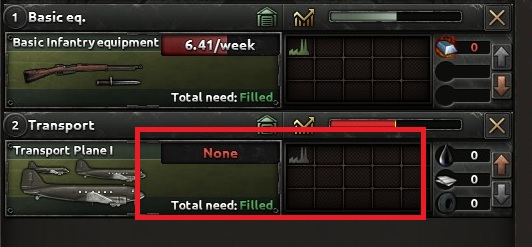
Selecting new gear creates a new assembly line. In this case, you do not own any military factory, that would assembly components for planes, but after you expand industrial issues, you will be able to allot as many as 15 factories to one assembly line, which will speed up the production process.
7. Gear management
Just as important for production of new units and for the management of the existing ones is proper management of gear that you receive from assembly lines.
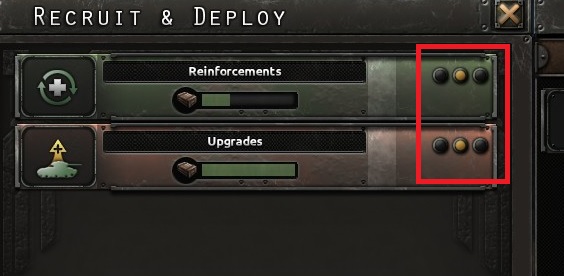
Using the recruitment window, you can manipulate those parameters. The above screenshot presents individual elements of the interface where you set priorities for production. In the above screenshot, priority has not been set, so gear is received by both those of the units that have shortage of gear and ones that need to replace theirs with new gear. Such situation is represented as the yellow dot. If you disable the yellow indicator light and select another one, red or green will appear next to it. Green represents top priority and red represents the lowest priority.
8. Researching into technologies
Technology are the basic branch of development. Thanks to new technologies, you will gain access to better gear, a number of improvements and better planning for military operations.
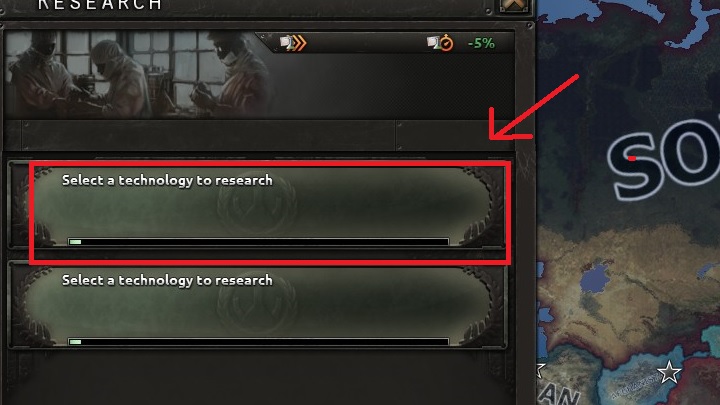
Bring up the research panel using the icon or using the "W" hotkey. At the beginning of the game, you should face the situation shown in the above screenshot. To start your research, press the LMB on one the panels marked in the above screenshot. After that, another panel will pop up, where you can view available projects.
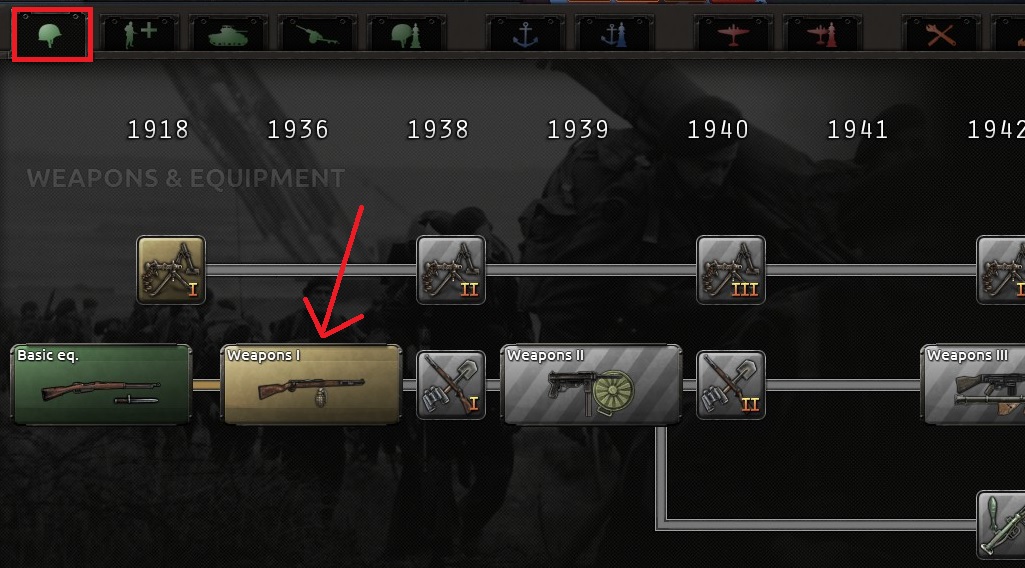
In the top part of the panel, there are tabs that correspond to fields of research. In this example, basic infantry gear has been chosen. Press the LMB on the icon. A window providing information on the project should pop up.
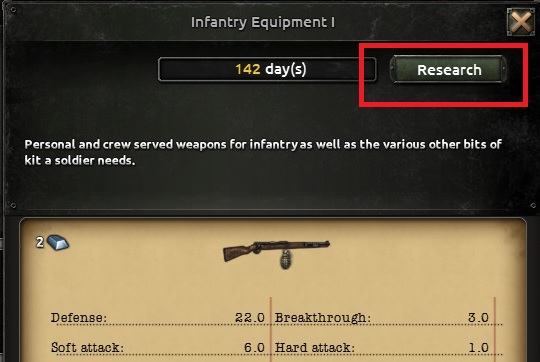
After you view the information, click the button marked in the above screenshot. As soon as you pick the project, the project icon should close automatically and you will be back to the world map.
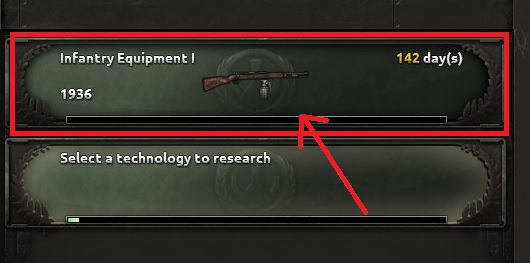
Throughout the course of the research, one of the research teams will inform of progress. After you bring up the panel, you can view how long until the end of the end of the research.
9. Management of templates
Army templates are the basic factor determining which units will make up specific divisions. To concentrate your forces properly and be able to make strategically good choices when it comes to selecting them, you need to know how to work with them. Basically the interface is quite clear and intuitive, but it may look complicated at first.
Of course, to reorganize templates, you require army experience, which you will not have at the beginning of the game. In spite of that, it is a good idea to monitor characteristics of templates to be able to implement quick changes.
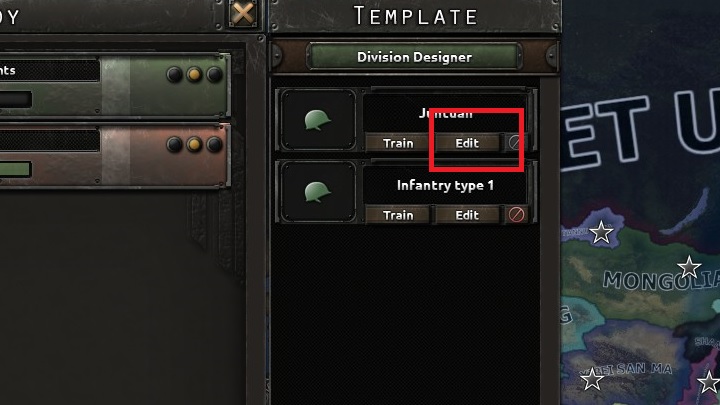
You can access templates by accessing the recruitment panel and deployment, which you can access by pressing the "U" hotkey. You can find templates in the side panel of the window. To start edition, you have to press the button marked in the above screenshot. After you press the button, another window providing information on the template will appear.
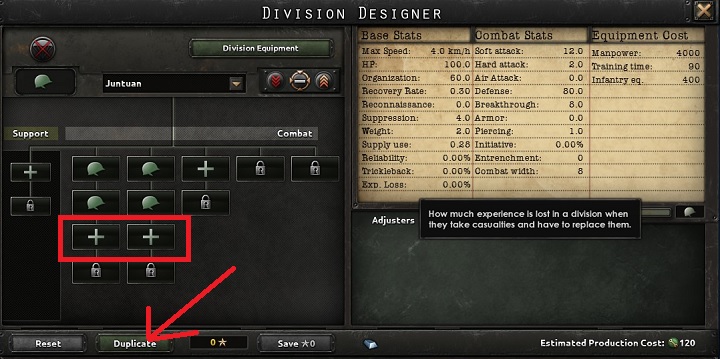
Using this window, toy can add units to an existing template or remove them. To reorganize the template, use buttons marked in the above screenshot. Additionally, before you implement changes, you can copy the template, free of charge, thanks to which you will have several variants for the a single type of units.
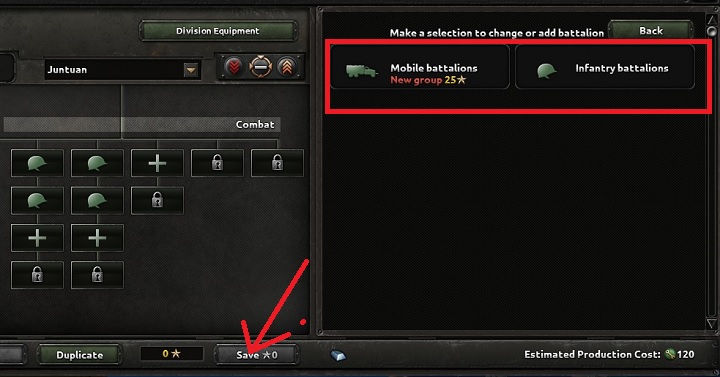
After you click on one of the plus buttons shown in the previous screenshot, the above window should pop up. In the blank area, you can add another unit. By each one of them, there is their army experience cost displayed. You can save the template by pressing the button marked in the above screenshot.
After you save the changes, each division created basing on the new template will consist of larger number of units and the existing ones will signal the need for adding new recruits and for more gear.
10. How to deploy the army
You can deploy new units using the same panel that has been discussed in the previous chapter.
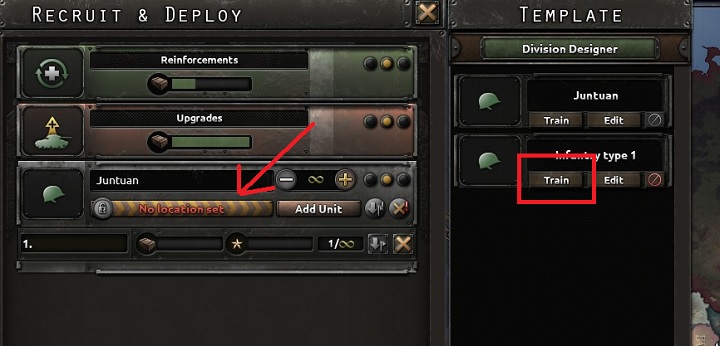
To deploy a division, you have to pick one of the existing templates and click the button marked in the above screenshot. As soon as recruitment starts, another item will be added to the deployment queue. To start recruitment, you first have to select the provinces in which the newly-formed units will be stationed.
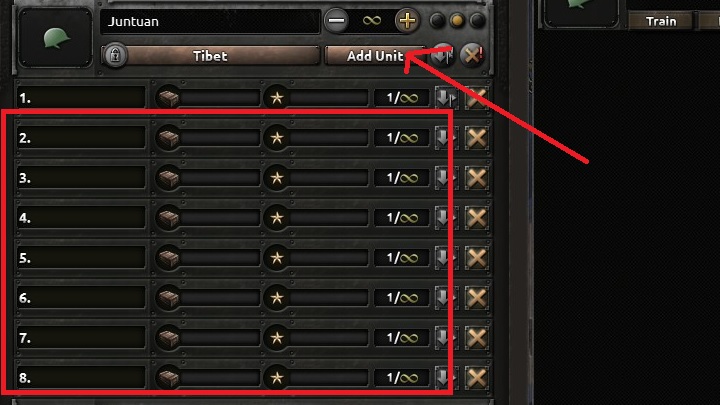
Using the button marked in the above screenshot, you can simultaneously deploy large numbers of units created basing on a single template. This is especially important when you want to form larger forces quickly, in a specific spot, and the vastness of your territory is makes it wasteful to transport them there.
You are not permitted to copy any image, text or info from this page. This site is not associated with and/or endorsed by the developers and the publishers. All logos and images are copyrighted by their respective owners.
Copyright © 2000 - 2025 Webedia Polska SA for gamepressure.com, unofficial game guides, walkthroughs, secrets, game tips, maps & strategies for top games.
