Dragon Age Origins Awakening: Main Quests part 1
The Assault on Vigil's Keep
Quest giver: You will get this quest at the beginning.
Phase 1: Get to the fortress.
When you will get to the [Vigil's Keep] you will find that it have been attacked by the darkspawns. First of all, kill all creatures (mainly genlocks, hurlocks and one ogre) that are blocking your passage to the inner gate (M1, 2).
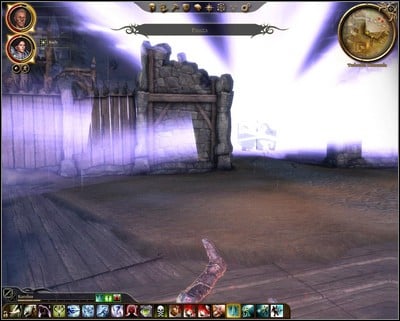
When you will be there the gate will blow up and you will be attacked by some darkspawns and their emissary. Kill him as fast as you can and get close to the entrance of the [Vigil's Keep] (M1, 1).
Phase 2: Get to the lever.
Inside you will be attacked by shrieks. Kill them and use the stairs located on the right. Open the door and you will see a cut scene with the mage Anders (M1.1, 3). You will be able to talk to him. The mage will join your team if you will accept his offer. Go to the next room. Kill some enemies and go to the [Vigil's Keep - Battlements] (M1.1, 2).

You will find some enemies here and the genlock emissary. Nearby ballista could be helpful in this fight (M1, 5). Order one of your team mates to handle it and start to exterminate your enemies. After the fight go to the [Vigil's Keep - Inner chambers] (M1, 1).
Phase 3: Go to through the corridors to get to the blanks.
Use the lever (M1.1, 5). As a matter of fact the gate located downstairs will open. Destroy the barricade (M1.1, 6) that is blocking your passage and kill the darkspawns.

Now go to the round room that is located there. Kill all the darkspawns, their emissary and move along. You will find Oghren who is fighting (M1.1, 7) with some enemies. Help him and speak with him. Now go deeper into the fortress and look for the dying Rowland (M1.1, 8), the friend of Mhaira. Talk to him and leave the corridor. The next chambers are full of darkspawns. Exterminate them and go outside (M1.1, 2).
Phase 4: Kill The Withered.
Here you will have to fight with the English speaking darkspawn - The Withered (M1, 6) and his companions.

At the beginning kill the weaker darkspawns and then try to kill the boss. The good idea is to cast Cone of Cold, because it will slow him for a while.
Phase 5: The lord is approaching.
After the fight the king / queen will appear (that the depends on your decisions that you had made in the basic version of the game).

Now you will have to make a choice (it will be connected with your companions). If you want to keep the tell that you want to join to the Grey Wardens. As a matter of fact you will be moved to the [Vigil's Keep - Throne Room] when you will have to complete the ritual (Mhairi will die).
The Awakening (part 1)
Quest giver: Seneschal Varel [Vigil's Keep - Throne Room]
After the ritual you will have to learn something about the sapient darkspawns. Speak with Mistress Woolsey, Seneschal Varel and with the captain Garevel. Each of them will give you a quest that will help you in finding some new informations about the darkspawns.
The Righteous Path
Quest giver: Mistress Woolsey [Vigil's Keep - Throne Room]
Phase 1: Investigate the Wending Wood
Go to [Amaranthine] and get to the trader street. You will find Mervis there (M10, 12). He will tell you about some problems that they have with the darkspawns on the path leading through the [Wending Wood]. He will promise you a reward after the job is done.
Phase 2: The first meeting with Velanna
Go to the [Wending Wood] and you will see a scene where some bandits are robbing the caravan. Fight with the bandits and sylvans until you will get to the small bridge.

Cross the bridge and you will see another scene. Now, you will meet the elf (M5, 5), she is attacking caravans in revenge (humans had probably taken her sister). Elf will disappear after a while and you will have to investigate this case. You will able to take a look at a Dalish Camp and the hints located there (M5, 6).
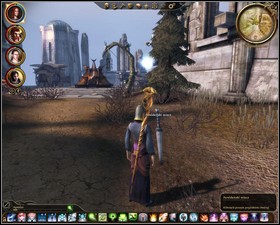 | 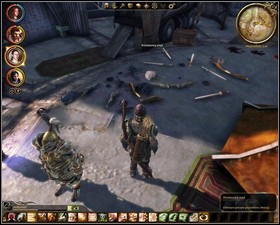 |
The first hint is the sword placed in the middle. | The second hint is the equipment strangely scattered in the camp. |
Phase 3: Find the living soldier and meet Velanna for the second time
Now you have to find the soldier that have survived (M5, 14). He is in the western part of the area. He will tell you the true story and he will also ask you to kill him. You can do it immediately or tell him that you are sure that you can help him. Your choice is not important here - in both of these cases soldier will just disappear. After the conversation some darkspawns will appear. Kill the them and search the emissary body. You will find an elf jewelery, that will be useful later on. Go to the Dalish Camp. You will meet Velanna (M5, 15). She will order some sylvans and wolves to attack you. After the fight go to the Dalish Camp.
Phase 4: Kill the darkspawn in the Silverite Mine.
In the camp you will have to meet Velanna (M5, 16). Now, you have to make a very important decision - let her join to your team or just kill her in revenge. If you want to choose the first option then you have to persuade her that humans didn't take part in this tragic story. Show her your elf jewelery that you have found near the emissary body.
After the conversation the door will open. They will take you to the [Silverite Mine] (M5, 2). The road is blocked by some darkspawns led by one ogre. After the fight make sure that you have plenty of lyrium potions and health poultices etc. because you won't be able to go back and some heavy battle is waiting for you. If you do not have a proper equipment then go to the [Amaranthine]. When you will be ready go to the [Silverite Mine] (M5, 2). After a while you will see a cut scene when you will see an Architect. He will cast a Sleep spell on you and you will wake up in the prison.
Phase 5: Find your equipment
After a while, Velanna sister will come and she will help you. Persuade her to tell you something more about the whole situation. She will give you a key to the architect chest. Go outside and kill all the wandering darkspawns. You can search their bodies and use their equipment, until you will find your equipment. Now take the southern door and use the ballista (M6, 3) to kill all the wandering darkspawns. One of them will be still alive, but you should kill him fast.
Now you have to deal in another group of darkspawns and in the next room you will find the experimental facility (M6, 4) that is wearing equipment of one of your mates. Kill him along with some dragons and take your things.

In another room you will find three experimental facilities (M6, 4) along with some darkspawns. Kill them and recover your equipment. Still, you are missing some things. Go to the southern part of the area. You will meet a trader Armaasa here (M6, 10) and a chest located near him (M6, 11).
Phase 6: To get out of the mine
You will meet Architect in one of the chambers. He will order some dragon whelps to attack you (M6, 12). This is a very difficult fight. At the beginning try to kill one dragon. When he will be dead, take care of the second one. Heal yourself and regenerate when the dragons will fly up. Remember that your enemies are immune to fire and they can be very easily killed with other elements. When the beasts will be dead, search their bodies and exit the mine (remember that you won't be able to return here for the second time) (M6, 2).

Shadows of the Blackmarsh
Quest giver: Seneschal Varel [Vigil's Keep - Throne Room]
Phase 1: Seeking some informations about Kristoff
Go to [Amaranthine - Crown and Lion inn]. Speak with the inn keeper (M10.1, 3) about the Kristoff and ask him about the key to his room. The next person that you have to find is Sorcha (M10.1, 4). You will learn some new things about the guard that you are looking for. Enter the Kristoff room and look at the Ferelden map (M10.1, 7). You will see that Kristoff went to the [Blackmarsh] and you have to go there.
Phase 2: Finding Kristoff on the [Blackmarsh]
To find Kristoff you have to go through the marshes following his "footsteps".
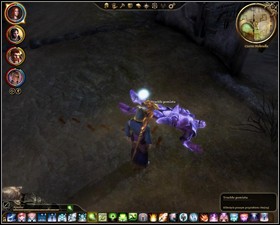 | 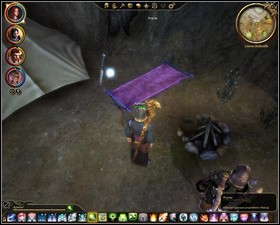 |
The first thing left by Kristoff is the dead body of your enemy. | The second one is the camp. |
First of all you have to find the darkspawn body (M7, 4). Then you will see Kristoff's camp (M7, 9) where you will be attacked by Shadow Wolves and Poisoned Shadow Wolves. These are very dangerous creatures so be very careful. At last, you will see the dead Kristoff (M7, 11). When you will be searching his body some darkspawns will appear - this was a trap! One of them (The First One) can speak. He will tell you that the Mother had sent him and that he will use his magic to teleport you to the Fade.
Phase 3: Escape from the Fade
You will find yourself in the alternate version of the Blackmarsh that are placed in the Fade - [The Blackmarsh Undying]. At the beginning kill all darkspawns that were teleported with you. After the fight you will have to take a very long trip. During the journey you will have to fight with some demons. You have to get to the [Shadowy Crypt] (M8, 1). There will be a woman (M8, 3) but she will run away to the crypt because of the skeletons. Kill undeads and enter the [Shadowy Crypt]. Inside, you will find many enemies. Exterminate them and get to the [The Blackmarsh Undying] (M8.1, 1). Go to the village guard (M8, 4). He will tell you about the situation.

Then go to the gate leading to the manor. You will meet a spirit of justice there (M8, 5) - he wants go get to the manor and kill the cruel leader - baroness (M8, 6). Now you can:
Option 1: Join them and fight against baroness
Speak with the spirit of justice (M8, 5) and tell him that you wanna join. You will see a scene with baroness (M8, 6) and The First, who has join her and start fighting with the second one. Baroness will be attacked by the ghost of justice. Don't care about them because you cannot join this fight. After killing The First and other darkspawns you will be teleported to the [Blackmarsh].
Option 2: Make an agreement with baroness
Speak with the spirit of justice (M8, 5) and tell him that you don't have time for them. Knock to the gate and you will be able to speak with the gate keeper. Be nice for him and he will let you in. While talking with baroness (M8, 6) propose her an agreement and you your persuasion skills to get the award. You have to defend her and after the battle she will transport you to the [Blackmarsh]. After a while the gate will be destroyed and peasants will get inside. There will be a spirit of justice and The First too. Kill them all (leave the spirit of justice, because you cannot fight with him). After the battle ask baroness for the next reward (she will raise your character stats). Now baroness will teleport you to the [Blackmarsh].
Phase 4: Kill the baroness.
You will yourself on the [Blackmarsh] along with the spirit of justice, who will take control over the Kristoff body. He will join your party and he will fight with you to the end of this quest. Go to the destroyed village where you will have to fight with baroness (M9, 5).

After a short conversation she will turn into a huge monster. Sometimes baroness will create a portal to the fade which will let the shadows to get into your world. Try to destroy portals as fast as you can. After the fight the quest will be completed.
Last of the Legion
Quest giver: Captain Garevel [Vigil's Keep - Throne Room]
Phase 1: Talk to Colbert about his discovery
Go to the [Amaranthine] where you will meet Colbert and Micah (M10, 9). Speak with them about the chasm. They will show you it's location on the map. You can (but you don't have to) give Colbert 1 $ (or 10 silver) at the end of the conversation 10.
Phase 2: Knotwood Hills - an entrance to Kal'Hirol
After you will get to the [Knotwood Hills] go to the chasm. Kill all the beasts located there and go north. You will meet Sigrun (M3, 6) - a dwarf woman that is fighting with some darkspawns.

Kill your enemies and talk to her. She can join your team. Now you will be ready to enter the [Kal'Hirol] (M3, 2).
Phase 3: Kal'Hirol - an entrance to the main hall
At the beginning you will see a deeply wounded dwarf - Jukka (M4, 4). He will tell you about the broodmothers that are creating a new army. Go north and you will have to fight with some enemies. At last you will be able to choose the entrance to [Kal'Hirol - Main Hall]. The choice is possible only if you have Sigrun in your team. If you don't - then you have to enter the main entrance (M4, 2). When you will be on the courtyard Sigrun will tell you that the main entrance is very well guarded. On the western wall you will see some sculptures - faces. Inside one of them, you will find the switch (M4, 5) that will open the hidden passage (M4, 3). It is good to enter in this way because you will be able to attack your enemies from the back.
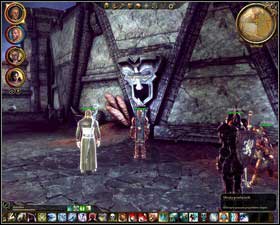 | 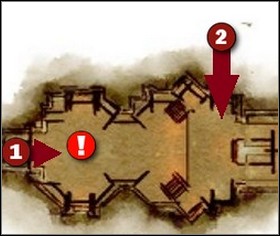 |
The switch is hidden inside the sculpture. | A map [Kal'Hirol - Main Hall]. "1" - main entrance, "2" - hidden passage. "!" - trap chamber. |
Phase 4: Kal'Hirol - Trade Quarter
In [Kal'Hirol - Main Hall] you will encounter many enemies. You have to stay focus because of the traps too (M4.1, 3).

To get across the first chamber (M4.1, 3) (if you have entered from the main entrance) you can try to stay in the corridor and shoot the darkspawns from this secure location. Do not enter the room until you won't defeat most of your opponents. Now make few steps and you will be attacked by the golem master (M4.1, 5). Kill him and take the Golem Control Rod from him. Go deeper and you will see an inert golem (M4.1, 6). Click on him to turn him on. Golem will move and he will start to kill other darkspawns. He will be helping you for some time and then he will return to his start position. Now you have to kill other darkspawns and get to the entrance to [Kal'Hirol - Trade Quarter] (M4.1, 4).
Phase 5: Kal'Hirol - Lower Reaches
In [Kal'Hirol - Trade Quarter] you will see that darkspawns are fighting amongst themselves. It will make a whole thing a bit easier. Tougher battles are waiting for you in corridors leading downstairs [Kal'Hirol - Lower Reaches] (M4.2, 3). You will find some maggots here. The most important thing is to fight only with creatures that are already attacking you. Cocoons are very close to each other and when you are passing near them, another larvas are coming out. So when you are attacking with one group, try to stay in one position. When you will kill all the darkspawns go to the [Kal'Hirol - Lower Reaches] (M4.2, 3).
Phase 6: The Lost and the fire golem
In [Kal'Hirol - Lower Reaches] you will have to fight against two bosses (M4.3, 3) - The Lost (he is the ally of The Mother) and the fire golem.

I advise you to start fighting with The Lost, because he has a very strong magic spells. It is good to attack him with many close combat characters. The Lost is casting many AoE spells so scatter your team if it is possible. Fire Golem can be stopped by the spell Cone of Cold. Use this spell very often and then you will be able to defeat both enemies with easy.
Phase 7: Destroy the Broodmothers in Kal'Hirol
Go south to the pit. You will be attacked by tentacles. Kill them systematically and focus on destroying two chains (M4.3, 4).
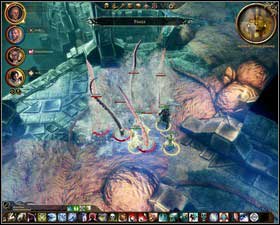 | 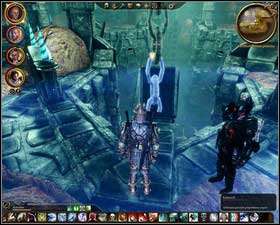 |
Do not focus on fighting with tentacles. | The most important thing is to destroy the chains. |
After you will be done (M4.3, 4) a huge stone block will fall down and broodmothers will be dead. You can leave this area now (M4.3, 2).
You are not permitted to copy any image, text or info from this page. This site is not associated with and/or endorsed by the developers and the publishers. All logos and images are copyrighted by their respective owners.
Copyright © 2000 - 2026 Webedia Polska SA for gamepressure.com, unofficial game guides, walkthroughs, secrets, game tips, maps & strategies for top games.
