The Dark Eye Chains of Satinav: The Fairy Scholar
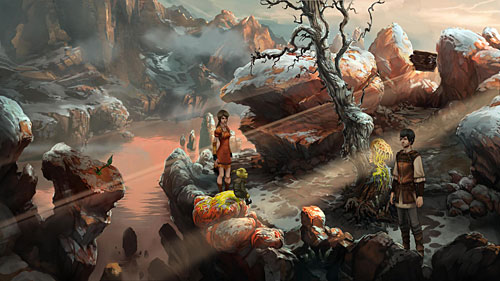
Talk to Imp and then pick up the blossom, on which the butterfly sits. Return to orcs' camp and take orc shield and bracelet. There is also a roast on the spit. Use the knife on it and Geron will cut of a piece of meat. Go to the ritual area and give the meat to guard dog, so you can pick up pipe-weed. Return under the tree with an Imp.
Put the orc shield in a gap in rock and the butterfly will be eaten by a plant, leaving slime after that. Take a bit of that and use it on the red rock at the lake bank. Talk again to the Imp, who will get into your ambush. Once again talk to him but he will answer only if you get some hat and weed for his pipe. Give him pipe-weed you have. After that use the bracelet in your inventory on the fodder bag and you'll get decorated fodder bag. Give it to imp.
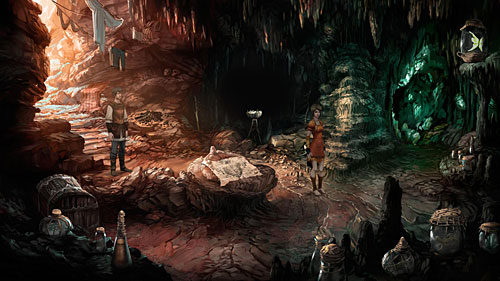
Nuri and Geron will reach the cave, but the scholar will be missing. You have to find him. Examine the fireplace and burrow in it - you'll find a piece of charcoal. Look at large drawing on the rock pedestal and pick it up. Open the chest in the corner of the cave and take one of tablets out of it. There is a jar with the butterfly inside on the right pedestal, but it is too high. Use the destruction spell on it and the butterfly will fly away. Now you have to destroy the dark niche. Place the blossom on the basin in front of the niche. Look at the stone tablet and examine the niche.
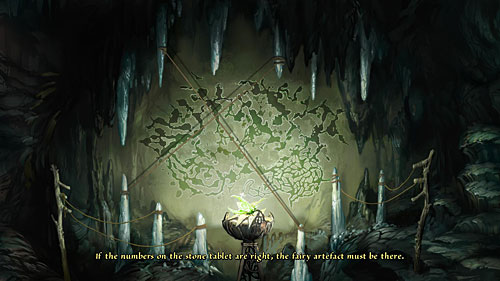
There is a plan of the cave inside the niche. Geron and Nuri have to get to the chamber with an artifact, where they probably will meet the scholar. Around the cave map there are 6 dripstones-stalactites on the ceiling and 6 stalagmites-posts. There are also threads tied to those stalagmites. Correct combination of groups of threads will show different places, with scholar location among them.
Examine again the stone tablet. There are four drawings and combinations of numbers on it. At the third drawing you can notice 4x1 | 2x4 numbers. By deduction we conclude that those numbers indicate stalactites and stalagmites. First number indicates a stalactite and the second one indicates stalagmite. So place the thread from the first stalagmite and connect it with the fourth stalactite. Then catch the thread from the fourth stalagmite and connect it with the second stalactite, as on the above screen. So now we know where the scholar is. The only thing to do is to draw the map. Use the charcoal on the drawing and enter the cave.
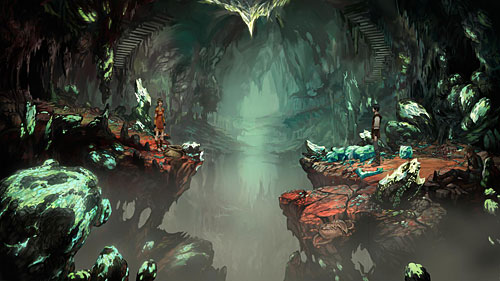
After a while it will turn out that the situation is a little bit complicated now. Pick up from the ground half a yardstick. Unfortunately the other part of it is under rubble on the left. Use the half of yardstick you have on the rubble and pick up the second part of yardstick. Use the reassemble spell on the broken yardstick. Now pick up the arm of knight's statue and try to talk to Jacomo Nauta. He got something in his throat. Give him water bladder and ask about everything. In order to draw a plan of exit path from the cave, Jacomo needs some notes. Use the yardstick on the arm of statue and then use the yardstick with arm to grab a backpack. Give it to Jacomo and you'll obtain directions on leaving the cave. Now throw the paper with directions into wicker basket on the other side of the abyss.
- The Dark Eye - Chains of Satinav Game Guide
- The Dark Eye Chains of Satinav: Game Guide
- The Dark Eye Chains of Satinav: The Oak Leaf Challenge
- The Dark Eye Chains of Satinav: Crows!
- The Dark Eye Chains of Satinav: To catch a fairy
- The Dark Eye Chains of Satinav: Bad Leads to Worse
- The Dark Eye Chains of Satinav: Northward
- The Dark Eye Chains of Satinav: In the Camp of the Zholochai!
- The Dark Eye Chains of Satinav: The Fairy Scholar
- The Dark Eye Chains of Satinav: New Prospects, New Old Enemies
- The Dark Eye Chains of Satinav: The Prism
- The Dark Eye Chains of Satinav: Fanglari Ho!
- The Dark Eye Chains of Satinav: Three Impossible Tasks
- The Dark Eye Chains of Satinav: The Dream Chambers
- The Dark Eye Chains of Satinav: Back Home
- The Dark Eye Chains of Satinav: To the King!
- The Dark Eye Chains of Satinav: Academy of Magic
- The Dark Eye Chains of Satinav: The Harp
- The Dark Eye Chains of Satinav: Game Guide
You are not permitted to copy any image, text or info from this page. This site is not associated with and/or endorsed by the developers and the publishers. All logos and images are copyrighted by their respective owners.
Copyright © 2000 - 2026 Webedia Polska SA for gamepressure.com, unofficial game guides, walkthroughs, secrets, game tips, maps & strategies for top games.
