AC Chronicles: China: The Return - walkthrough for sequence 2
Last update:
Secrets:
- Synchronization points - 1
- Animus shards - 9
- Treasure chests - 2
Optional task: You must reclaim three assassin scrolls (100 points).
Obtainable upgrades:
- Expand Eagle Vision - Increase the reach of Eagle Vision. You must collect at least 650 points in the mission to get it.
- Increase Throwing Knife Ammo - it guarantees more throwing knifes. It is available only in Plus and Plus Hard mode. You must additionally collect at least 2240 points.
General information: Second level is harder, especially at its ending where a good precision is required if you want to avoid larger guard groups (including ones with crossbows). As in the first mission, when you're exploring the cave be careful not to avoid any scrolls needed for completing the side quest.
Reaching the main cave

Go to the right and start climbing the first wall. Slightly further you will have to get down to lower ledge. Walk right and you will reach synchronization point. Do two things there - activate Eagle Vision and then make a leap of faith to land in a haystack.
Now go to new ladder, don't walk completely to the bottom as guards are standing below. You must land on right from them, so move your analog stick to the right (or press the right direction button) and then press the button/key responsible for letting the ladder go. Go to the right and start a new climbing. On the road use for the first time the jump button/key for bypassing the lacking part of the ladder.
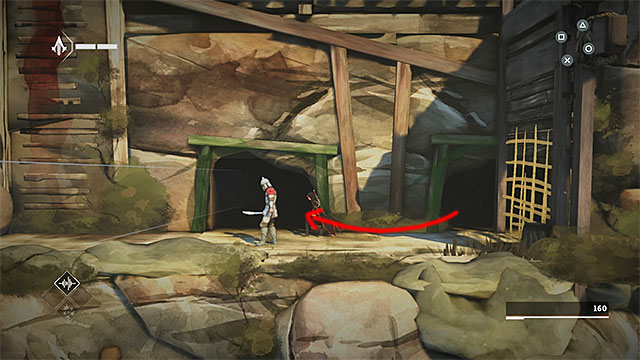
Carefully walk to the new enemy and hide in the new, bottom type of hiding place. Walk maximally to the right, wait for the guard to go to the left and get out of hiding. Slightly further you will find two talking guards. Hang on the edge, move to the right and reach new hiding place. Get out of cover when enemies will walk to the left. You must reach new ladder.
On the upper ledge, go to the left. Hide in the hiding place and use it to get through the bars. Now, you must use the new ability to quickly jump from one hideout to another. Move the analog stick in direction of second hiding place and press the jump button/key. After you reach the second cover, wait for guard to turn towards the bars before you walk further. Use the ladder to get above. There hold the right wall and get to the one on further plan.
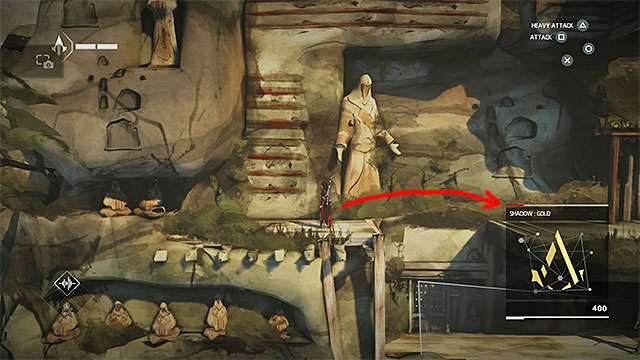
You must be careful in this location, if you're spotted, reinforcements will be called. Wait for first guard to walk to the right and then follow him. Hide in the closest lower hiding place. There, move to the right, wait till it is safe and run to the neighbor (upper) hideout. Repeat it with the last (again, lower) hiding spot. Finally, wait for a good moment and jump out of the hiding to run to the right ladder. Quickly leave this place, before you are spotted by second guard.
At the upper level wait for guards to get close to each other and run to new hideout. As before, you must wait for enemies to turn in opposite direction and jump to neighbor hideouts (first lower, then upper). After that, run to the ladder. After climbing to upper platform start with turning around and jumping to the right ledge. There you will find first Animus data fragment.
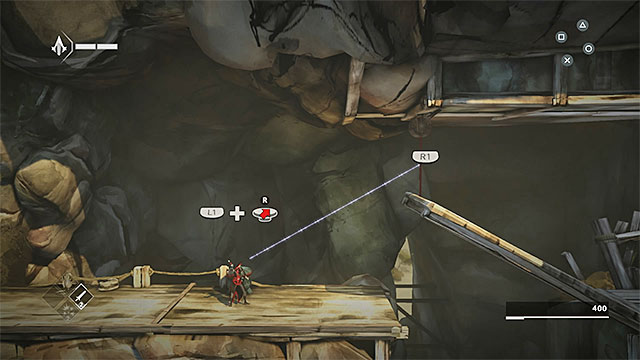
Return to the left ledge and start climbing - first go to the wall up, then right and finally down. No go right. Here game will give you access to Throwing Knives. Select them from the inventory and start preparing to use the gadget. You must aim at the rope shown on the picture above. After cutting it and lowering the bridge replenish your ammunition and go right.
In next location you must again use the knives. Aim at another rope and lower red chest down. Utilize the fact that guards become interested in destroyed chests and quickly walk to lower level. Here, start with exploring left side where you will find second Animus data fragment. Then, quickly run to the closest hideout. Jump to the near (lower) hideout and, after it is safe, repeat it with third hiding place. Finally, run to the right and start a long climbing combined with bouncing from the walls.
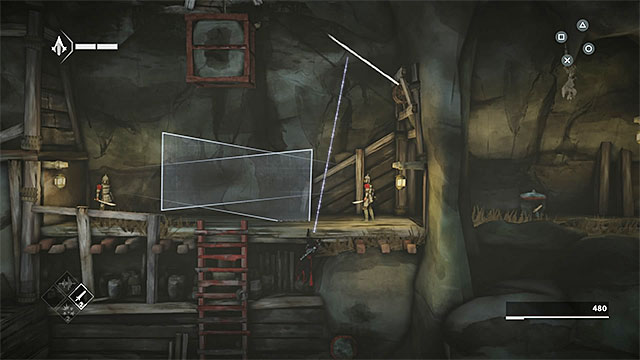
Make few steps to the right and use the closest ladder to reach third Animus data fragment. Now return below and go to the right. Catch the new ladder, but don't walk to its top as that place is watched by two guards. Instead, start moving to the right while still hanging near the edge. Select throwing knifes and from position shown on the picture above throw one of them at the right rope. Large cargo will break near the ladder. Use this distraction to climb up when it becomes safe. Immediately leave this place.
In next location fourth Animus data fragment can be found, you should start by obtaining it. Walk down the ladder and then move to the edge of the lower ledge. Wait for the guard to go right, quickly climb up and go left in order to collect the secret.
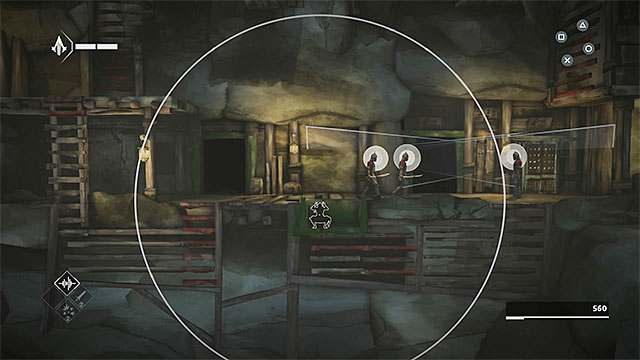
After getting the new data fragment, QUICKLY return to the right and jump to nearest hideout. When it will be safe, jump to the middle lower hideout. Use whistle and make sure all three enemies are in its reach (picture above). After completing this action quickly catch lower edge and move to the right. Wait for guards to reach the hideout you used previously, climb up and sneak behind their backs to the right.
In next territory reach the narrow upper passage. A tutorial will start, explaining how to fight enemies with long range weapons. Train few times pushing the block button/key when the line symbolizing bullet flight path change its color to red. After completing the tutorial go to the right. Below you there is a chamber with first treasure chest and it is guarded by a single enemy with crossbow. You should sneak up on him from behind, execute him, plunder the chest and then load the previous check point to keep a "clean record". Distracting the guard would be pretty hard, especially since searching the chest take Shao Jun few seconds.
Go to the right and use the knob to unlock a passage. In next location position yourself near the red bough and move analog stick up (or press up direction button) to use rope and get to further plan. Getting through the new cave is linear and not complicated - jump above abysses, climb the walls and bounce from them. You must reach the upper right ledge and walk through a narrow tunnel.
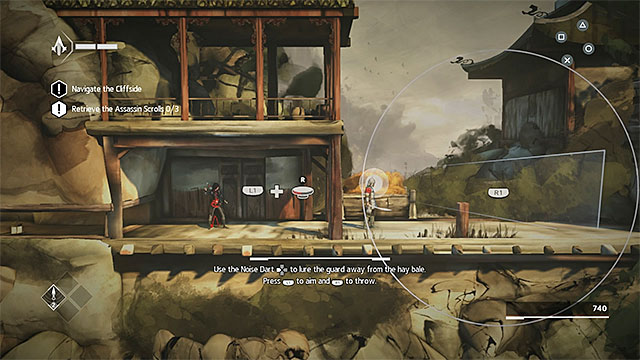
In next location you will be able to use Noise Dart for the first time. Pick it from the inventory and start preparations for using it. Place the circle on the position shown in picture above - it must be as far to the right from heroin as possible, but at the same time have the guard in its reach. Use the dart and, after the guard walks right, jump to the haystack. Now wait for enemy to walk left and jump from hiding. Now you can climb the right ledge.
Exploring the cave with Assassin Scrolls

Jump to the bushes and start moving to the right. Stop whenever a guard is near Shao Jun as he might suspect something. Get to the right ladder and use it to walk down. Enter new bushes, jump to neighbor hideout and, when it will be safe, lower yourself near the edge. Avoid first guard and his two friends, walk to the right and hold to the new red bough to reach further plan. Aim the knife at the new rope and walk through the lowered bridge.
You will reach a larger cavern with various objects both on first and second plan. You should explore this location according to further advices as here you will find, for example, three scrolls from the optional mission task. Remain on the first plan and go right. Start climbing at the large observation tower. Wait for the guard to move to the right, climb up, move to the right and drop down on the ladder. Again, wait, this time for guard to walk left. Again, climb up, turn right and jump to the hanging cage on the right. Once again jump, this time catching the boards on the right.
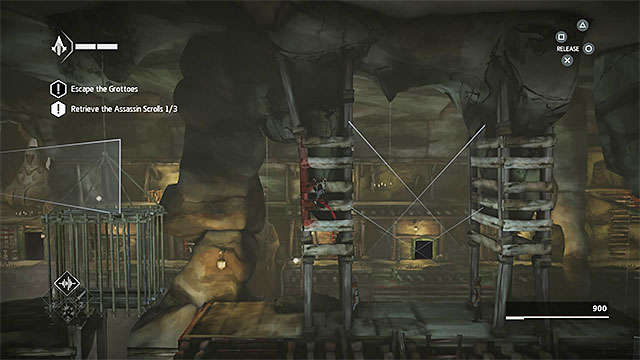
Start moving on the boards to the right. Don't rush getting to the central part of this territory as two guards patrolling the place below from time to time are looking up. Move on after they walk in different directions. Move as fart to the right as possible and then make a jump to the boards on the right side. As before, move to the right. Wait for the guard to stop checking the cage hanging on the right and after that jump to it.
Climb the cage and make a jump in the direction of neighbor one. Lower yourself on the right side of the cage and then bounce back. Shao Jun should land on the east ledge. Start by taking fifth Animus data fragment from there. Now walk through the tunnel to reach the first of three Assassin scrolls.

After collecting the scroll return to the left and stop at the spot where you previously obtained the data fragment. Wait for the guard below to go left. Lower yourself, go to the left as well and use the first encountered ladder. Climb the small ledge and wait for the guard to move right. You should distract him with a noise dart, thanks to that he will remain longer on the right side. Return down and quickly go left. Don't rush climbing as the left guardian sometimes looks at that place. Make sure it is safe to climb and only then reach the upper part. Again, climb the left cage on which you have previously jumped.
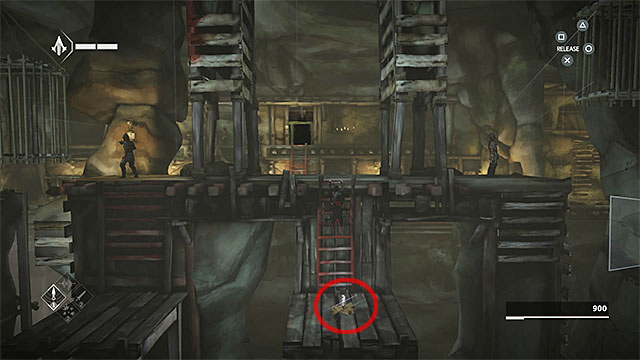
Go back until you reach the place where two guards are sometimes looking up. Wait for them to walk away, drop from the edge and quickly find the lower ladder. Go down it and you will find yourself on a small ledge with second Assassin scroll.
Now you must return to the place where you started exploring the massive cave. Make few jumps to the left, again climb the observation tower and avoid the guard with the use of previously learned trick. After few successful jumps you will reach your destination. Notice there are three long wooden beams here. Use them to get to the second plan.
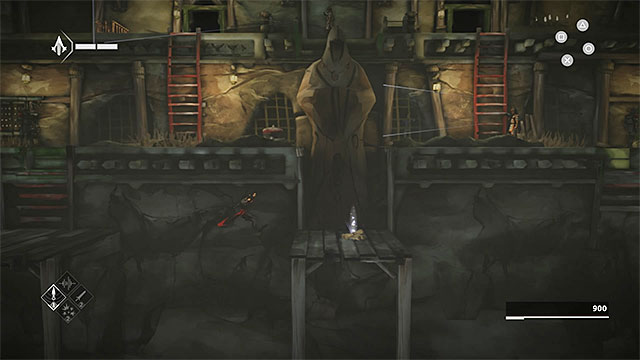
Walk down the ladder and hide in the closest hideout. Wait for guards to meet and start talking. No go in their direction but when opportunity shows itself, use the lower hiding place. Reach the lower platform. Now start running to the right. You must make a long jump towards the ledge unavailable in any other way. There you will find the third Assassin scroll.
After obtaining the scroll return to the left platform. Climb up and when it will be safe, reach the near ladder. On the left you should see a cage with dog inside and sixth Animus data fragment. Sadly, you can't avoid the cage. So decide whether you want to kill nearby guard and after all is done load previous check point or maybe you prefer to distract him with, for example, noise dart and send him to the right. It will give you more time to hide after obtaining the collectible.
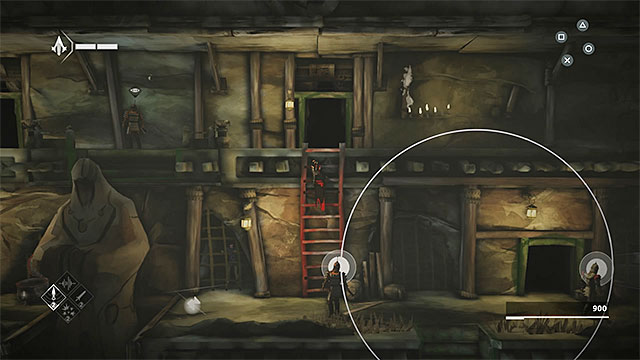
No matter how you acted before, go to the right from the place where you collected the sixth data fragment, use new hideouts on the way. You must reach the new, red ladder. Don't use it to walk down as there is a guard. Use the noise dart to disorientate two nearby guards. After they walk away from you, quickly go down and collect the seventh Animus data fragment on the left. After that, quickly return to the ladder (you can hide in the hiding place on the upper level to be sure).
Wait until situation calms down and again go down the ladder, more or less to the middle. Wait for the guardian under you to turn left and make a jump from the ladder to the right side. You should land in lower hideout. Move to the right, but watch out for second guard which sometimes checks the hideouts. Don't let him see you.
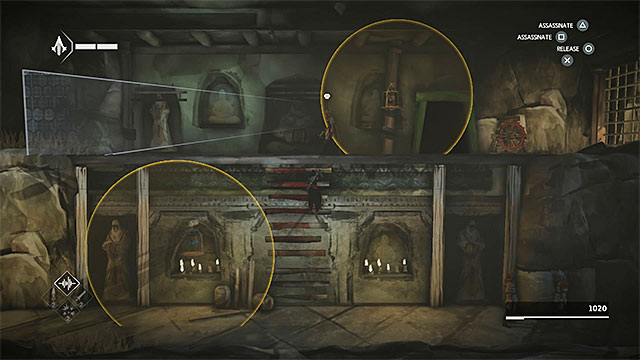
When it is possible, walk out from the hiding, go right and reach the new tunnel. In next location you will see the bird cages for the first time. Don't run near them, instead bypass them by walking slowly (you don't need to sneak up). On the right side of the lower level you should see talking guards and behind them, eighth Animus data fragment. Distracting them would be very hard and risky, so it is best to deal with them and after obtaining the secret load last save. Execute a silent kill on the left guard and quickly remove the other one with your sword. When you attack them, watch out for the archer from upper level, whenever it is necessary avoid his arrows.
After collecting the secret use ladder, but don't walk immediately to the upper ledge as a single guard is walking there. Wait till he walks near the ladder, climb up and walk (don't run!) to the right. Hide in the hideout, wait for the guard to go again to the left and only then use the knob to unlock yourself an exit from the huge cave.
Further passage through the rocky ledges
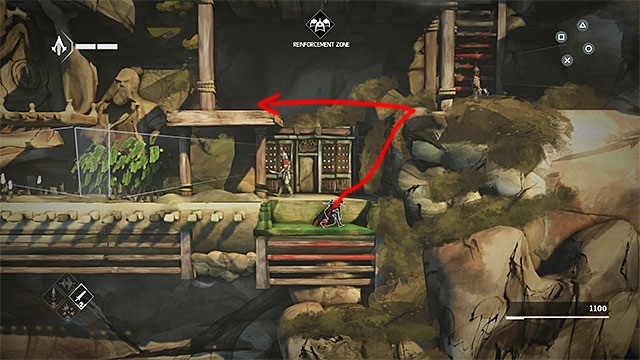
Walk a while to the right and then go to the further plan (open all containers on the way to replenish all supplies). When the guard walks to the right, climb on the right ledge. Carefully walk to the first hiding place (watch out for the bird cage!). Lower yourself and start moving to the right. On the way make two jumps and watch out as guards sometimes look down at this spots.
After reaching the end, climb up to find yourself in a new lower hiding place. Wait for the guard to walk left, go out of hiding and jump to the right ledge. On that ledge, quickly turn around and jump to the left. Make one more jump towards the smaller left platform and stop for a while there.
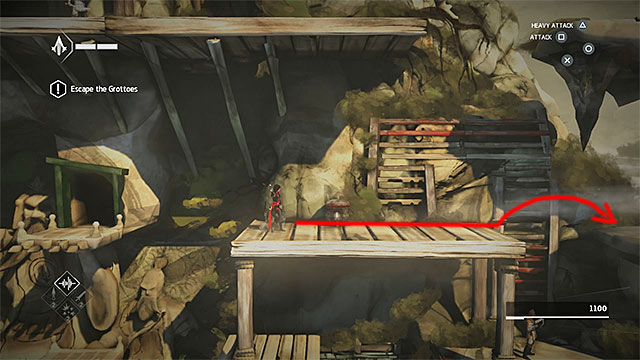
You must wait for the enemy with crossbow on the left edge of the screen to stop observing the neighbor. Then start acting - jump the left ledge, turn around and jump to the right upper platform (the one with hideout). Stay on that platform and jump to the longer right ledge. Run right, wait for guard below to turn around and jump to the rocky ledge with last, ninth Animus data fragment.
After collecting the secret go back left. Again reach the small platform with the hideout. Wait until it is safe and jump to the upper left ledge. Here you should hide for a while as well.
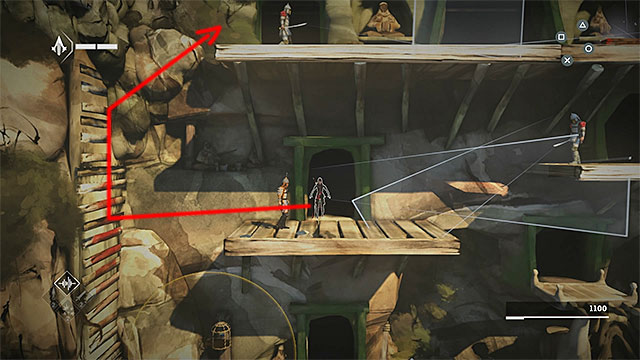
Now you must jump to the higher left ledge, the one with a guard with crossbow. After performing that action quickly hide in the hiding place. Wait for the guard on this ledge to start his patrol and quickly jump to the left horizontal wall. Climb it up and bounce from it. You must reach the hideout on the highest ledge before one of the guards that patrol it starts his walk to the left.
Avoid the first guard when he will be standing near the abyss and reach the larger, middle hideout. Second treasure chest is near it. Plunder it after both guards on this level starts walking in opposite direction.
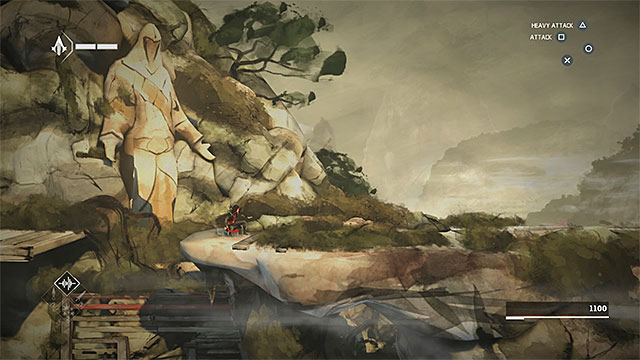
After looting the chest again hide yourself. Use the hideouts to pass by the second (right) guard. Move to the right and at the end make a long jump to the nearby ledge, which luckily isn't guarded by anyone. Go to the edge of the abyss and make a leap of faith to complete this level.
Important - After completing this level you will receive information about unlocking Under Hang skill that allows you to grab various ceiling elements. You will use this ability in the next mission.
- Assassin's Creed Chronicles: China Game Guide & Walkthrough
- AC Chronicles: China: Game Guide
- AC Chronicles: China: Walkthrough
- AC Chronicles: China: The Escape - walkthrough for sequence 1
- AC Chronicles: China: The Return - walkthrough for sequence 2
- AC Chronicles: China: The Port - walkthrough for sequence 3
- AC Chronicles: China: The Slaver - walkthrough for sequence 4
- AC Chronicles: China: Consequences - walkthrough for sequence 5
- AC Chronicles: China: The Search - walkthrough for sequence 6
- AC Chronicles: China: The Snake - walkthrough for sequence 7
- AC Chronicles: China: Hunted - walkthrough for sequence 8
- AC Chronicles: China: Old Friend - walkthrough for sequence 9
- AC Chronicles: China: Demon Fire - walkthrough for sequence 10
- AC Chronicles: China: The Betrayal - walkthrough for sequence 11
- AC Chronicles: China: Vengeance - walkthrough for sequence 12
- AC Chronicles: China: Walkthrough
- AC Chronicles: China: Game Guide
You are not permitted to copy any image, text or info from this page. This site is not associated with and/or endorsed by the developers and the publishers. All logos and images are copyrighted by their respective owners.
Copyright © 2000 - 2025 Webedia Polska SA for gamepressure.com, unofficial game guides, walkthroughs, secrets, game tips, maps & strategies for top games.
